I chose this one because I like a golden ale now and then, and because I wanted something easy with which to test several new pieces of kit and methods: fermenting under pressure with the recently acquired Fermzilla, closed transfer to a new Cornelius keg, then serving under pressure straight from the fridge.
Bure Gold was a resounding success on all fronts, and remains one of the tastiest beers I’ve ever had, anywhere. I can’t wait to repeat this one.
The 19 litre Cornelius keg is getting lighter by the day, so I decided to re-keg to my 5 litre Mangrove Jacks mini and ready the Corny for its next adventure, which will hopefully be my first all-grain brew.
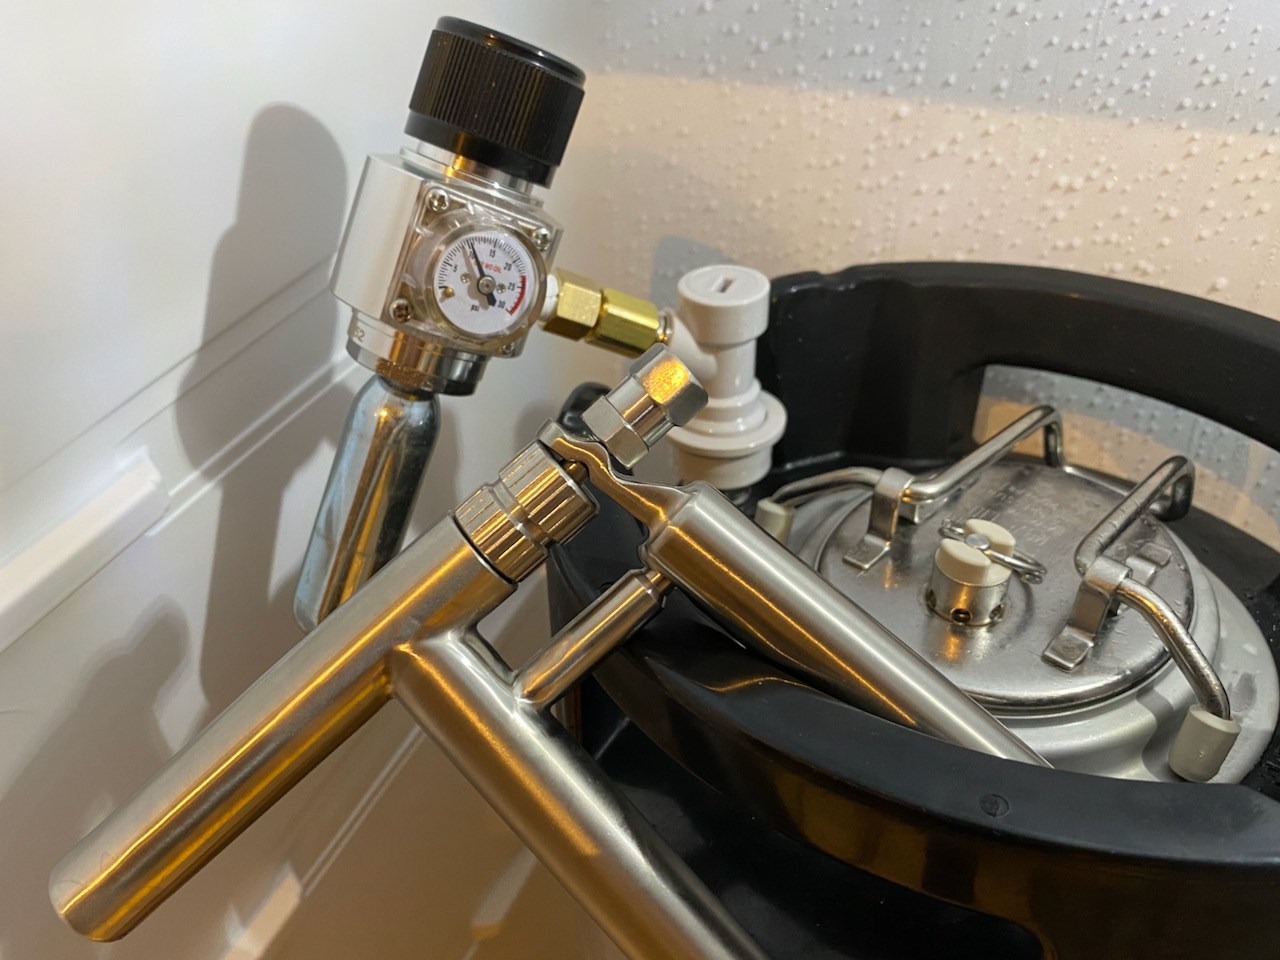
The re-kegging procedure was a copy of the closed transfer that I used to package this from the FV originally
Fill recipient keg with sanitiser and purge with CO2,
Equalise the pressure in both kegs,
Connect beer ‘out’ posts with black transfer line,
Connect gas to source keg,
Reduce pressure in target keg to start the flow.
This time I didn’t have a second recipient keg connected in series to protect against overflow getting into my spunding valve, mainly because I didn’t use the spunding valve at all and instead pulled at the PRV on my smaller keg to reduce pressure and start the flow. Taking it fairly easy at the start to prevent foaming, it wasn’t difficult to gauge the progress in both kegs via the condensation level on the outside. As the smaller MJ keg began to fill up I placed two fingers on the top, hoping to feel the temperature difference and therefore know when to stop the transfer before beer gets into the PRV. That worked well too, and because I can’t leave these things alone I gently kept going until the slightest change of tone told me I was about to release foam. Next time I’ll stop sooner – just figured that on this occasion I can always clean the PRV and will probably have drunk the remaining 5 litres before any backwards contamination becomes a factor, if that’s even a consideration.
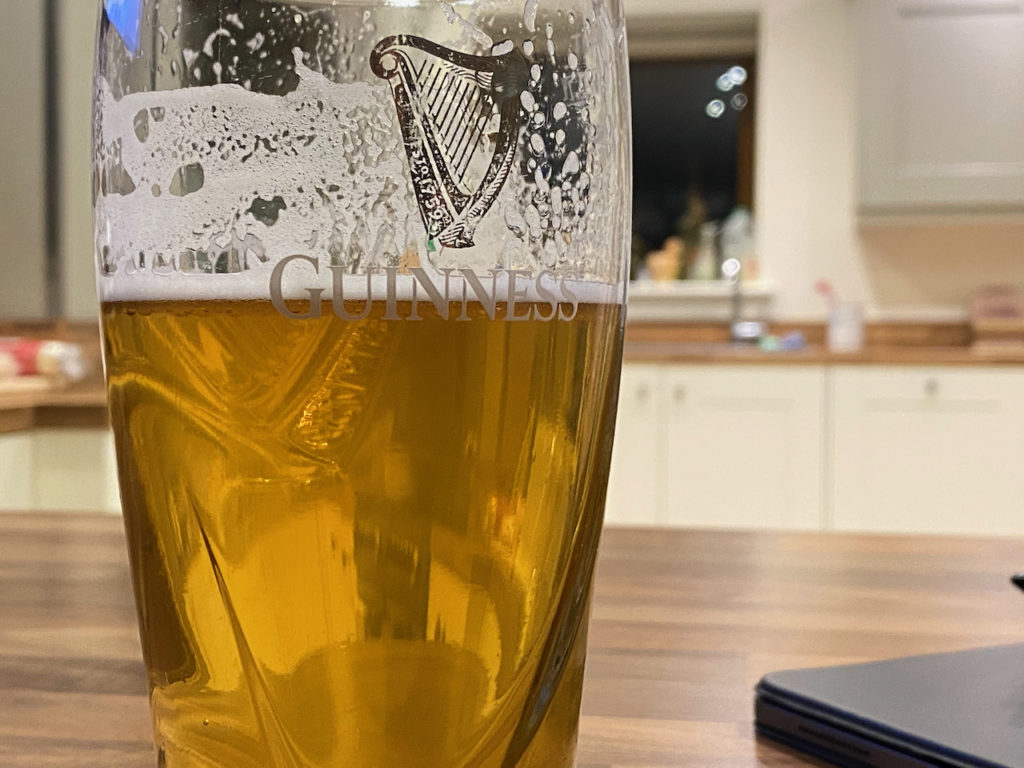
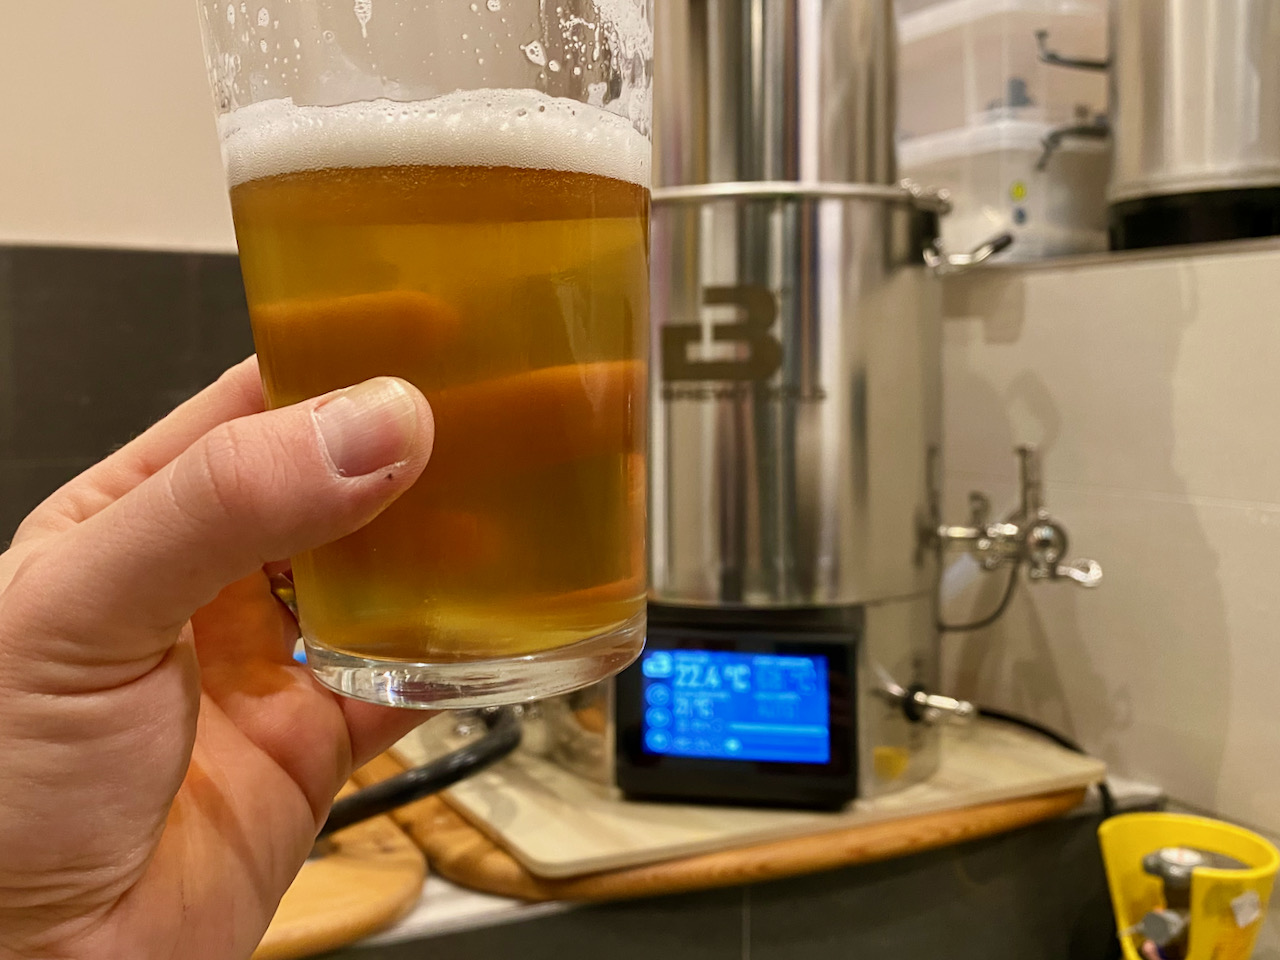
There was about a pint left in the Corny after I’d filled my mini-keg, so I used the beer gun to decant that into a plastic bottle for consumption this evening. Another successful procedure completed, more lessons learnt. Also, I’m really glad how well this brew turned out and will be buying it again. Here’s a picture taken yesterday showing off that amazing clarity:
Clear as a Bell: the magnificent Bure Gold
#wisdom: PRV on recipient keg is fine for relieving pressure and starting transfer, no need for spunding valve unless you need to be hands-free. If the recipient keg is room temperature and has a sloping metal top then two fingers placed at the base of the top make a sufficient filling guide, provided the liquid is cold.
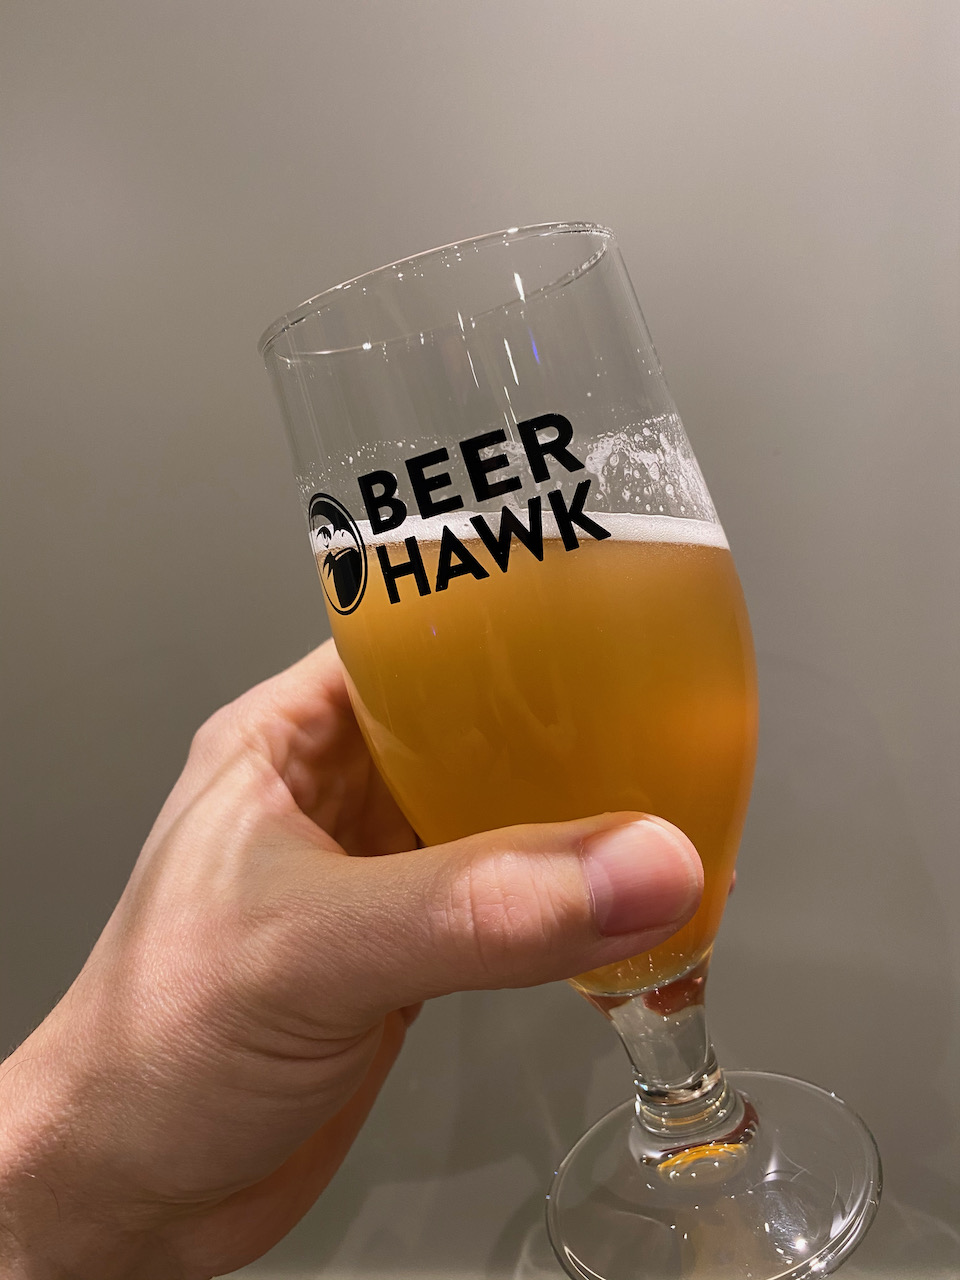
I pumped Bure Gold to 13 PSI last night for good measure, and in 24 hours the keg has gone down to 11 PSI. I don’t know if that’s due to liquid contraction, carbonation, or a leak. I do know that I want to sample a glass – just to clear any settlement from the dip tube you understand – and in order to save on having to reconnect the main gas tank I thought I’d give the mobile regulator a go.
What use is relying on these things when they’re untested? At least that’s what I though as I screwed a 16g CO2 cartridge into the Mangrove Jack’s portable. The dial works the same as a full-size regulator (clockwise to add pressure) but it’s a bit more fiddly and dialling it to 10 PSI didn’t take as many degrees of movement as its bigger brother.
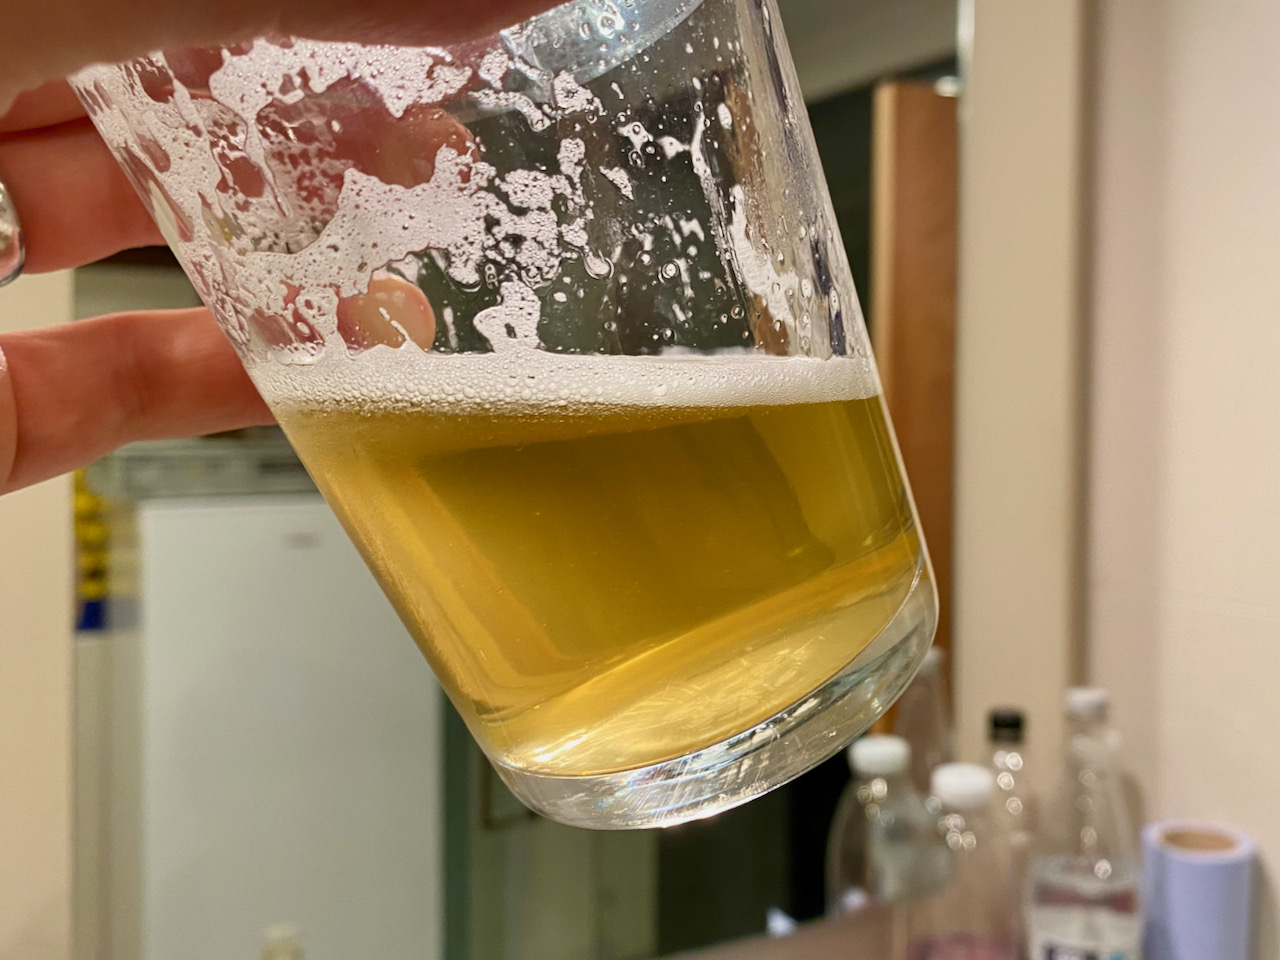
The beer was dispensed with my stainless beer gun, which I’m going to leave connected for as long as this brew is in the fridge. Of course I need to have a couple more pints in order to figure out if the haziness is due to settlement or something I’ve introduced, but until I need the fridge for cold-crashing I may as well save on sanitiser and leave the dispenser rigged.
Oh, and taste? Almost forgot! Very good indeed; minimal malt and a reasonable amount of crispness, a raw nose of hops which will probably condition out, if it isn’t in fact due to sediment on this first pull. In other words: good, and will only get better.
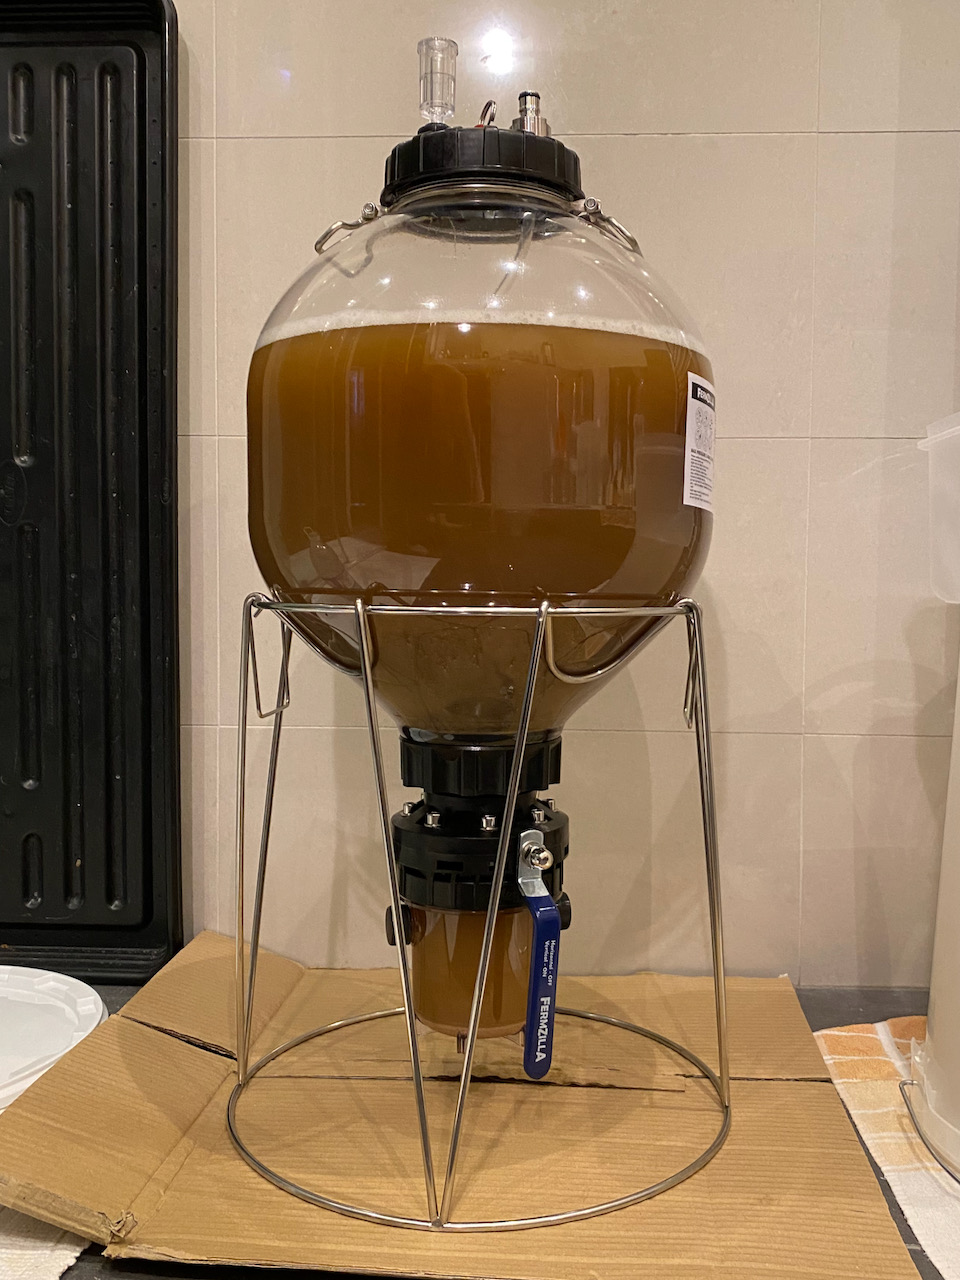
I just kegged my first ever brew!! Everything went very smoothly and exactly as planned, so I’m now going to leave it alone for a week or two in order to settle down. There are around 17 litres in a 19 litre Cornelius keg, stashed in my new brew fridge which has become available since I’m no longer cold-crashing.
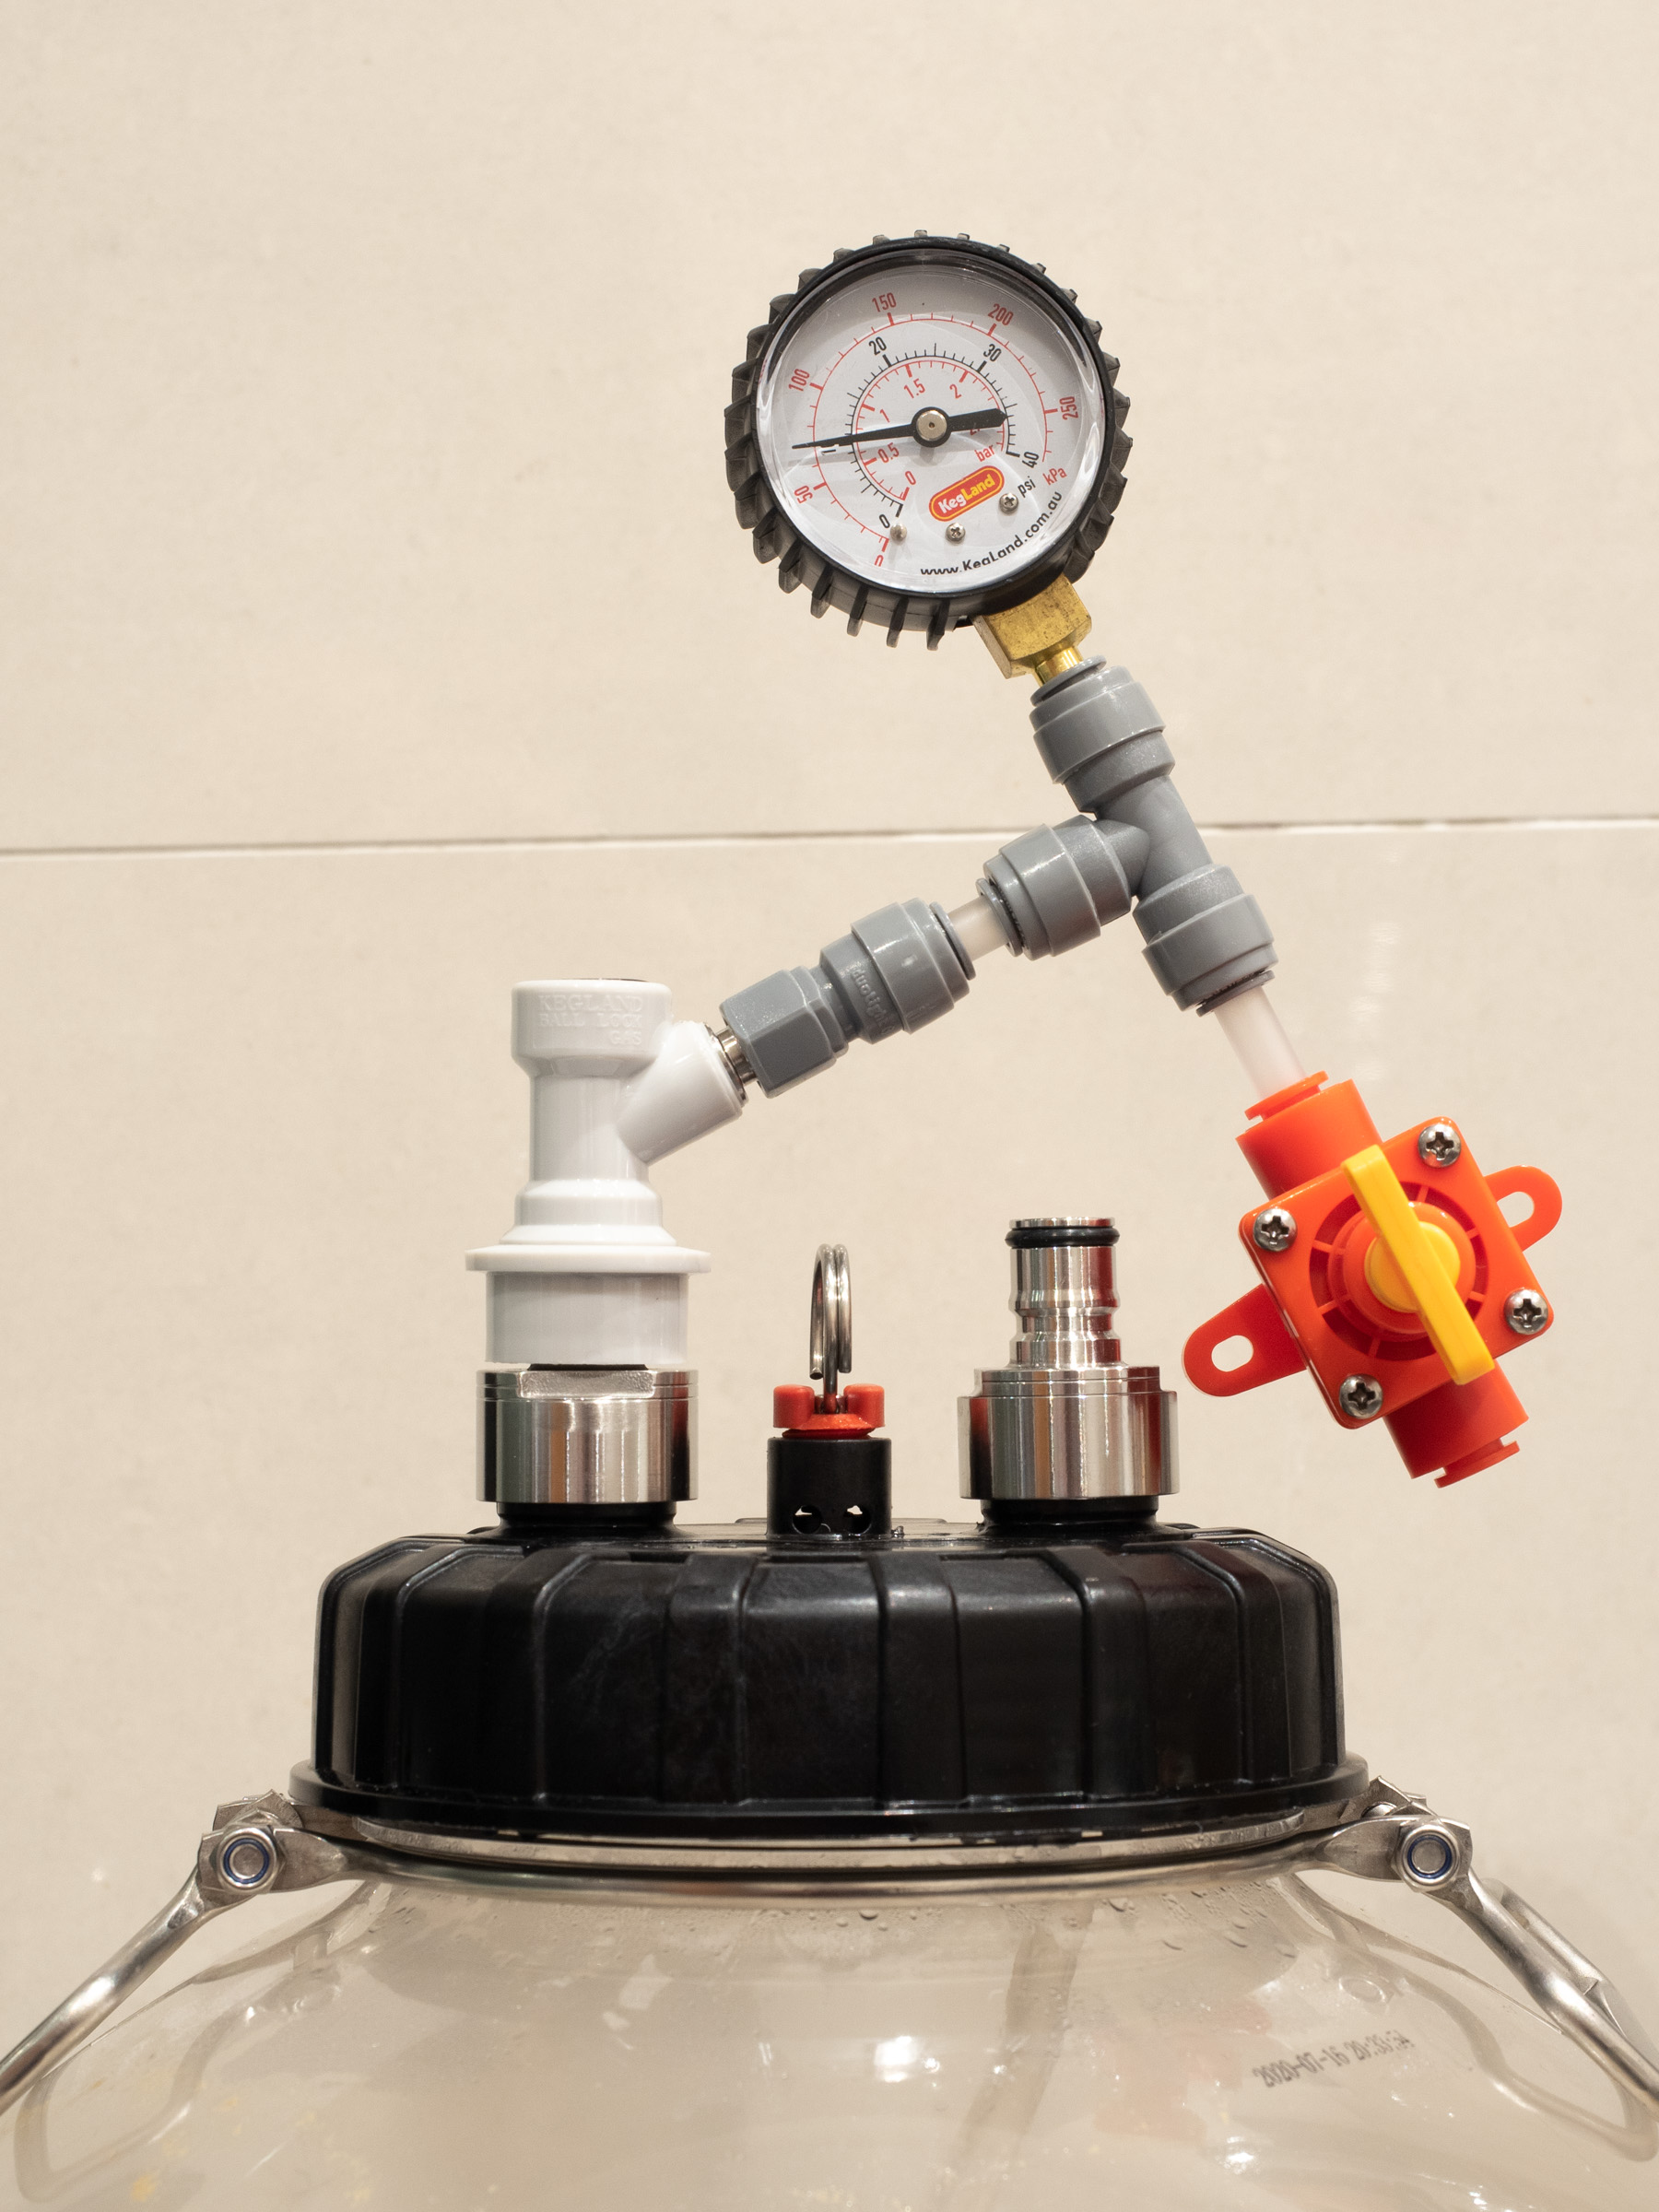
I’m not really sure what to do in terms of carbonation pressure. The dregs I sampled at the end of today’s fun and games was pretty much spot-on and that’s after a week or so at 10 PSI, so I don’t think I need to give it much more. I’ll pump it up to 12 PSI once the keg has acclimatised just in case there’s a slow leak somewhere. There’s no gas inside the fridge since chilling a cylinder seems wrong and I’ve not explored the drain hole method (ooh-err) though I’m leaving the spunding valve & gauge connected so that I can check on the pressure just by opening the door. If there is any drop in pressure I’ll remove the spunding valve and will rig the gauge straight to the disconnect, if it drops after that I’ll take everything off and will just leave the keg to it, checking in a day later.
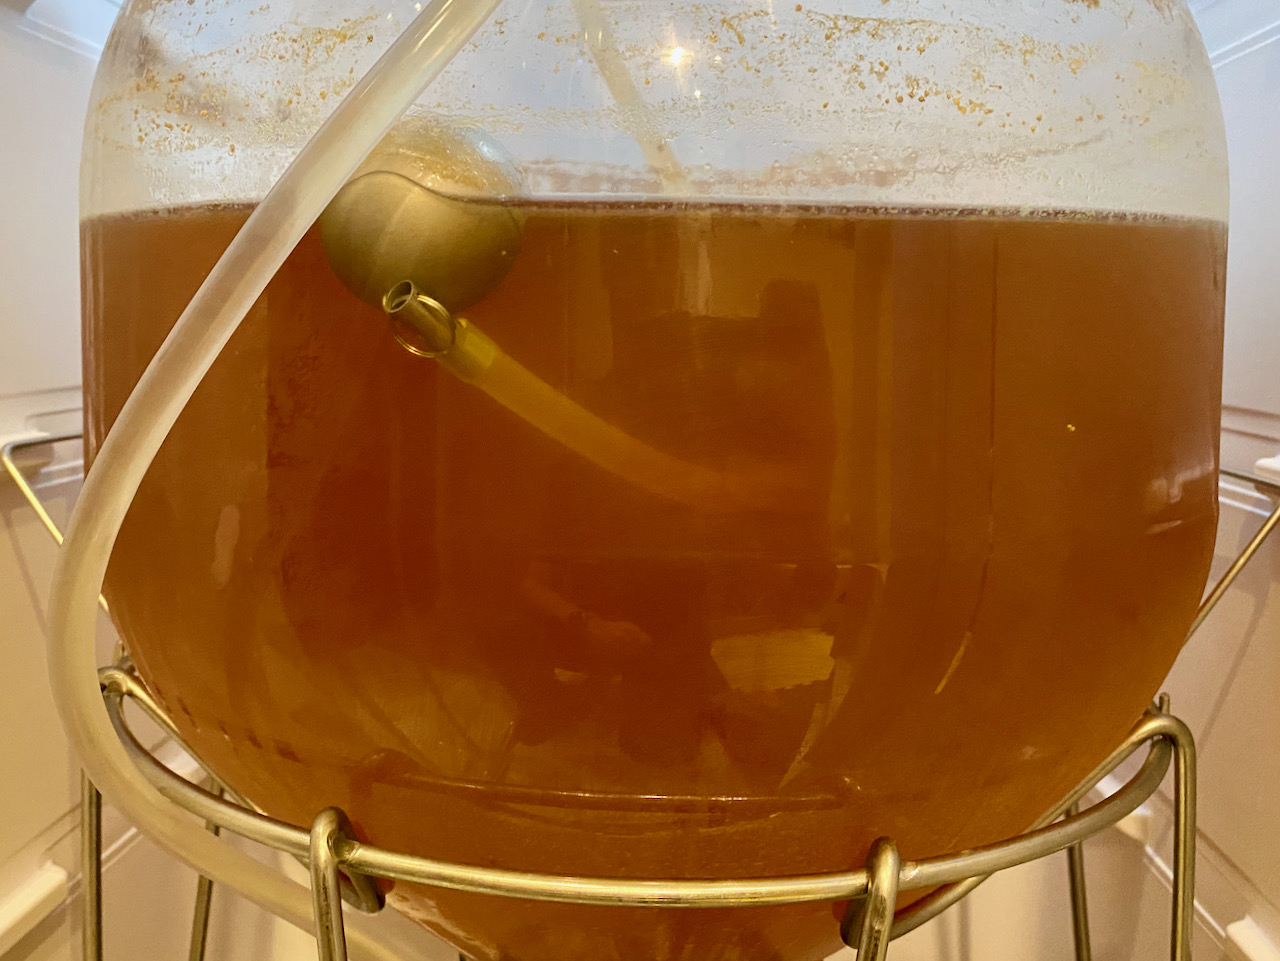
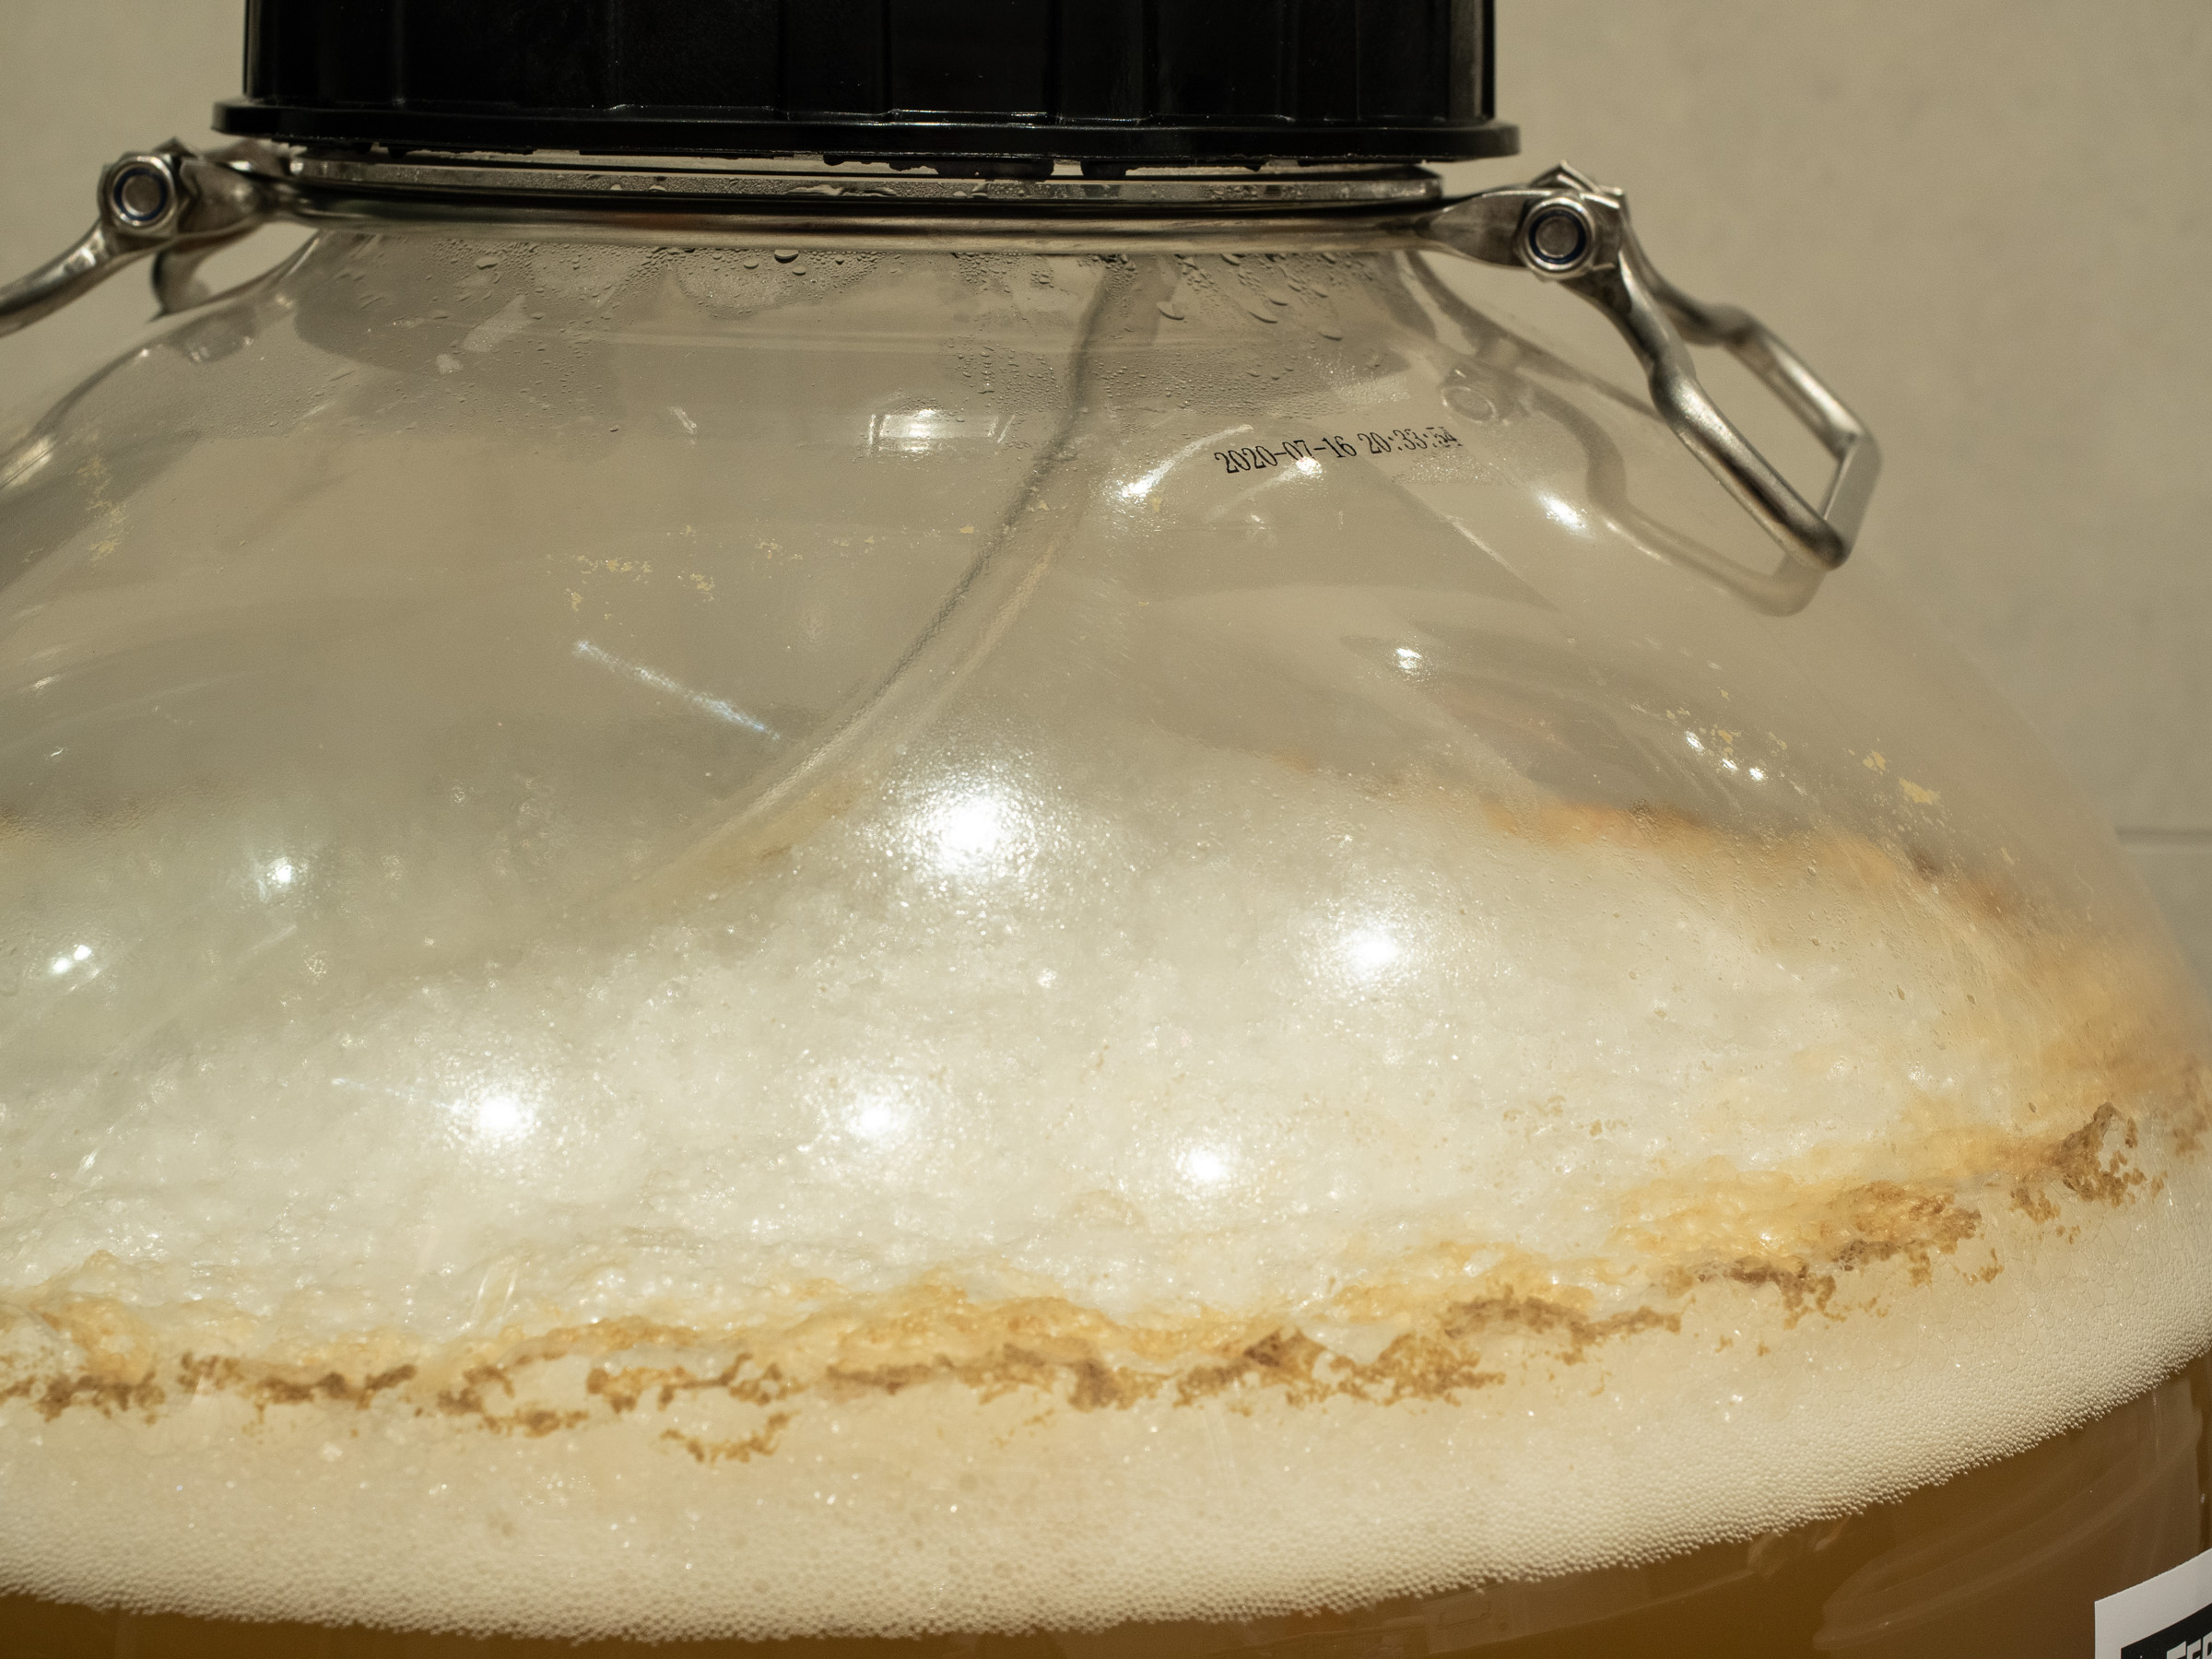
Since the Fermzilla defrosted following its accidental brush with permafrost a few days ago I’ve been gradually creeping the fridge’s temperature dial down again, and it’s been on maximum cooling for two days now. The dial on the spunding valve has been reading 5 PSI for a couple of days which should give me 2.0 vols at 2.0 ℃, so I was a bit surprised to find almost no carbonation when I poured a glass straight from the FV just now. I upped the pressure to 10 PSI prior to serving and got a perfect amount of foam, but there’s no real fizz in the glass, which is a shame.
On a positive note, the colour is amazing and once it’s in a pint glass it looks much clearer than it does in the Fermzilla. There’s a good aroma of hops but the taste isn’t as hoppy as the nose leads you to expect. I’m tempted to dry-hop a bag of Citra for a couple of days, but then again since this will be my first kegged brew I’m going to stick with the original plan.
Speaking of which, it doesn’t seem to be clearing up any more than it has a couple of days ago, so I’m going to keg it ASAP. The hold-up until now has been the fact that I need to deep-clean and then passivate all my new stainless toys, including the B40Pro that arrived a few days ago, and I want to do that in one session with as much re-use of chemicals as possible in order to save costs. This brew will be just fine in the chilled FV for a couple more days … if I don’t drink it first.
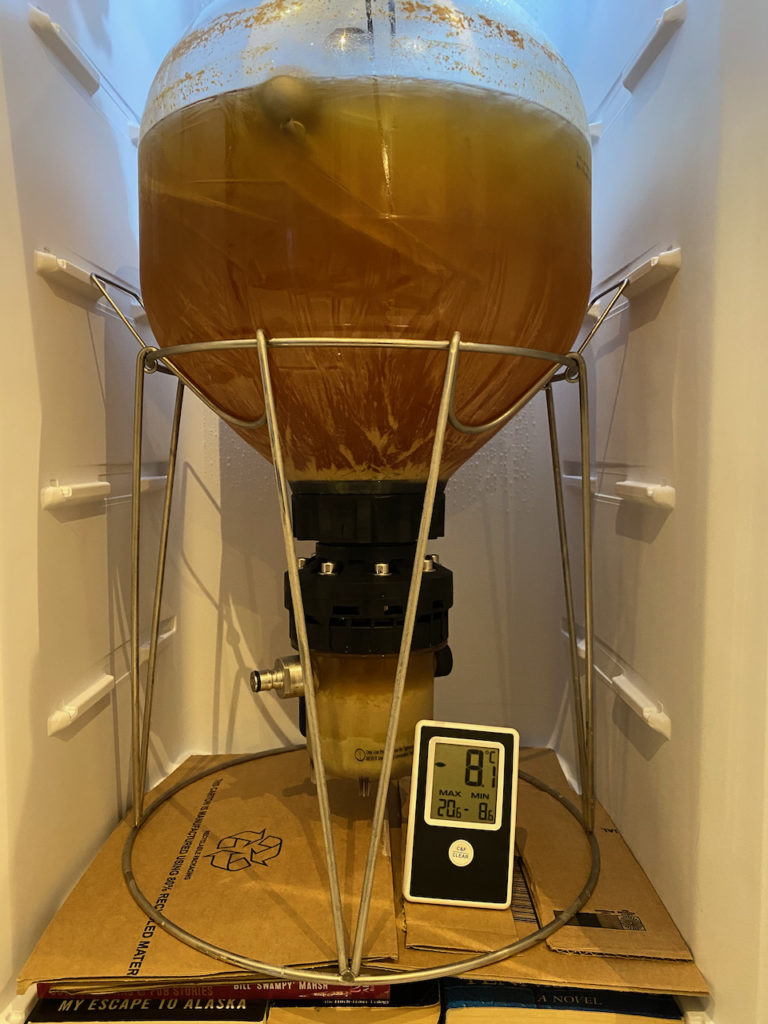
Temperature in the fermentation fridge had dropped drastically a couple of days ago, reaching -8.6 ℃ and causing the extremities of the fermenter contents to start forming ice. In hindsight This may be due to there only being a single, solid item in there, which takes a while to cool down and causes the air temperature in the fridge to get much colder than usual while keeping the average interior temperature warmer than usual. Then again, the thermostat is mounted inside the fridge and should be sensing the air, not the fermenter contents, so I don’t know what’s going on.
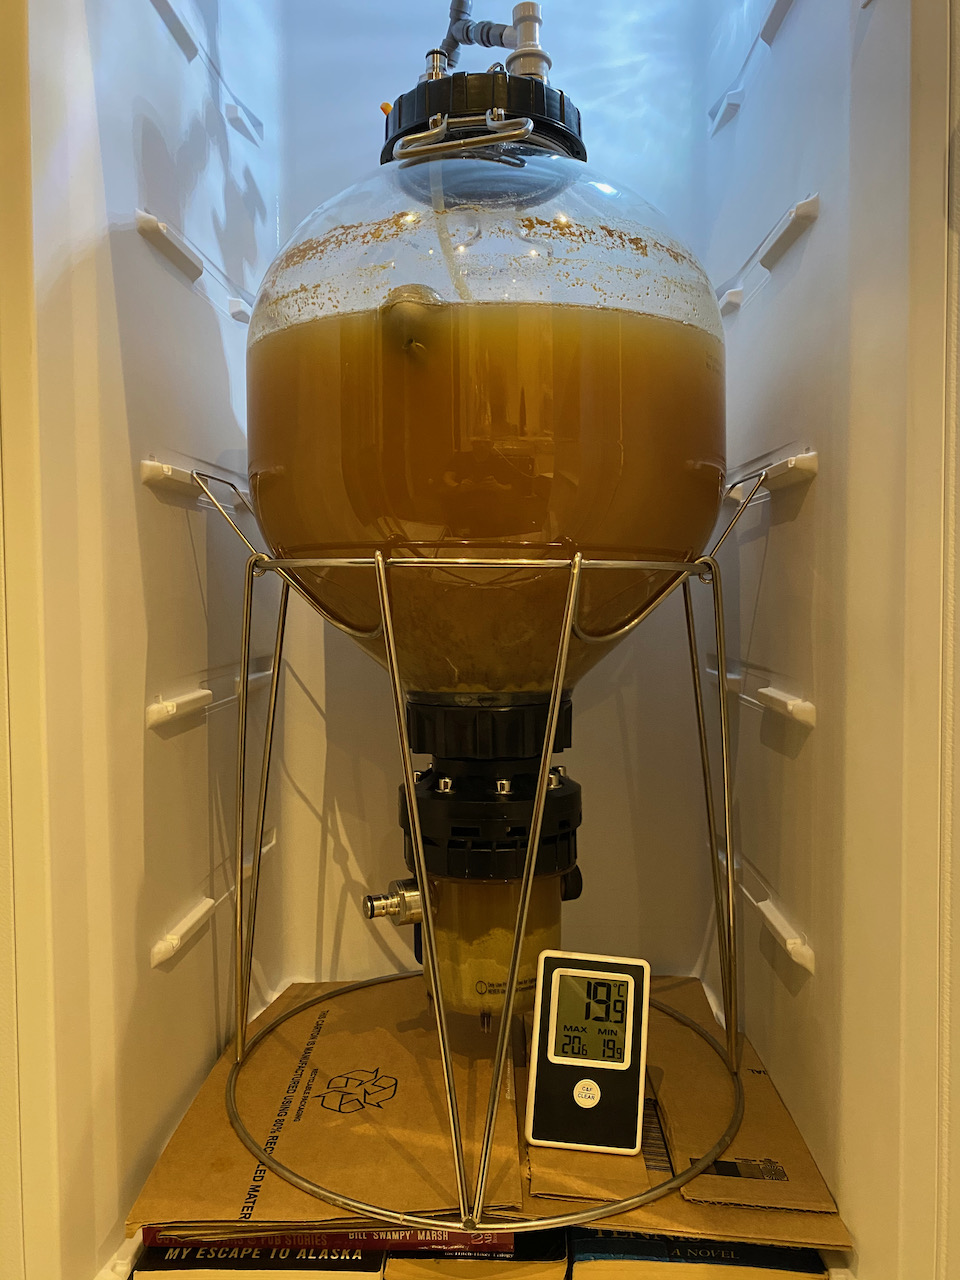
Either way, from now on I’m going to use the fridge on a low setting so that the difference between a newly added fermenter and the air inside the fridge is minimal. It’s all thawed out again now and no leaks have sprung, but I’ll have to inspect the threads and seals carefully when cleaning the vessel. On the bright side my brew appears to be clearing gradually, which is nice.
Image taken yesterday, thaw underway. Today all the ice is gone and I’m taking the temperature down again.
#wisdom: decrease the temperature slowly when cold-crashing to avoid freezing the brew. When using the Inkbird it may be worth placing the sensor inside a separate bottle of water to act as a thermal buffer.
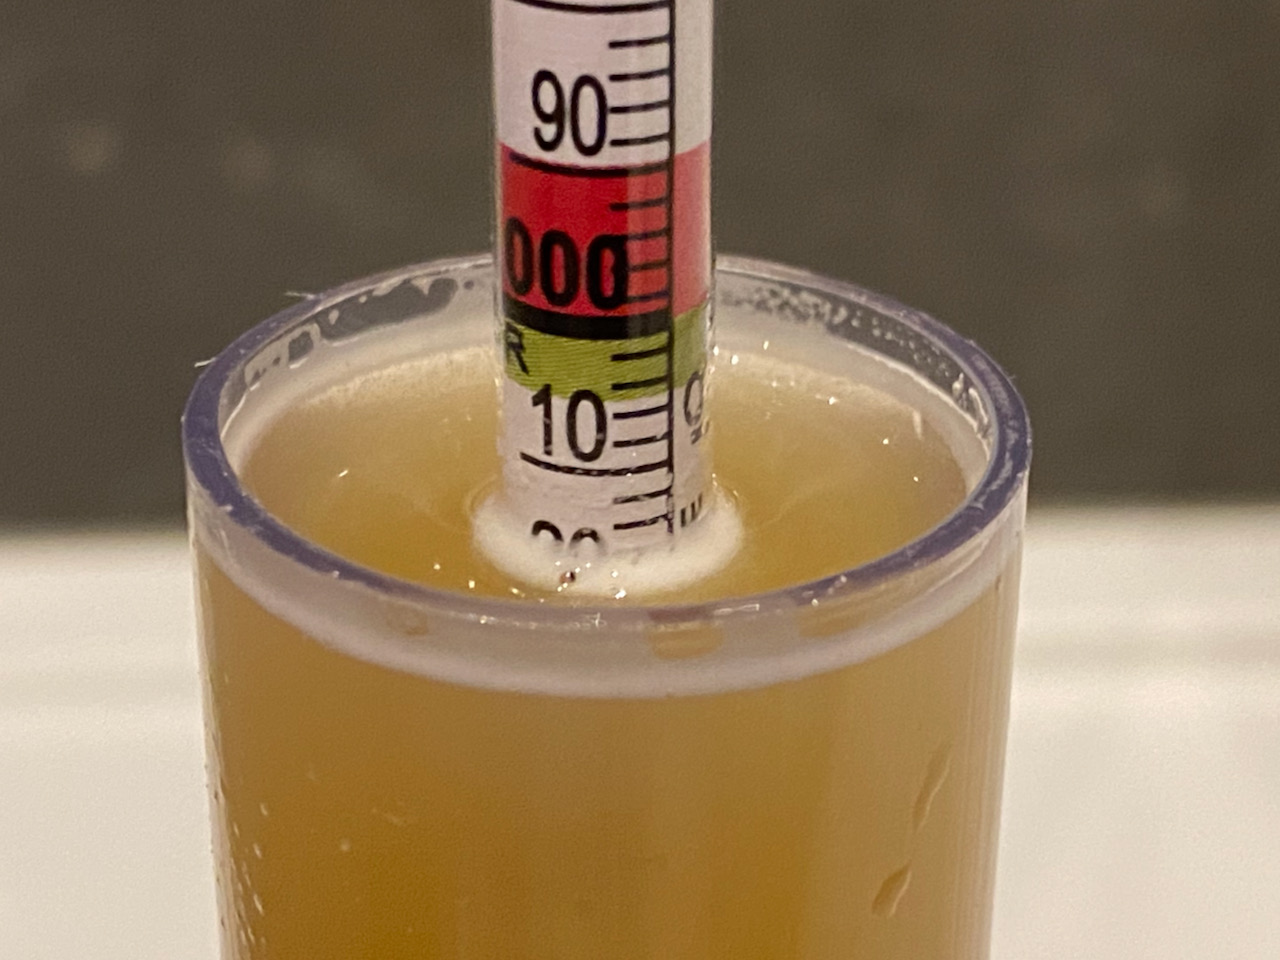
Gravity tested at 1.011 today which means she’s only dropped 1 point in two days. That’s technically not stable yet (still producing gas from 8 PSI to 10 in 30 – 40 minutes) but it’s been 4 days since I dry-hopped and that’s already too long for my liking. The brew tastes very nice indeed, with a velvety feel and some subtle hints of citrus. At 1.011 she comes in at 4.33% ABV, which is bang-on the expected 4.3% of its official draught sibling.
Ignoring the gravity, the delay in getting this cold-crashed was down to my new refrigerator not being delivered until yesterday, and it then had to stand half a day in order for the coolant to settle. Until I make a proper shelf for the Fermzilla she’ll have to rest on some paperbacks, which isn’t ideal since it’s not 100% level and I’m concerned about transferring uneven pressure to the vessel via the stand. Seems happy enough for now.
I started the refrigerator at 15:30 and 10 minutes later the thermometer inside was already showing 13 ℃ though obviously the vessel and its contents will take longer to get anywhere near that. In preparation for the increased CO2 absorption that comes with reduced temperature I’ve increased the pressure from 10 to 15 PSI, and will check in later to make sure she stays suitably high to prevent ingress of oxygen.
Speaking of carbonation, I’ve been thinking more about the effect of temperature on the level of fizz in the beer. Using the keg carbonation calculator I see that for 2.0 vols (upper end for a British Ale) at 2.0 ℃ I should set my regulator to 5.1 PSI. If I want the same level of carbonation at 20.0 ℃ I need to dial in 19.8 PSI, and I’ve been fermenting at 10 PSI until now in order to not stress the yeast. Can we therefore assume that in order to arrive at 2.0 vols / 2.0 ℃ I now need 20 PSI and not 15? I’ll definitely check in again later in order to add some more if it looks as though I need it – can always reduce pressure easily enough once the vessel temperature has reached its target.
Fermentation seems to have slowed quite a bit on this brew, with only very tiny amounts of yeast rising sporadically from the bottom. Gravity comes in at a smidge over 1.012, and the sample from the trial jar tastes nice with a good amount of carbonation. My new fridge arrives tomorrow so if we’re still at 1.012 come Saturday morning then I’m cold-crashing this as soon as I can.
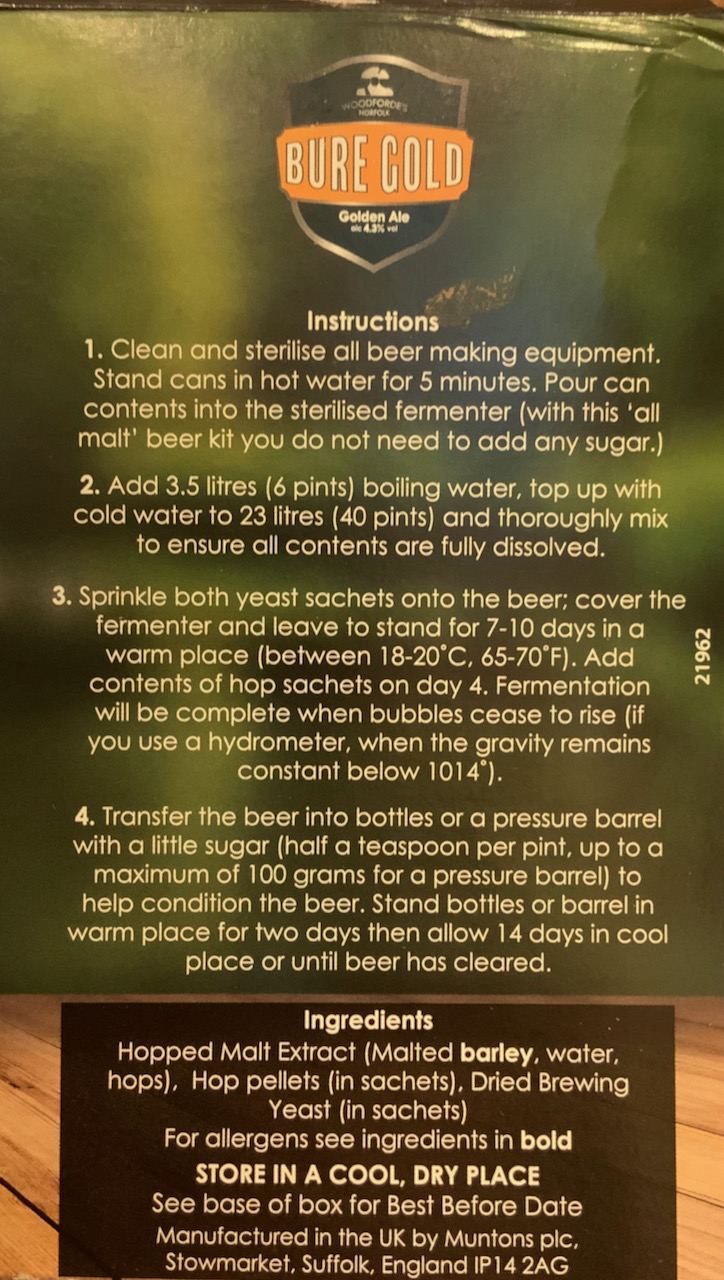
The instructions for this kit recommend to add the finishing hops on day four, but fermenting under pressure speeds things up a notch so I decided to take a gravity reading and add the hops if we’re nearing our target FG of 1.014 or below.
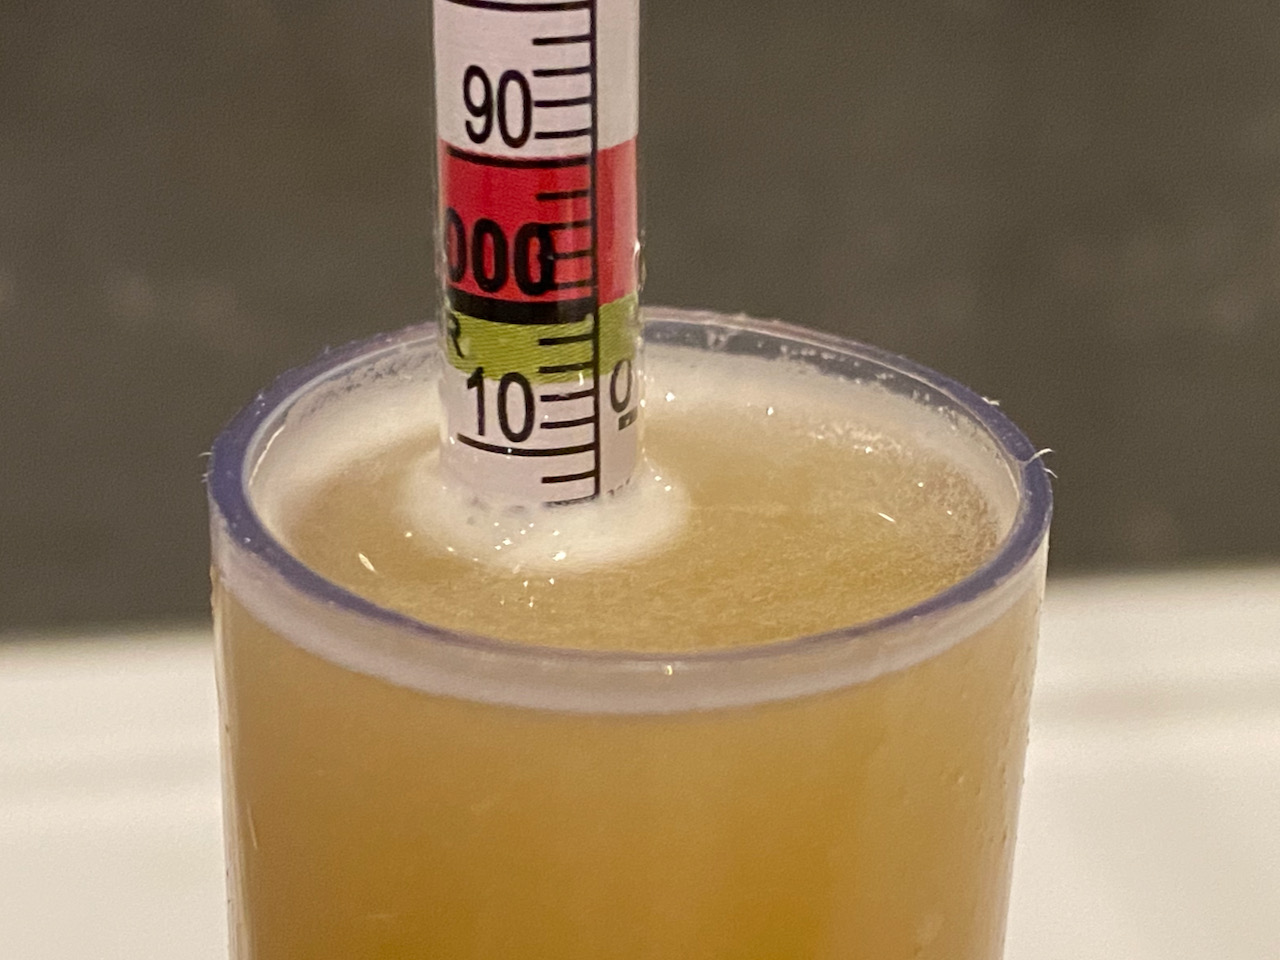
Gravity Reading
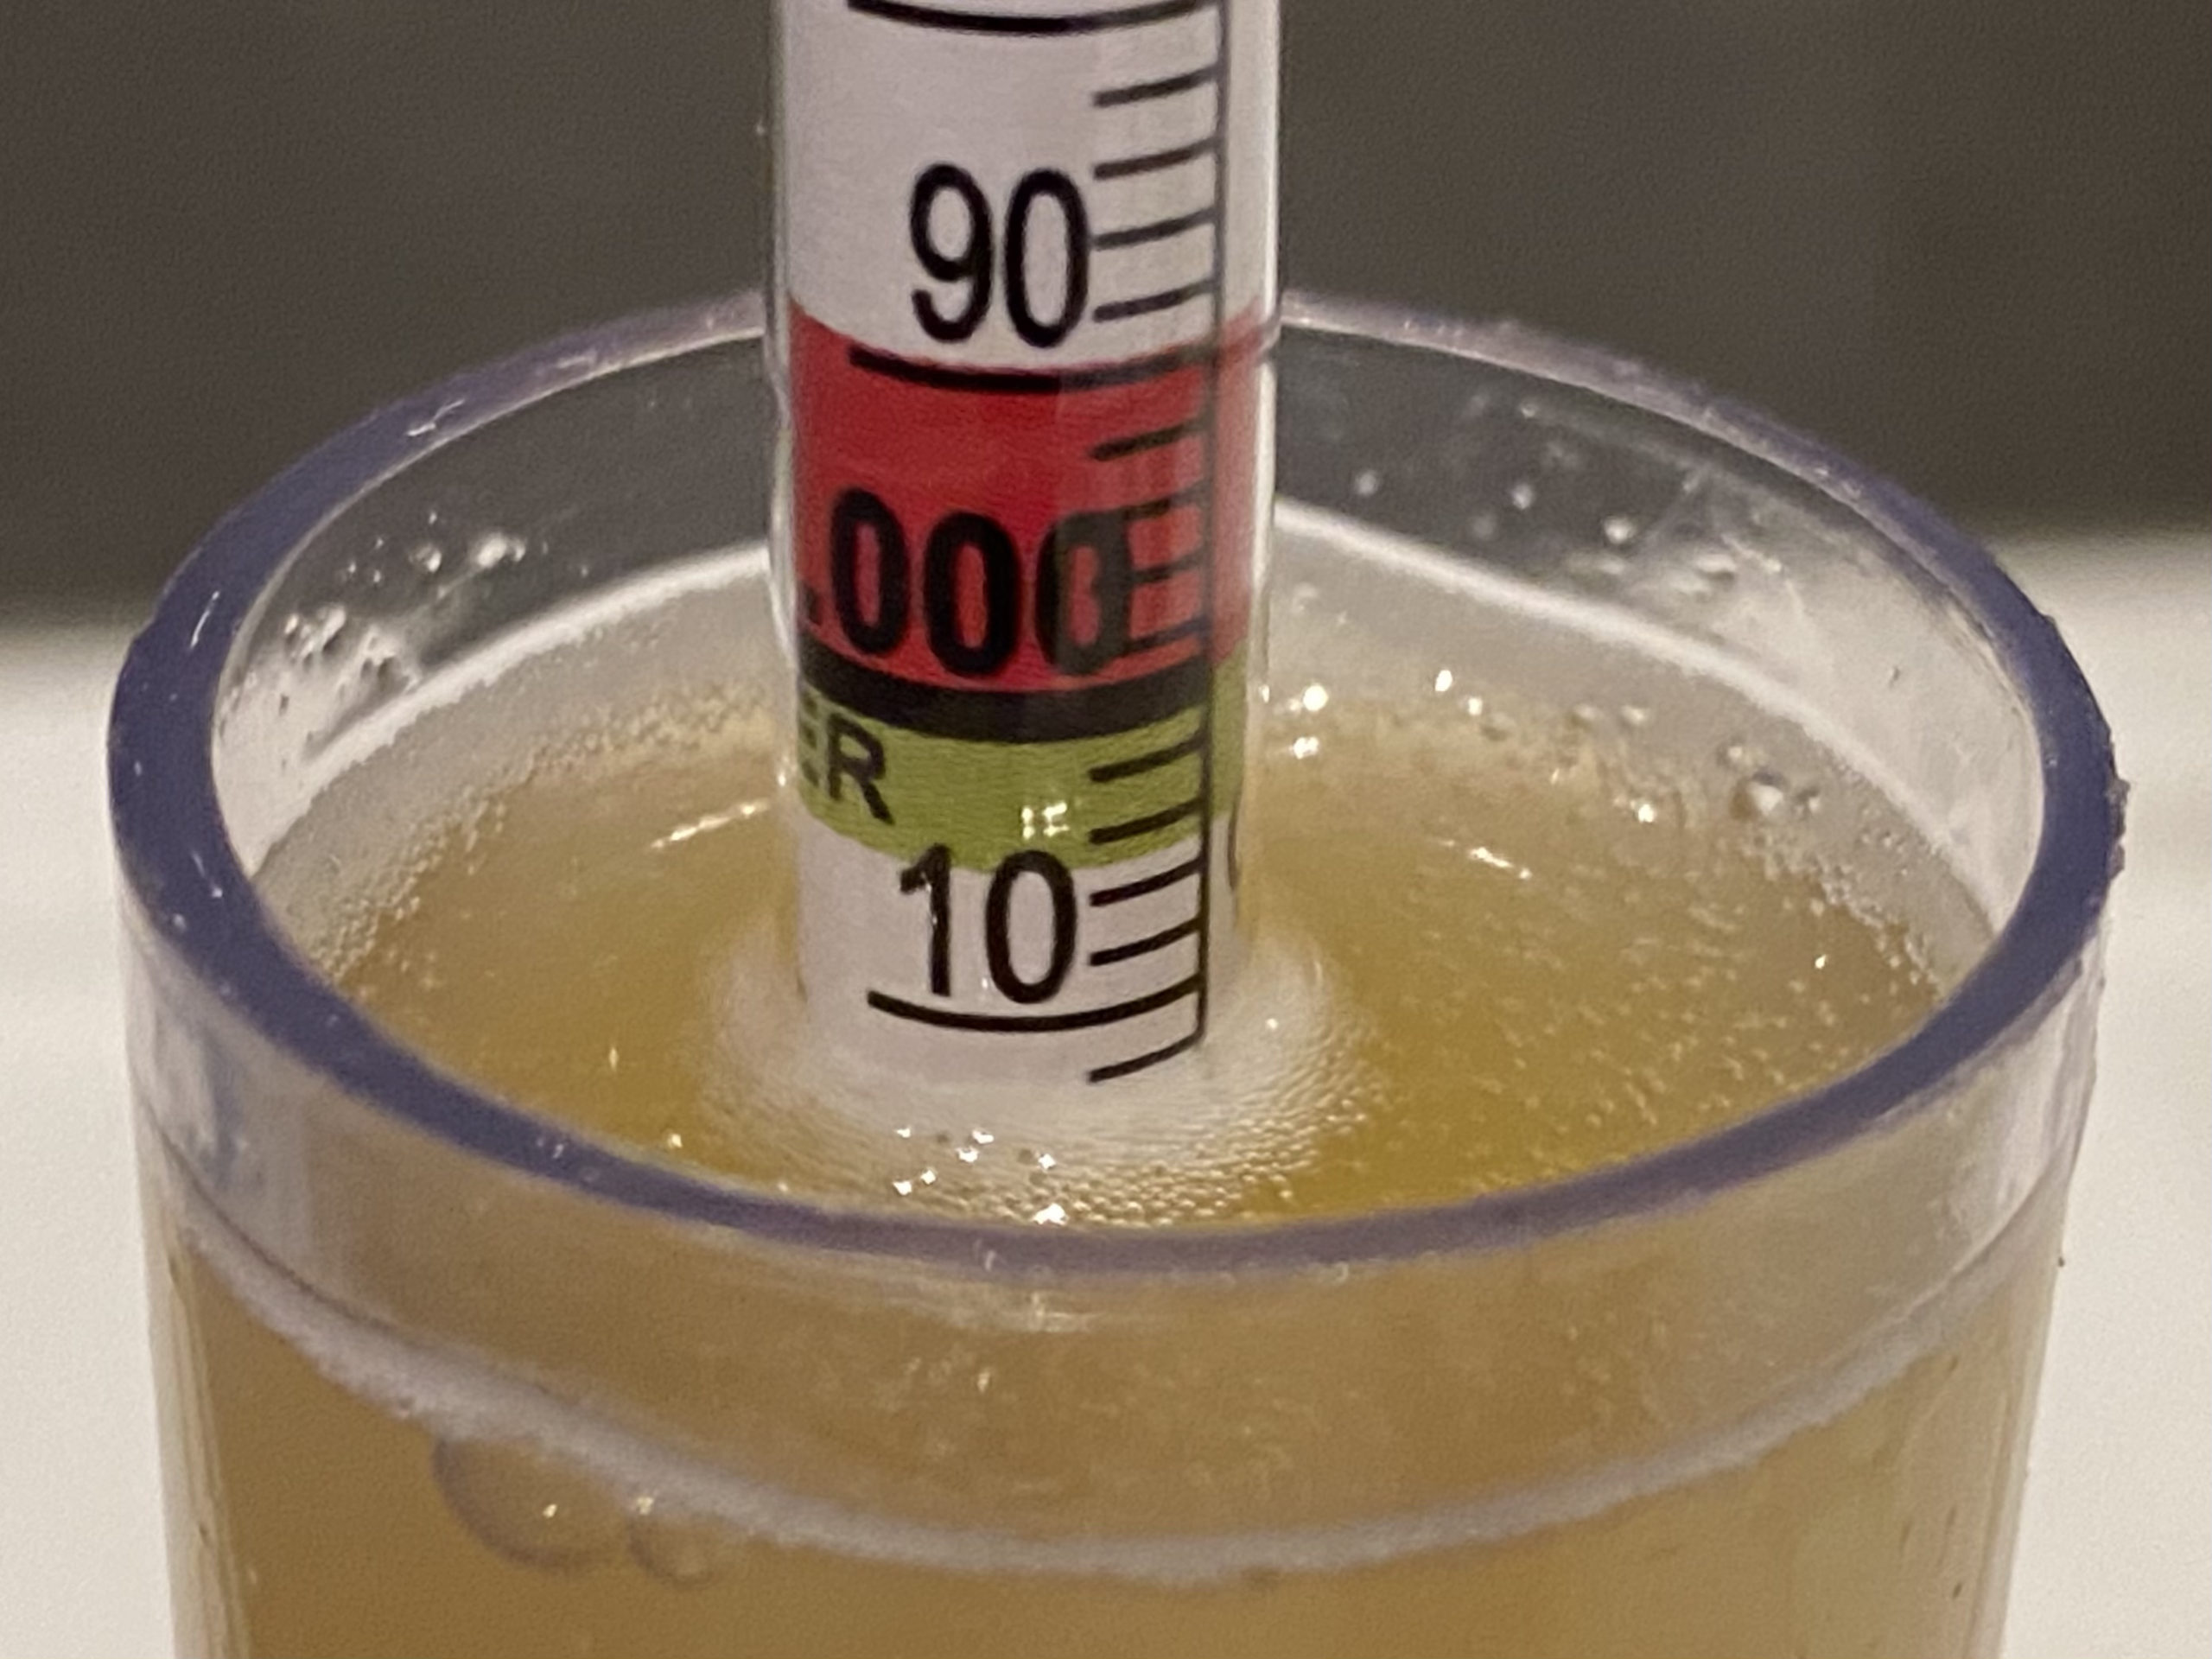
Taking a sample via my new picnic tap was an experience – turns out that a gentle squeeze at 10 PSI gives you a very effective foam cannon! Dropping the pressure a couple of notches and opening the tap all the way allowed me to fill an empty beer bottle about ¼ full and then decant that to the trial jar, where taking a reading was also interesting on account of the pleasant carbonation. My first go registered 1.014 but three subsequent dips gave 1.015, so I’m going with that for now. The taste from the trial jar was very good; no off-flavours and a lovely velvety texture thanks to the carbonation, but obviously limited bitterness and no ‘bite’ since I’ve yet to add finishing hops.
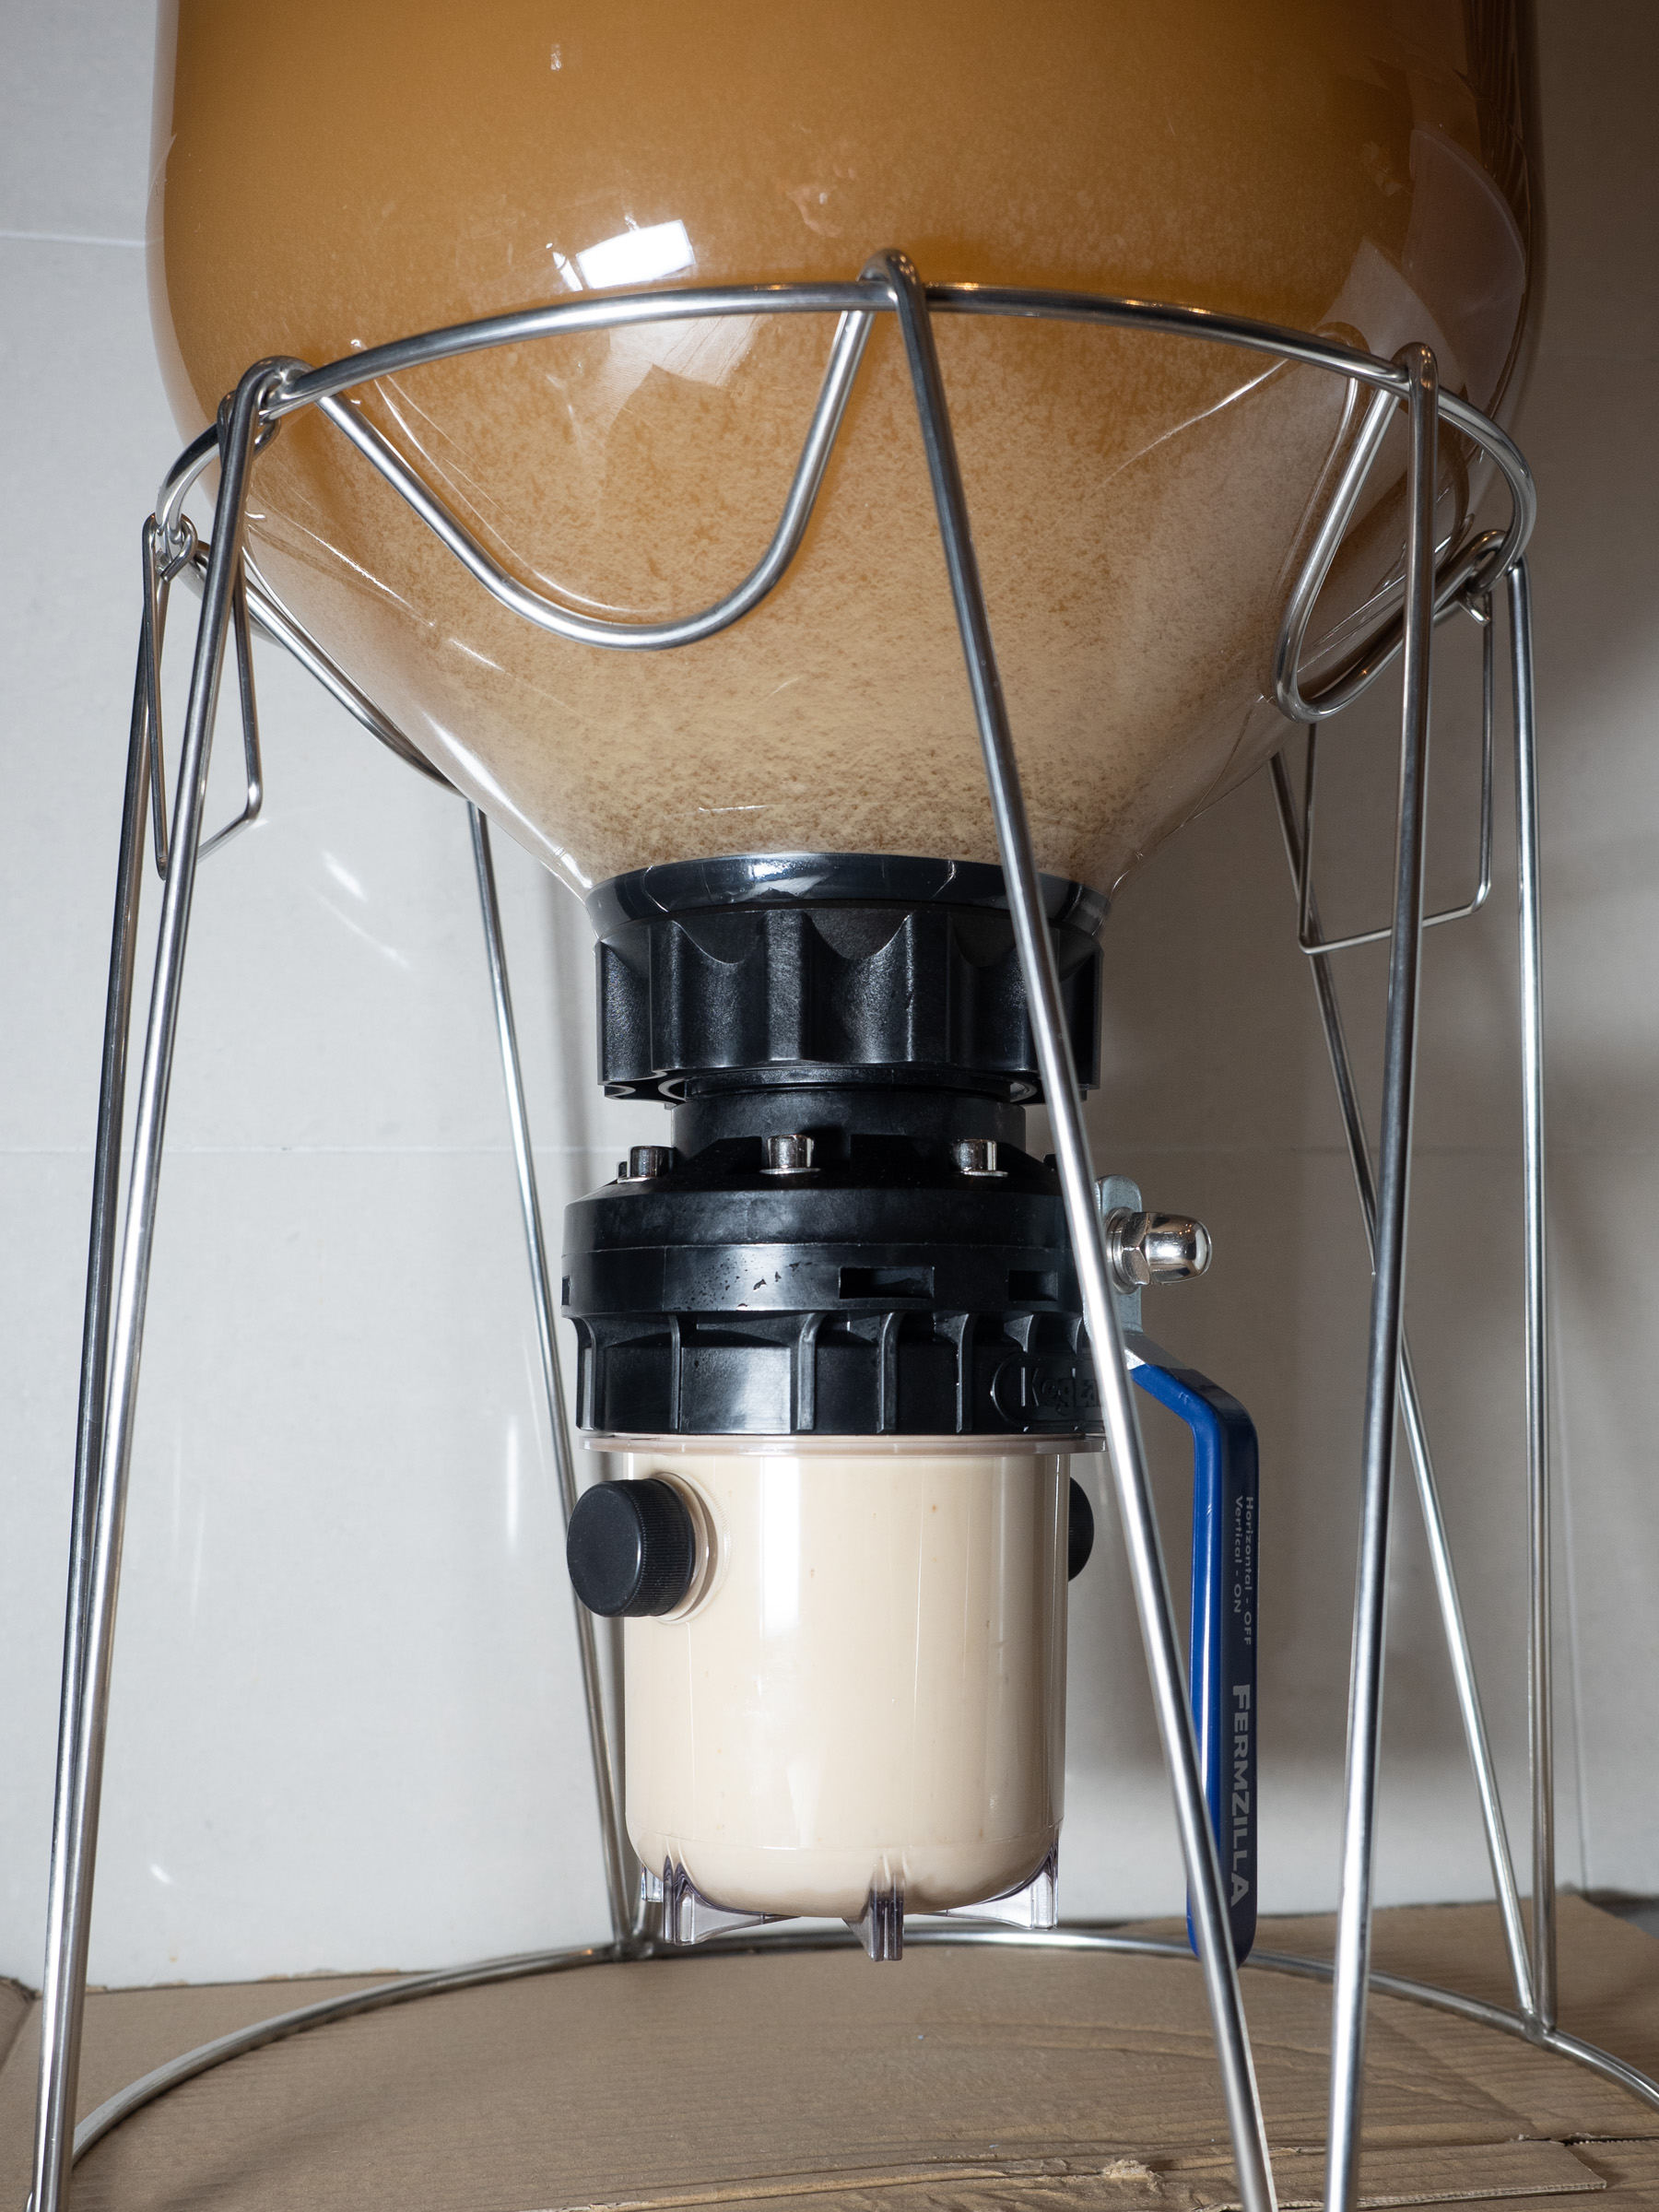
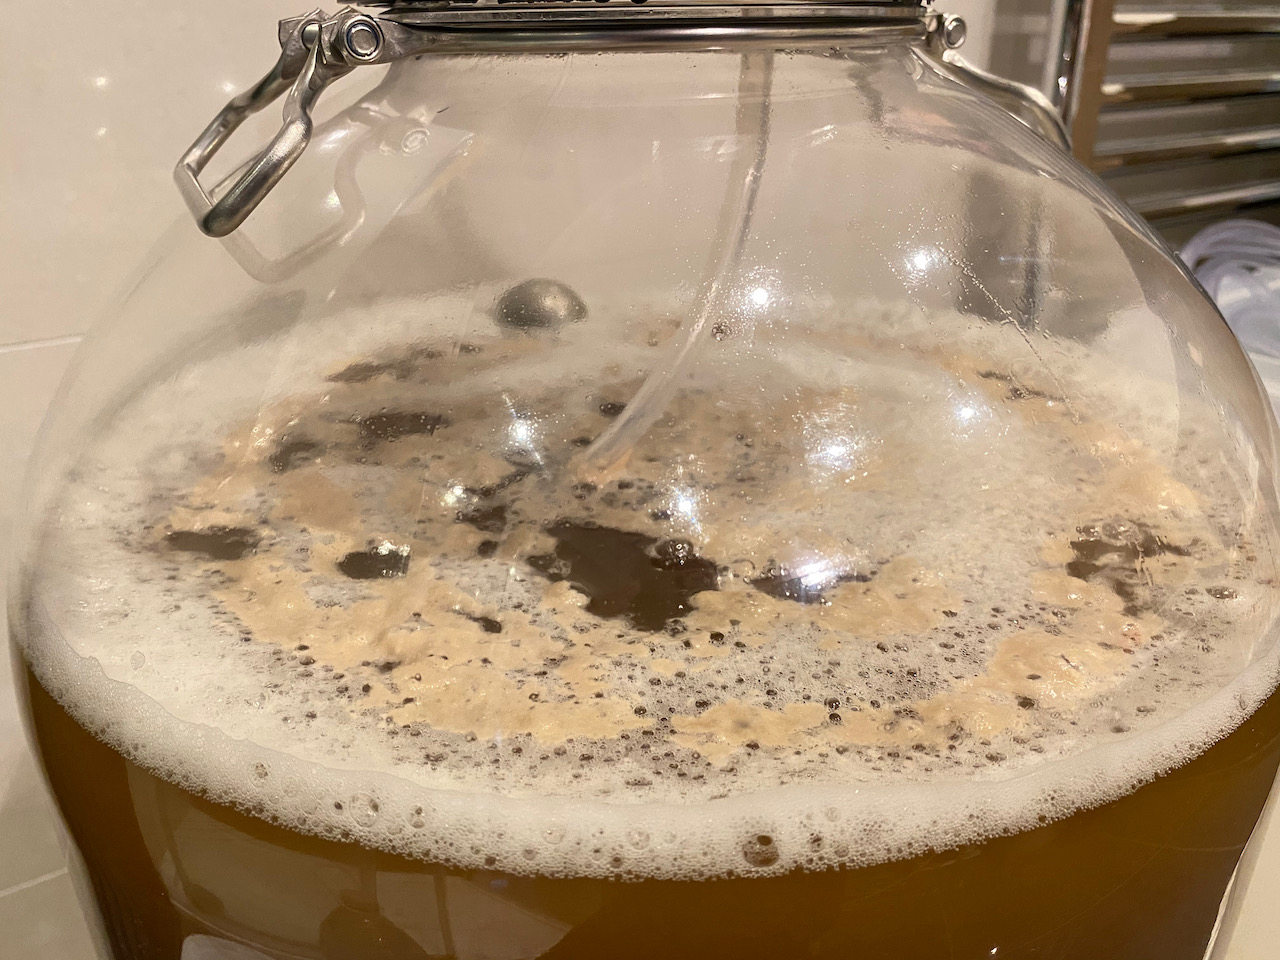
Trub-Dump
Since we’re nearing the end of fermentation and I wanted the hops in there while the yeast was still slightly active in order to carry on making CO2 I decided to dump the crud out of the trial jar and then use that for dry-hopping. There was certainly a load in there – for some days I’d not seen the top of the sediment stack and guessed it was probably way up past the butterfly valve.
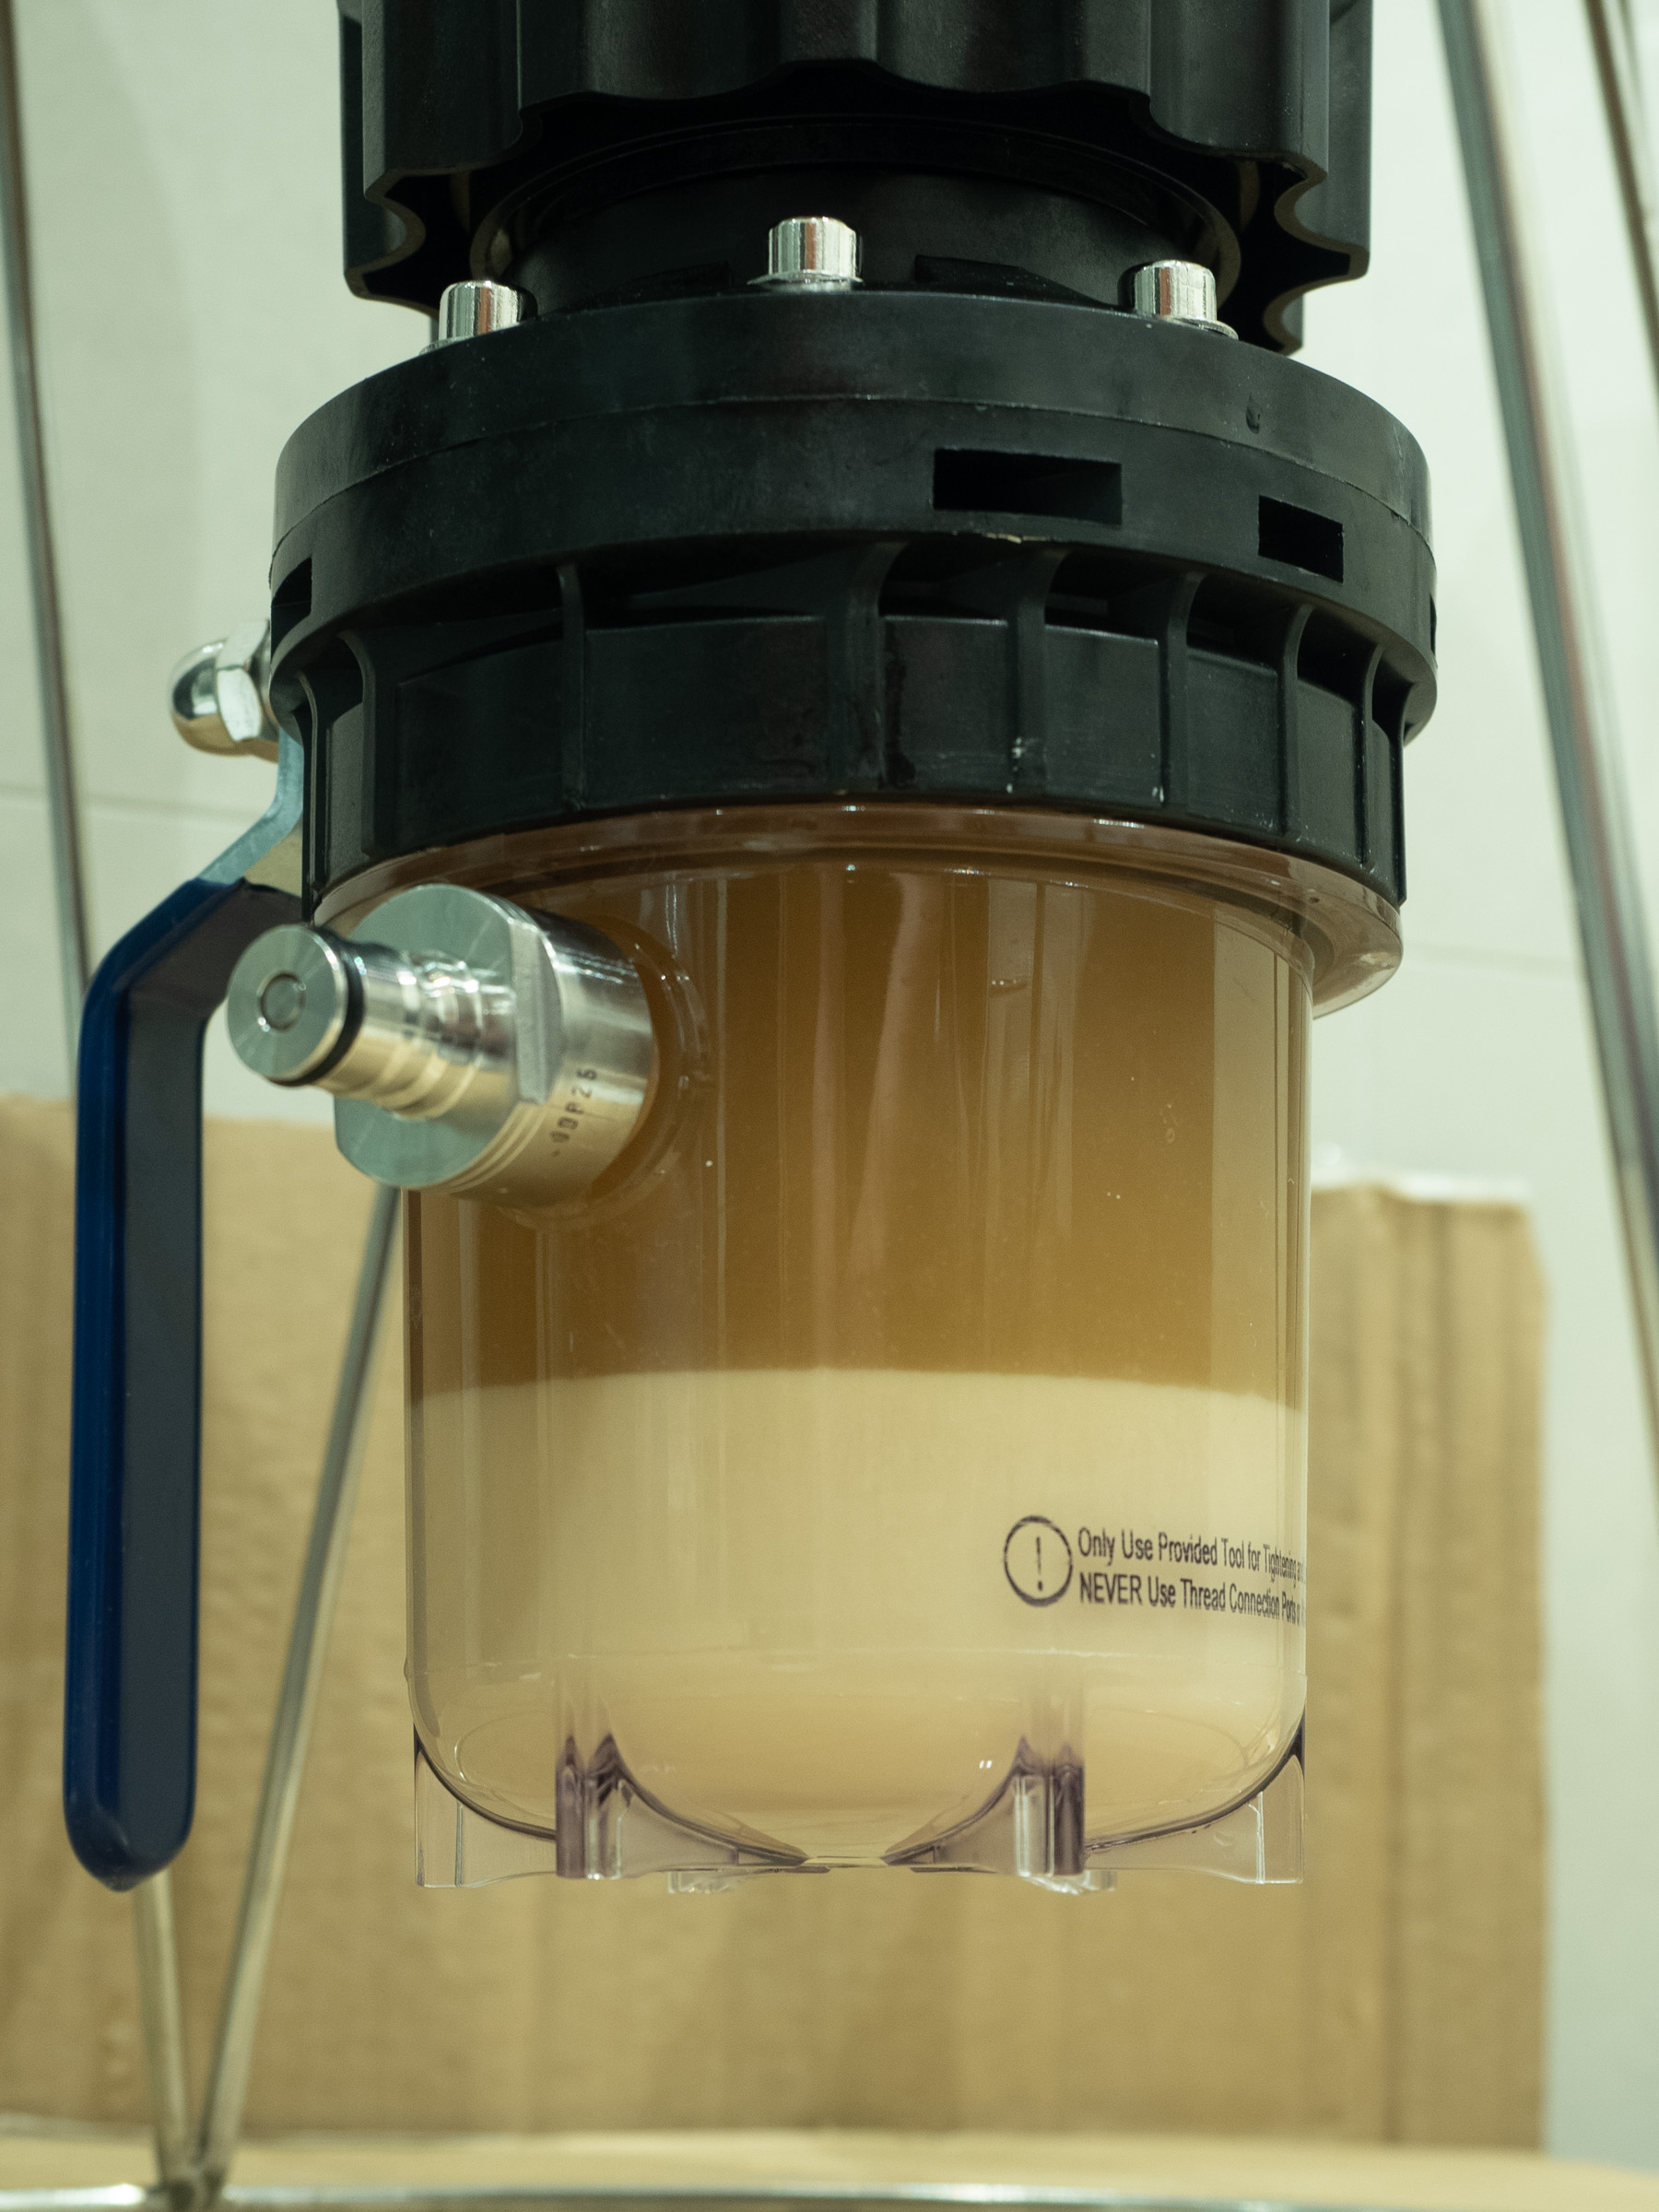
Small amount of crud in the floating dip tube prior to taking sample – nothing to worry about
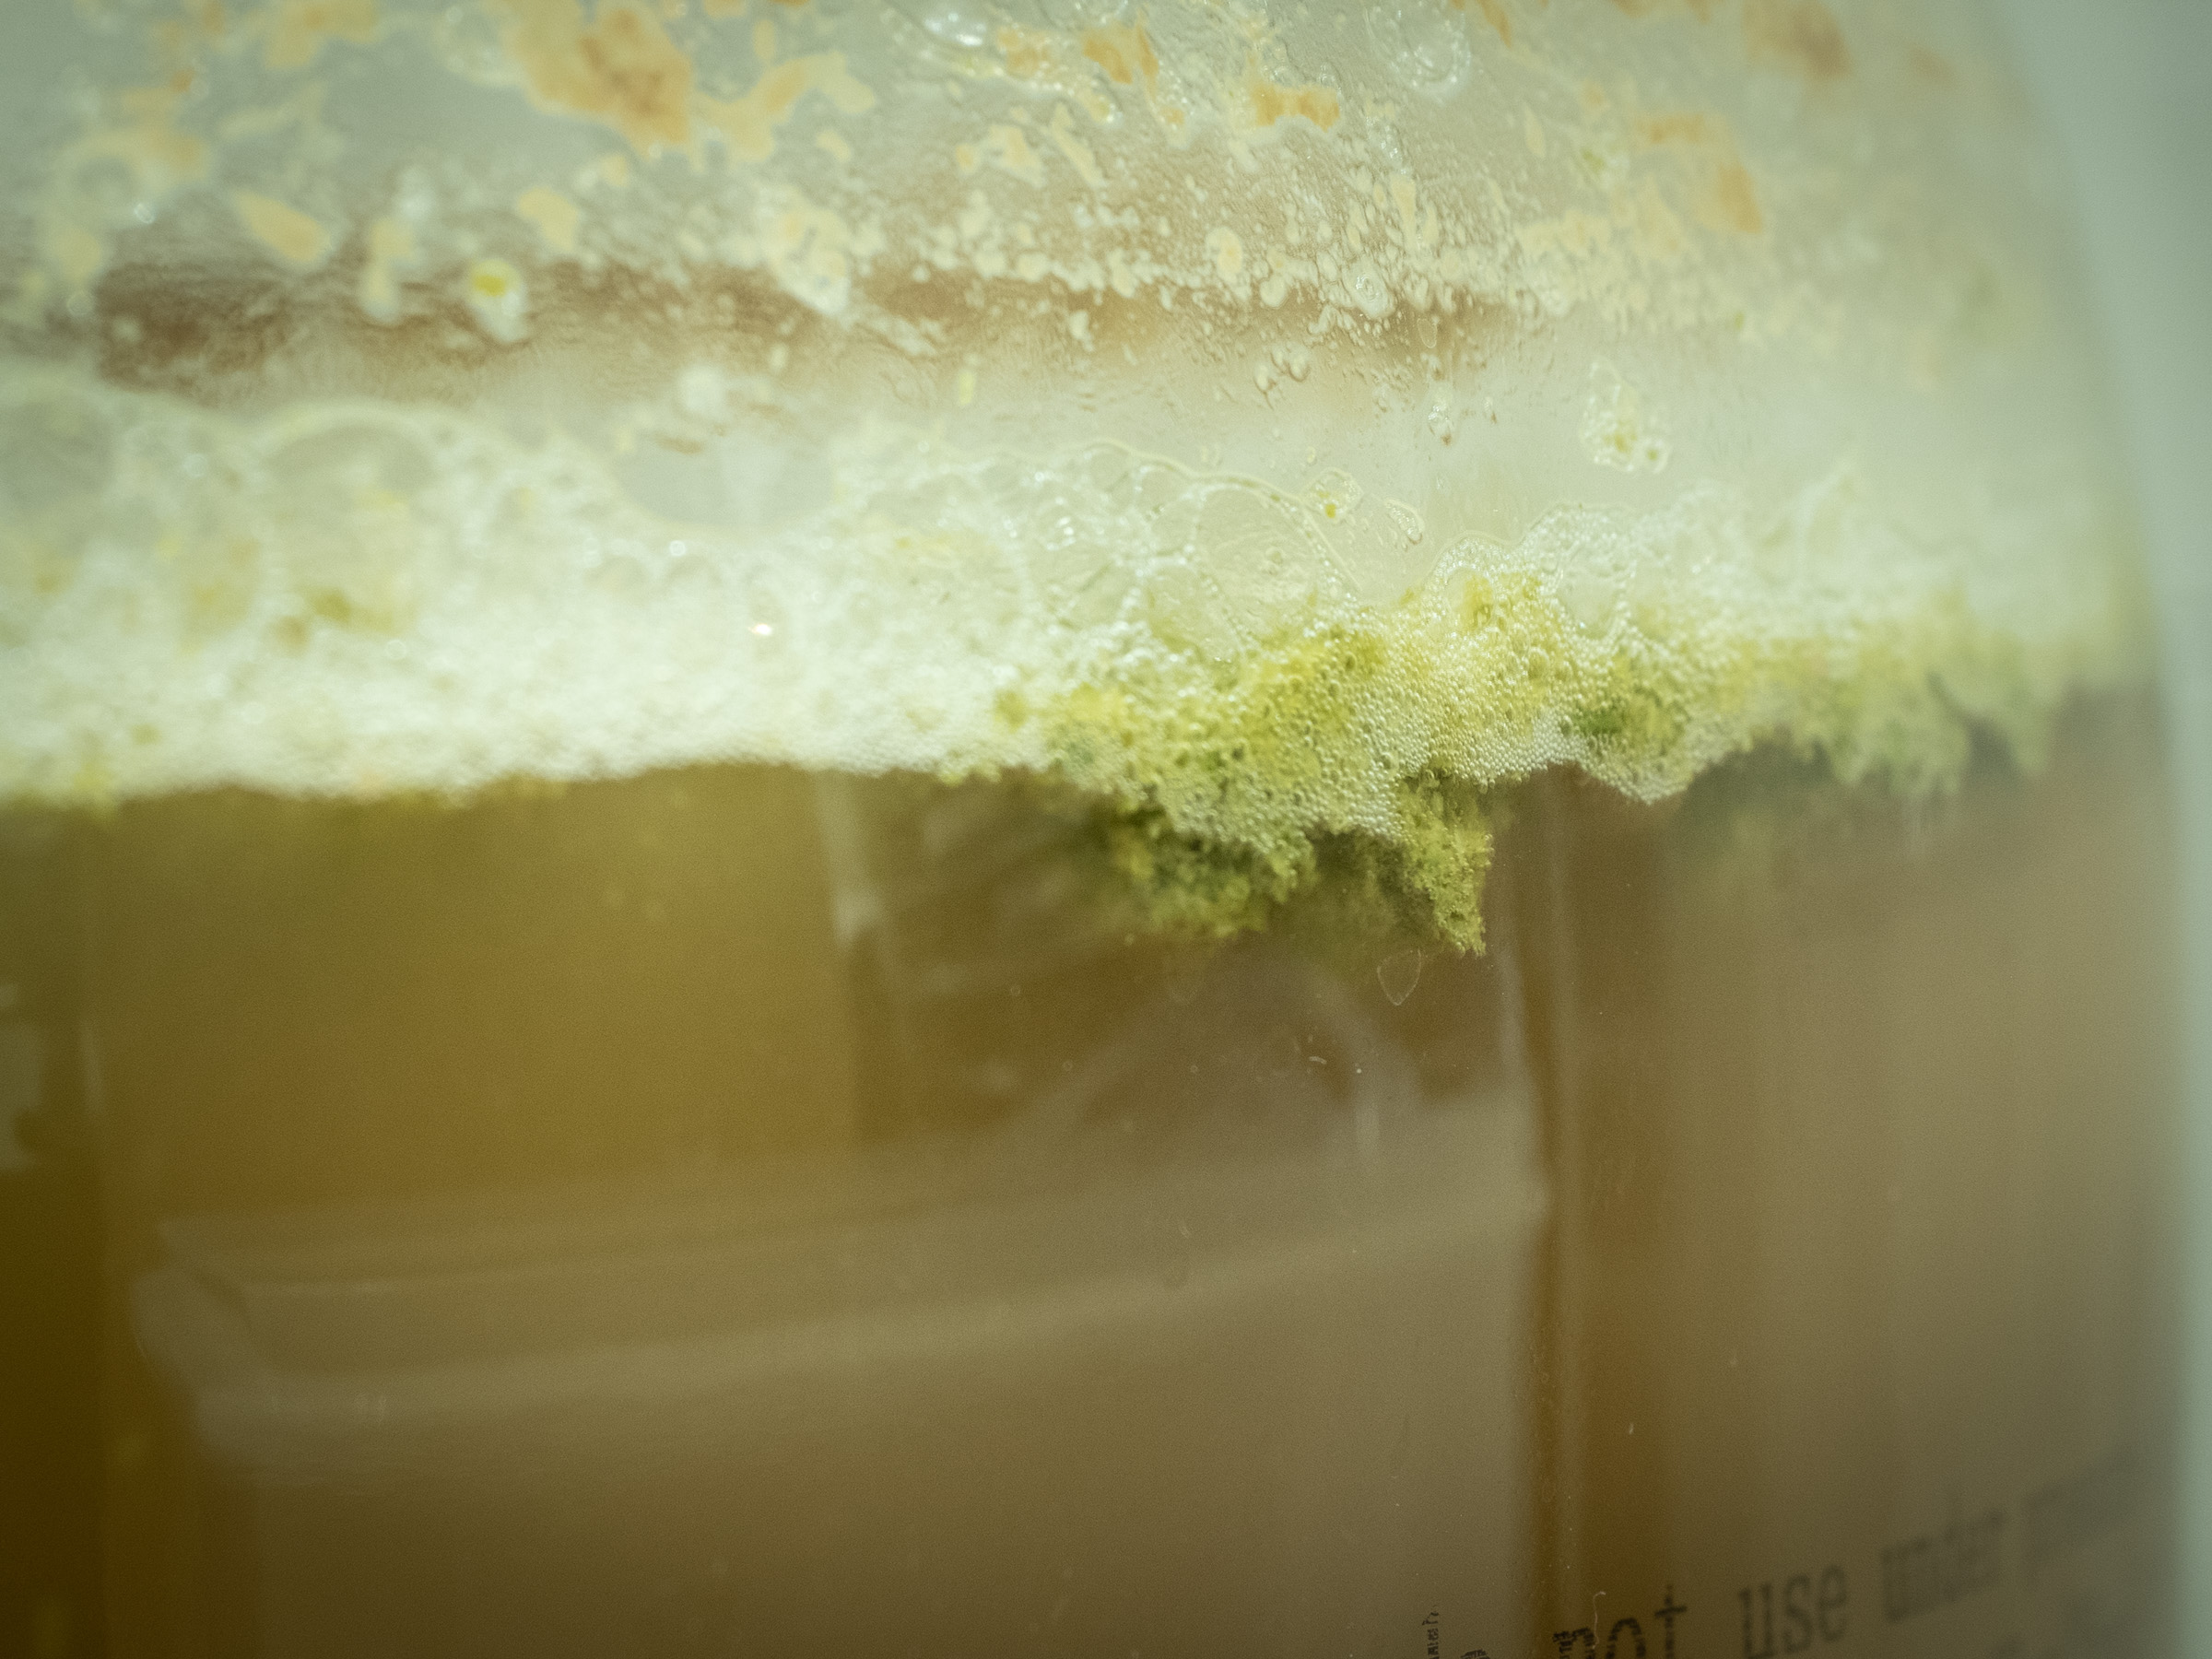
The last of the Krausen prior to dump & hop
Turns out all this was yeast, the only trub is barely a ¼” in the bottom
Fermzilla’s instructions are quite clear on the fact that the butterfly valve must remain open during fermentation and should not be closed while there’s pressure in the vessel, something I’ve seen repeatedly ignored in just about every how-to video on YouTube. I decided to de-pressurise the whole vessel before attempting to remove the collection jar because doing so with the jar under pressure would almost certainly be messy, and I didn’t have a way of de-pressurising just the jar even if I did feel like ignoring the manufacturer’s advice and betting the brewery floor on that butterfly valve. Letting the gas out of the vessel even gently caused some large lumps of crud to float up from the trial jar before bobbing about a bit and settling back down, a bit like some primordial aquatic monster.
Once depressurised and with the valve closed the jar was quite tricky to remove, definitely need to invest in some food grade tap lubricant before next time. When it did go there was a small, controlled explosion of beige phlegm covering an 18” radius which included my knees, and with considerable disappointment I noticed that most of what was in that trial jar was yeast, with only about a quarter inch of actual trub underneath that. Was that bad? I thought this was a top-fermenting brew and therefore anything lying on the bottom would be dead, but the presence of foam in the middle of the surface, i.e. directly above the trial jar, told me that whatever was down there was still breathing, and now I’d effectively murdered it. Oh well, off it goes into the toilet trub disposal facility.
Dry Hopping
Once the collection jar was cleaned up and sanitised I removed one of the screw-tops from the side and replaced it with a stainless carbonation cap before dropping the hops in and reattaching it to the underside of the Fermzilla, also sanitised liberally with Star San. Purging oxygen was then a matter of attaching my CO2 tank to the carbonation cap, turning on the regulator to about 3 PSI, and opening / shutting the cap on the other side of the collection jar a number of times. Each of these bursts filled the collection jar with CO2, and each unscrewing of the release side filled the bathroom with hoppy aroma. It’s not a perfect method since each cycle just dilutes the O2 in the jar and doesn’t fully purge it, though I suppose with enough repetition the oxygen would be reduced to near enough zero levels.
But what about the hops? I heard somewhere that if you can smell their pungent aroma it’s because those precious oils are being diffused into the air, which is why you keep them in vacuum sealed bags, in a fridge. Repeatedly blasting them with CO2 and then purging that to the atmosphere probably isn’t the best thing that could happen to the hops, even if each hit decreases the likelihood of oxygenation.
Going forward I’m going to try and improve this method a little bit so that each purge gets more oxygen out of the trial jar, reducing the need for more purges in total. This Home Brew Network video speculates on the possibility of fitting an elbow to the inside of the carbonation cap which then channels the incoming CO2 towards the bottom of the collection jar, but if you think about it, CO2 is already heavier than O2 and will find its way to the bottom naturally, pushing the oxygen towards the butterfly valve where there’s no exit since the exit port is halfway up the opposite side to the incoming port. It would make much more sense to have an elbow tube on the inside of the exit port which ends somewhere near the butterfly valve, since that’s where the majority of the oxygen will be hanging out. Definitely one to try. I do like the guy’s suggestion of using the ‘waste’ CO2 from the Fermzilla to do the purging of the collection jar instead of using external CO2, but that means leaving the butterfly valve closed for extended periods with the vessel under pressure – again contrary to the manufacturer’s recommendations.
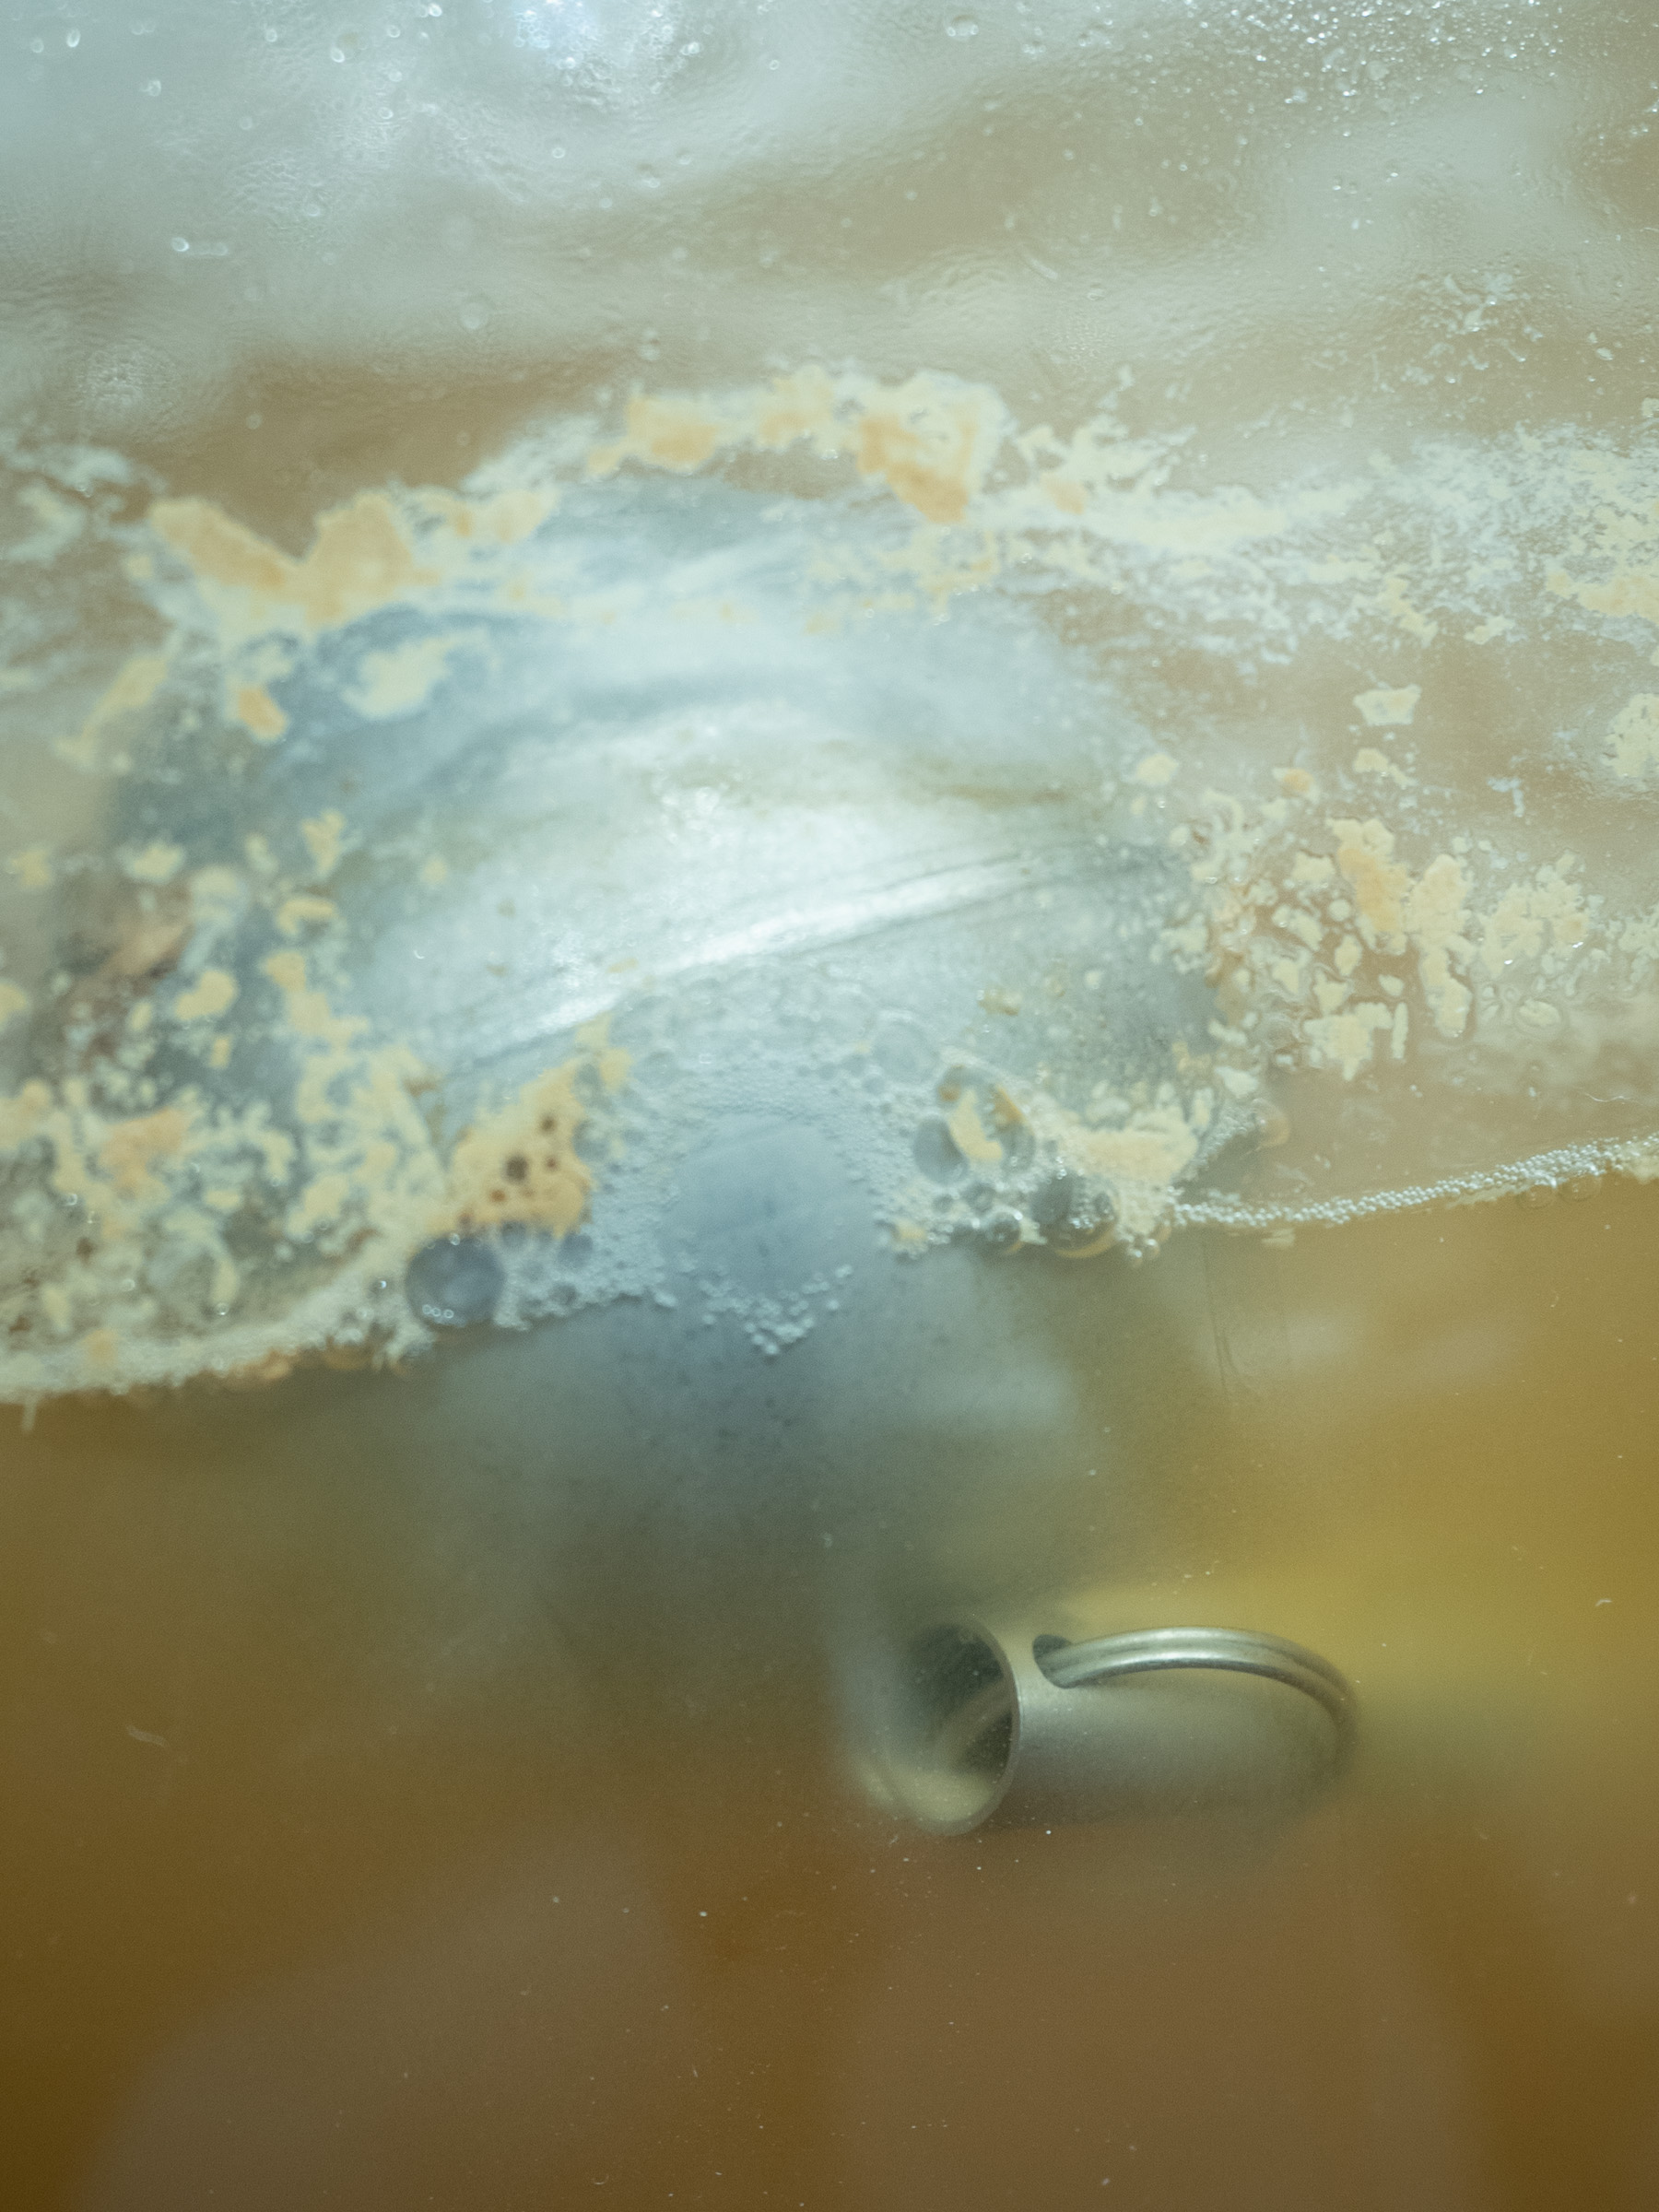
Anyway, with the hops suitably purged of oxygen and the jar firmly connected it was time to open that butterfly valve, and boy did those pellets head for he sky. Almost immediately the collection jar was purged of hops and filled with the rest of my yeast, which had settled on top of the butterfly valve while I was messing about with the jar. The rush of CO2 though the brew (I hope it was just CO2) also produced a nice foamy head on top, which was punctuated here and there by dissolving hop pellets. There was just about 1½” of yeast in the bottom of the jar now but it still looked active. In order to test this I pressurised back up to 8 PSI (the dry hopping procedure boosted things to 5 PSI already, mostly through agitation) and let the yeast contribute the final 2 PSI to get me back to my original 10, though at 30 minutes it did take quite a bit longer than it would have before the trub dump. It’s now about 4 hours later and there’s still some foam on top, a lovely green colour, with the brew itself also a shade darker. Let’s hope there’s enough yeast left to finish the job.
The foam did build up again yesterday after its disappearance following the initial addition of fermentation pressure, but now it’s receded almost to nothing and the collection jar on the bottom of the vessel is full. The spunding valve isn’t hissing as much this evening as it was 12 hours ago, so I’m wondering if we’re already getting towards the end of fermentation after just 2 days? That seems impossibly quick. I’m also wondering how I’ll add the two bags of hops without letting in oxygen, and whether the jar’s full enough with trub to interfere with the butterfly valve when I come to dump it after cold-crashing.
There are still some fresh foam bubbles in the middle of the surface and I can see occasional bubbles crawling up the inside of the collection jar, so clearly the yeast is still doing its thing and I needn’t think about taking a gravity reading just yet, which I’m quite looking forward to since it should be very easy using the picnic tap. I do want to get the hops in there before the yeast stops producing CO2 altogether since that’s a partial insurance against oxygenation, though I suppose that CO2 that I bubble in via the dip tube after dry-hopping will displace any oxygen that’s inadvertently introduced since oxygen is lighter and will exit via the spunding valve. Might be worth minimising the oxygen in the hop pellets somehow.
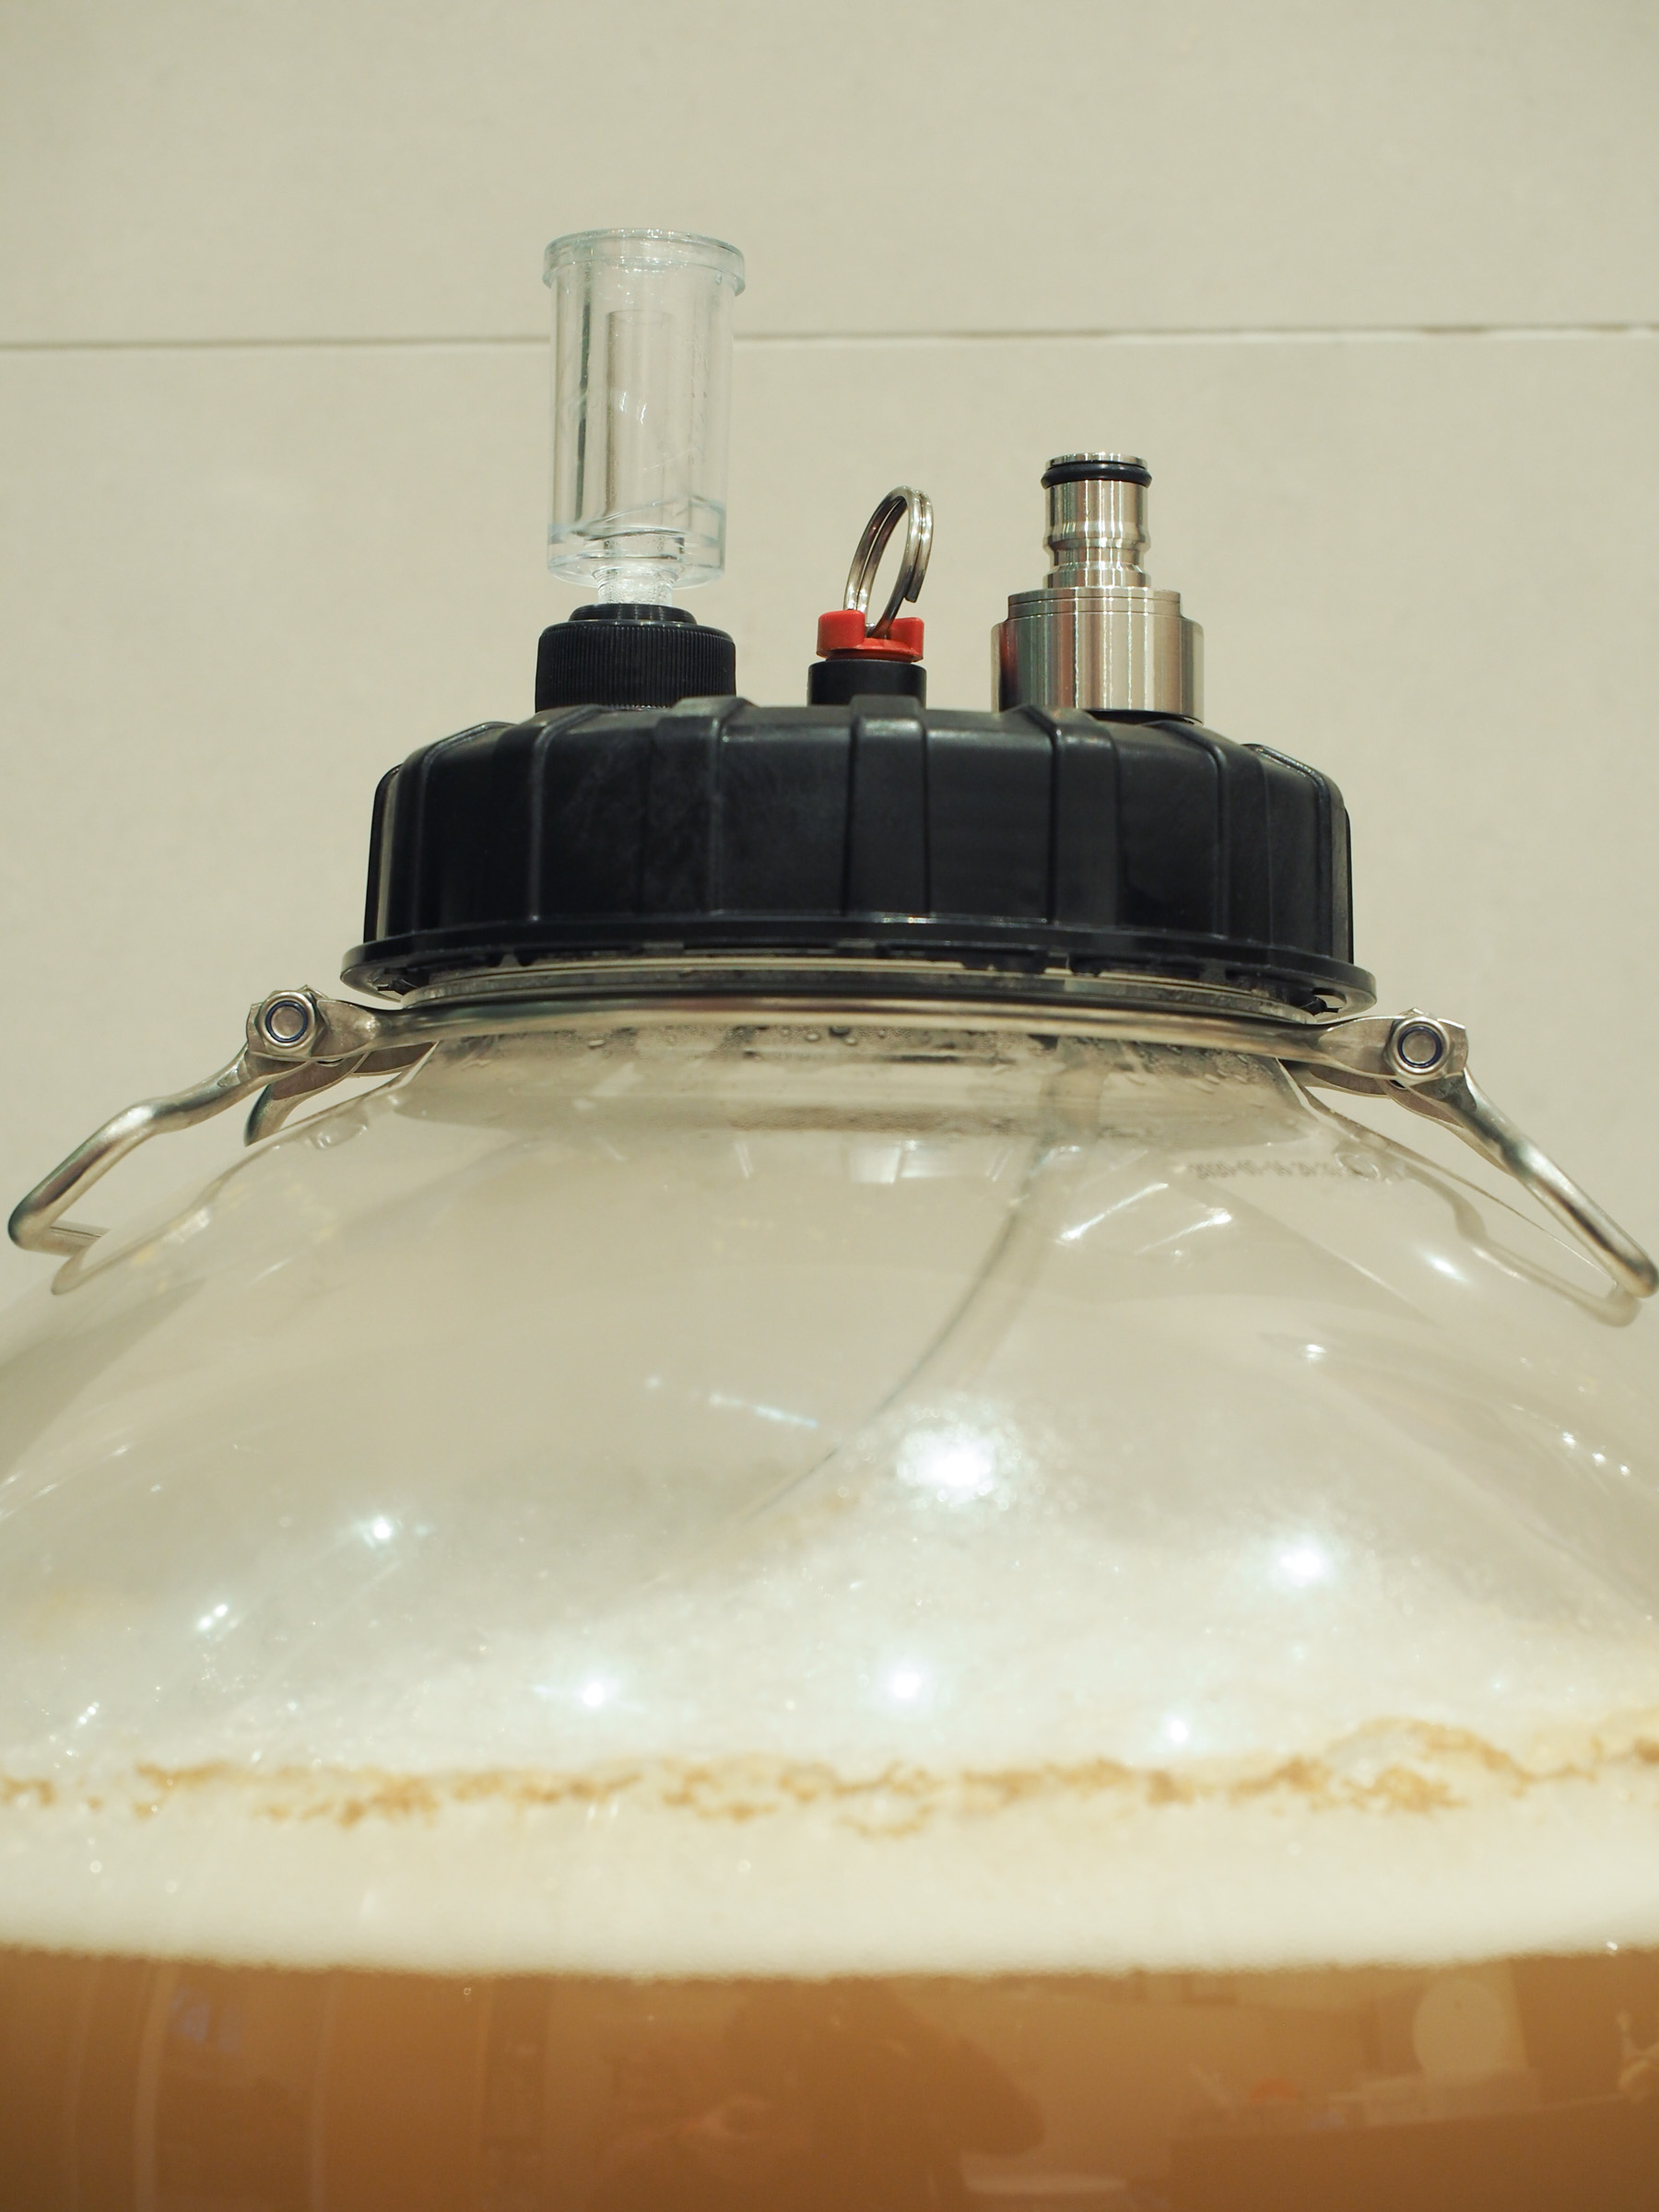
After reading an interesting article by Scott Janish I decided to start pressure fermenting a little earlier than originally planned with this brew. Scott also thinks that pressure inhibits the release of esters and fusel flavours and makes a case for pressure fermenting right from the start, but what’s interesting here is that there’s also a suggestion that some of the hops’ oils are lost along with the CO2 in unpressurised fermentation. Keeping that hoppy goodness locked in is one of the main goals for me, so I’m wiling to gamble a little with potential loss of mouth-feel and maltiness (which my brews to date have in abundance) in return for a little more hops. I therefore decided to ditch the airlock just 24 hours into primary and fit my new spunding valve instead.
The whole process was very easy; just unscrew the cap with the airlock, fit a freshly sanitised carbonation cap, click on the spunding valve kit. Rather than letting the pressure build naturally and then knock it back, I decided to add CO2 via the dip tube allowing me to adjust the spunding valve there and then, settling on 10 PSI for now.
I did have some concern about the building Krausen getting into my shiny new valve and briefly toyed with the idea of patching the Fermzilla to a spare keg and then fitting the valve to the keg instead, but I needn’t have worried: within 30 minutes of adding pressure the Krausen has retreated significantly and continues to shrink as I write. I believe this is another expected positive side-effect of pressurised fermentation which allows brewers to get better returns from smaller vessels including Cornelius kegs, since less room is lost to head-space.
Kicking off another Woodeforde’s kit today, using the Fermzilla for the first time. Approximate procedure:
Wash & sterilise Fermzilla, bucket, spoon, etc while kit tins are warming.
Empty both tins into bucket, add 3.5 litres boiling water. Mix.
Add two near-freezing 5 litre bottles of Tesco Ashbeck from garage, one more bottle from the spare bedroom that’s around 12 ℃. Top off with cold tap water to get around 20 ℃.
Pour everything into the Fermzilla. Not easy, next time use a large funnel.
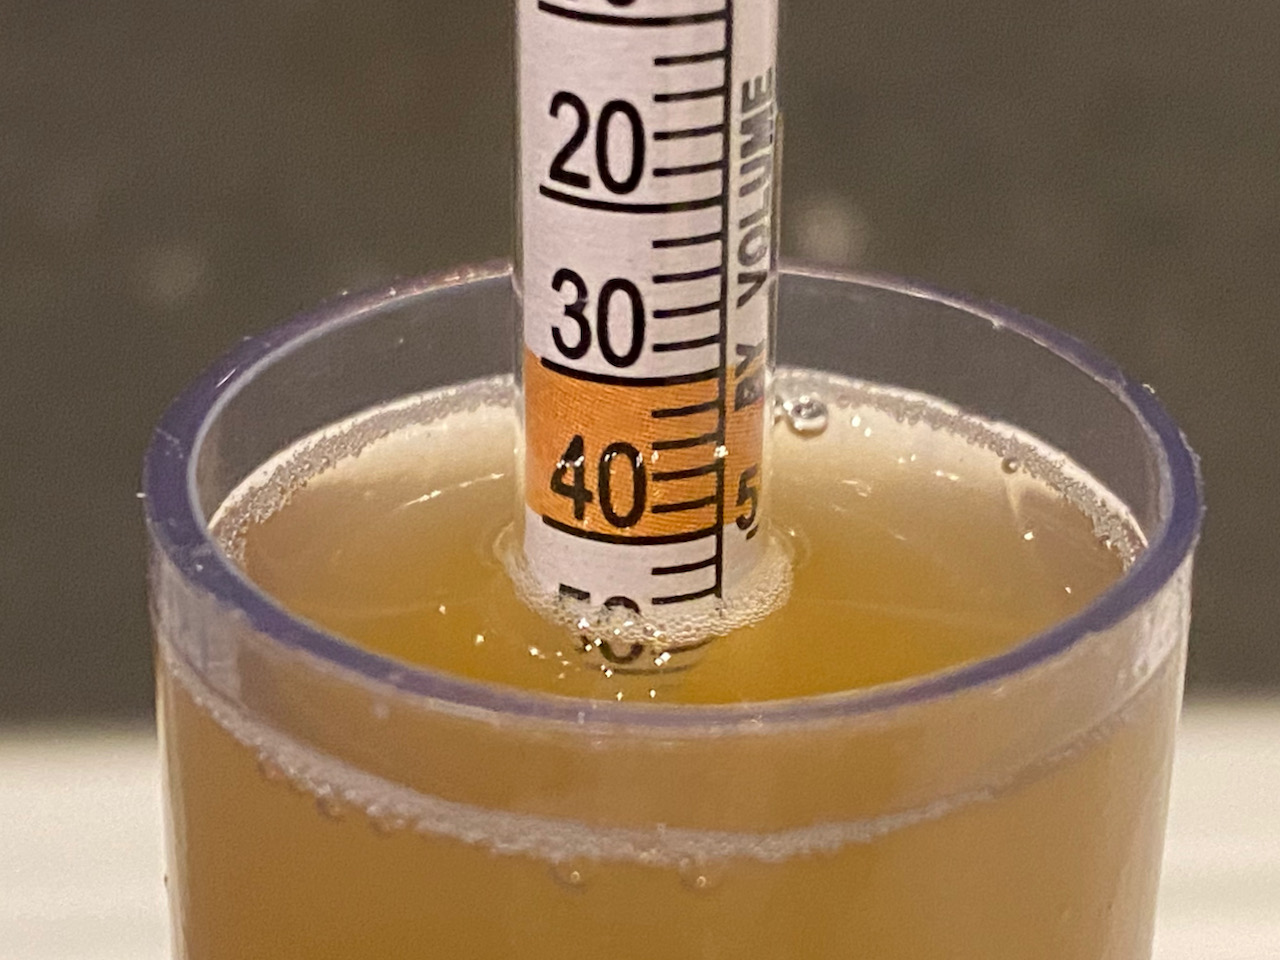
Take OG reading, pitch yeast, go clean up.
This kit contained two sachets of “69 Premium” yeast with no weight markings, but my new scales confirmed them to be 7g each, which seems a bit stingy. I thought those small sachets were normally 10g? Also included are two bags of hops; 100g Cascade and 100g Amarillo, which I’m supposed to add on day 4 of fermentation. Again, a bit stingy. I’ve been bitten once or twice before by hopping according to instructions, so I might play it by ear and try to dry-hop slightly later.
Then there’s the issue of pressure fermenting. Lagers and pale ales are said to be OK when fermented under pressure right from the start since pressure prevents the release of esters, but those are more desirable the darker a style gets, so I’m going to just do the last couple of days under pressure. Again, this depends on how quickly the beer ferments and my ability to judge the remaining time, so we’ll just have to see.
When fermentation is done I’m going to take the Fermzilla out to the garage for cold-crashing (it’s 2 ℃ out there right now) and then I’ll make a call as to whether or not I’ll leave the beer in there until serving – in which case I’ll remove the trub via the bottom bottle – or whether I’ll do a sealed transfer into my shiny new Cornelius keg. Either way I’ll have to wait for the sediment and hops to fall to the bottom so that they don’t block up the floating dip tube. One idea might be to employ one of my new straining bags, but that could get stuck in the butterfly valve prior to dumping the trub and might be more trouble than it’s worth. Need to sleep on that one.


