Been wondering for a while about yeast starters, specifically how far ahead of brew day I should be preparing, and how long to leave them on the stir plate. In the past I’ve gotten it wrong and ended up with a lifeless, limp soup which may or may not have taken off given more time, but resulted in me pitching dry yeast on top just to be sure.
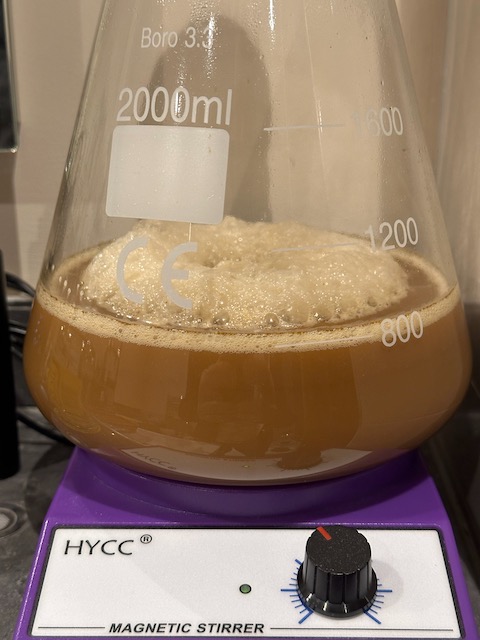
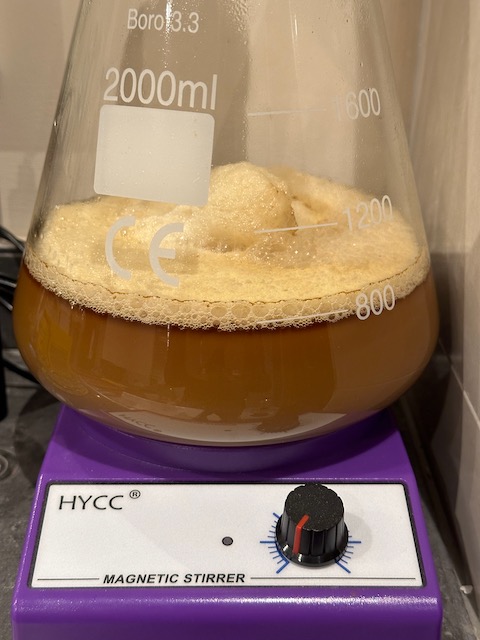
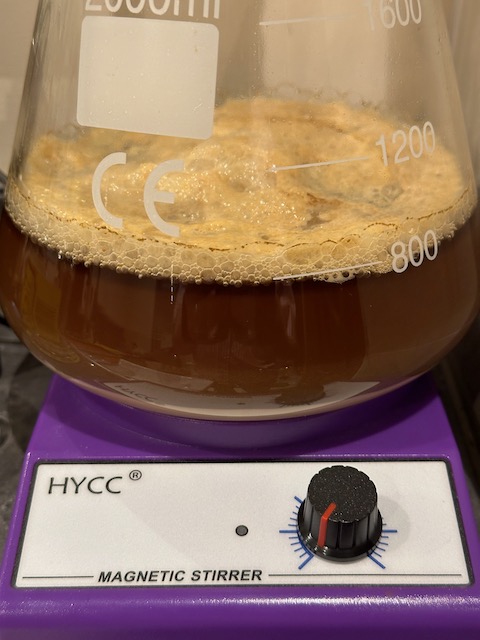
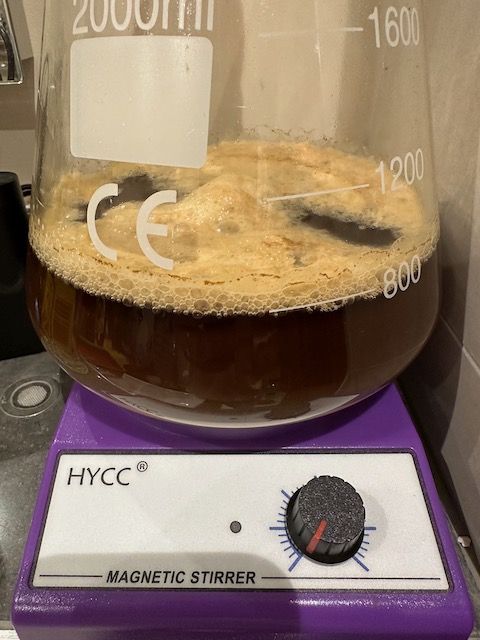
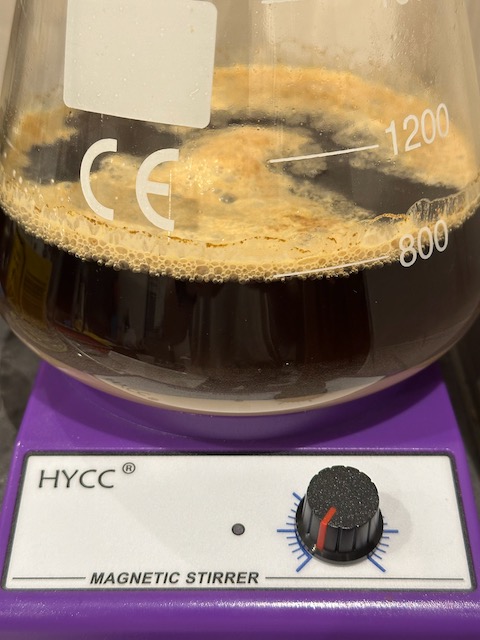
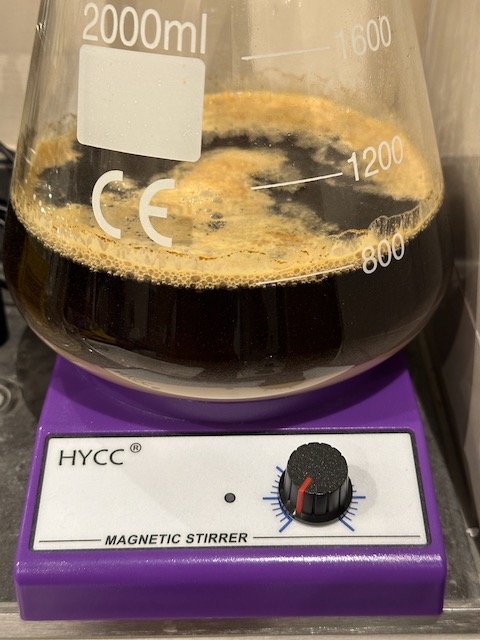
Anyway. I’ve just kicked off Yeti XI and this time I feel the starter was close to perfect, maybe a couple of hours early. Here’s how it looked:
Looking at the images above I’d say that the sweet spot for preparing a starter for this brew is somewhere around 26 – 28 hours before pitching, with the first 23 hours spent on the stir plate. Obviously the type of yeast and fermentation temperature are going to play a role here, but going forward I’m going to aim for similar timing and will record the results.
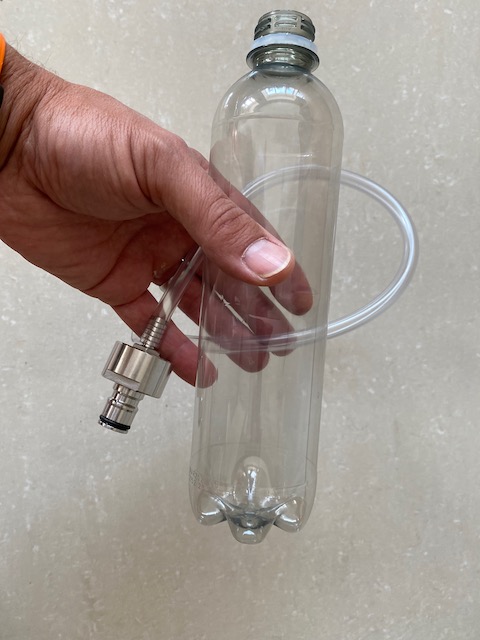
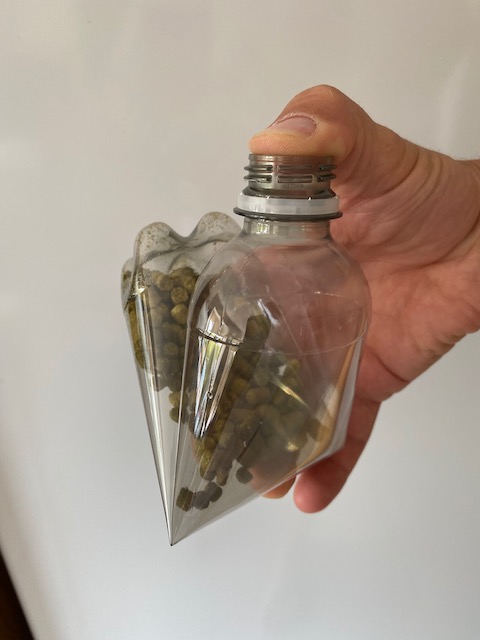
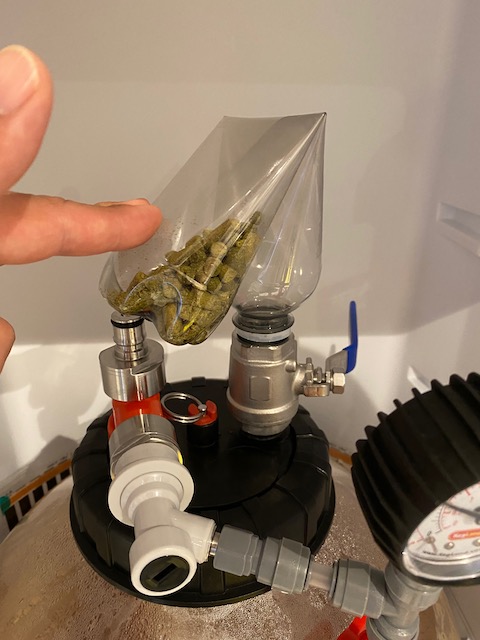
Another new gizmo in my everlasting quest to cut diluted oxygen (DO) contamination, this is basically a ball valve fitted to the top of the FV with a plastic bottle on top of that. The idea is that you can place the dry hop pellets inside the bottle and purge it with CO2, then fit it to the top of the fermenter around the same time as transferring the wort from the kettle, where it’ll sit ready for oxygen-free deployment via the ball valve. More on that in a moment.
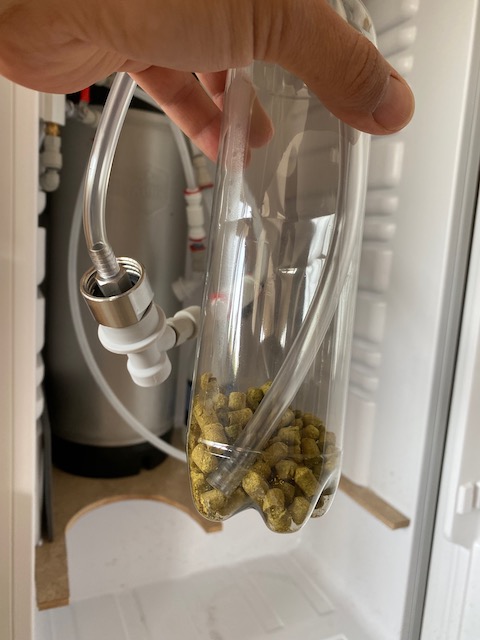
Although the valve had been sourced ages ago I didn’t use it on the last couple of brews because I hadn’t taken the time to find a suitable bottle – after all this has to fit inside the fermentation fridge along with my Fermzilla. When I did finally get my hands on two contenders I had already started fermenting my latest creation, and since it was now too late to remove the ball valve from the FV I had to find a way of fitting the sanitised, purged bottle of hops onto the ball valve without spilling the payload or letting in oxygen. For this reason I chose the larger of my two bottles, because it allowed me to fold it in half and trap the pellets in the bottom while screwing the bottle onto the ball valve. It worked after a fashion, but I’m not convinced that oxygen was eliminated as well as it could have been if I’d planned things properly, and purged the hops with the ball valve already fitted to the bottle right from the start.
The biggest scope for improvement however is the release process itself, because as soon as you open the ball valve a couple of pellets drop through and the rest get jammed. I had hoped to avoid this scenario by allowing the bottle to dry fully after sanitising it, but alas even dry pellets jammed up in the neck of the bottle and necessitated some aggressive agitation. I’m not happy with this arrangement and will see if I can come up with a way to improve things before my next attempt; perhaps a small auger inside the bottle, or a magnet on a stick, or an external vibrator? (oooh-err)
First go with … Dry Hop Bottle Thing?
Maybe the answer is to simply crush the hop pellets down before putting them into the bottle so that they flow more readily as powder instead of getting stuck as pellets, but would this affect their potency while waiting to be deployed? Might be one to experiment…
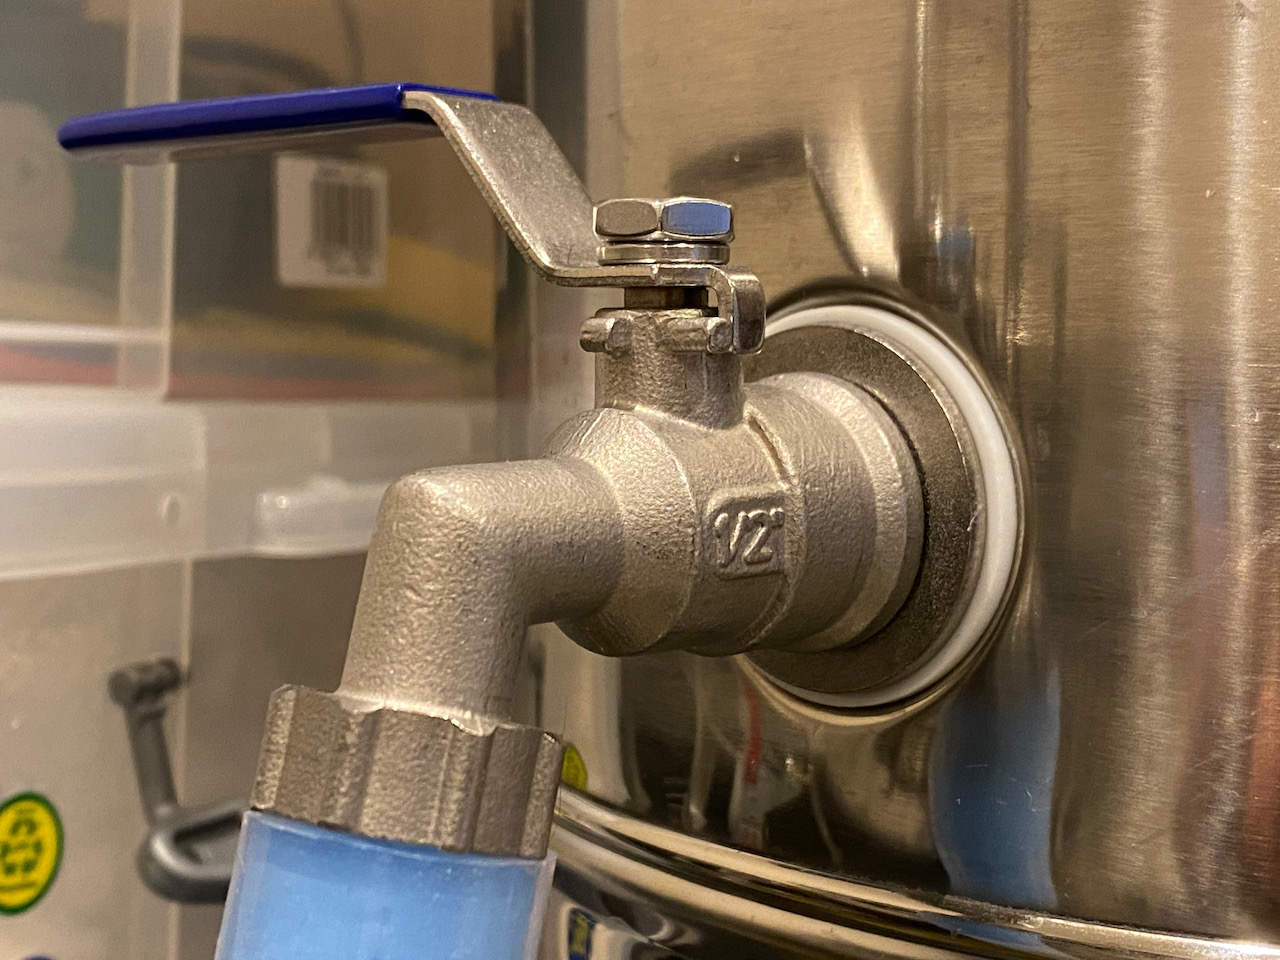
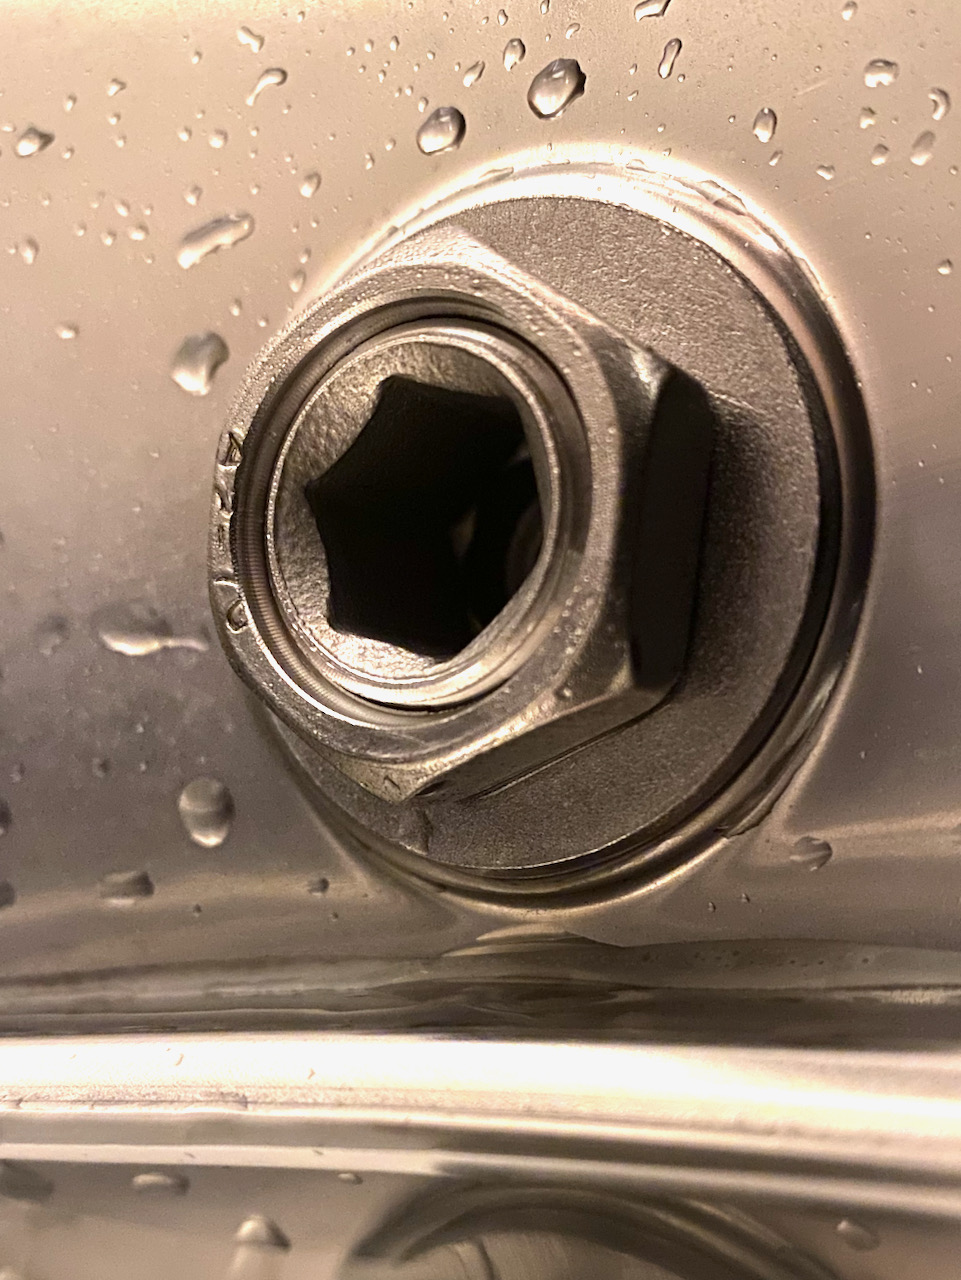
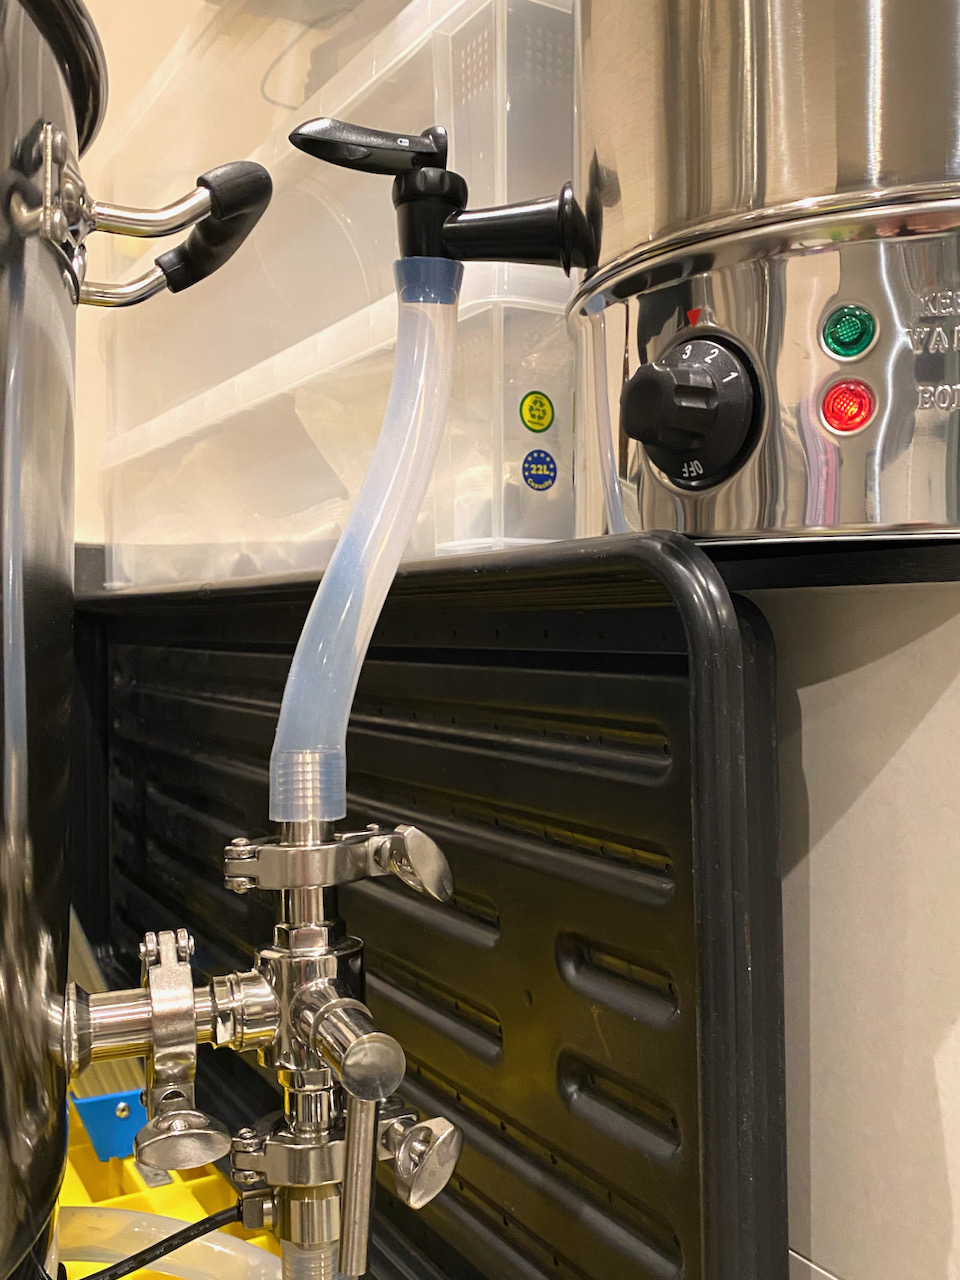
A traditional hot water urn like Burco’s Cygnet makes for a great hot liquor tank (HLT) / sparge water heater. It’s easy to clean thanks to a hidden heater element, has a built-in adjustable thermostat with enough resolution to dial in your desired sparge water temperature, and occasionally you run across a real bargain locally or on eBay. The only problem is that the standard tap doesn’t lend itself very well to being hooked up against other brewing kit, unless you’re happy with serious levels of cowboy bodgery. Which means you need to do a bit of fettling.
The good news is that the standard tap is easily removed, and plenty of parts are available to help you replace it with a much more versatile equivalent. I went for:
½ inch BSP stainless ball valve assembly from The Malt Miller
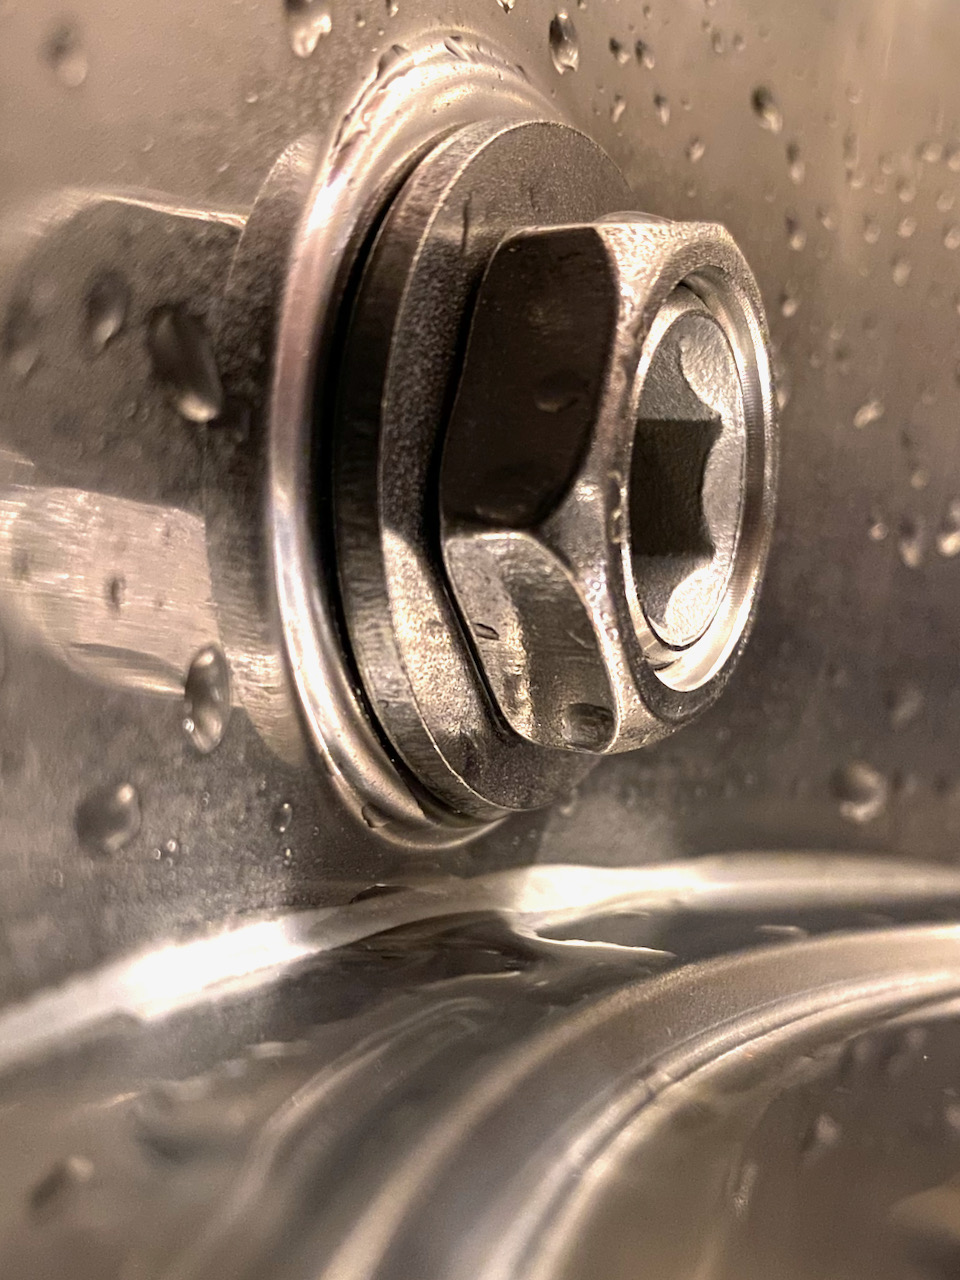
bespoke silicone washers from eBay (inside ⌀ 20 mm, outside ⌀ 40 mm)
stainless steel washers, also from eBay (inside ⌀ 21.5 mm, outside ⌀ 38.5 mm)
Once I’d removed the standard tap using a 30 mm spanner against the copper nut inside I was able to thread first a stainless washer and then a silicone washer onto the threaded end of that ball valve assembly, poking it into the Cygnet and securing it with another stainless washer and its own nut. The standard tap didn’t have any kind of seal on the inside of the urn and that’s just as well, because there’s only just enough thread on the ball valve to tighten it well with what I used.
All of this took less than 5 minutes once the parts had arrived, with the only downside being that the ½ inch ball valve seems to bizarrely have an even lower flow rate than the original tap. When testing this with cold water I couldn’t get my B40pro to ‘fan out’ from the centre pipe, but a subsequent go at mashing with heated water proved the flow to be more than enough; it fanned out adequately when needed, nearly burnt my face off, and will empty the 20 litre tank in under a minute if you’re so inclined.
My last all-grain brew took advantage of the standard equipment profile in Brewfather to calculate how much water I’d need and which values I should – theoretically – end up with at the end of the brew day. I accepted that default profile because I had nothing better to work with and at that point precisely zero brews under my belt, intending at some future stage to measure the actual capacities of my system before and after an hour’s boil.
Overview
Having just taken delivery of two dedicated 10 metre 13A single-gang mains leads and some IP rated outdoor coupling boxes, I decided today would be a great opportunity to test not only the resilience of my beefed-up electrical supply, but also the 60 minute boil-off rate and all the other good stuff that makes for an accurate equipment profile. In the spirit of sharing condensed learnings ahead of detail, here’s how my data stacks up against the default equipment profile for a Brewtools B40pro with steam hat and condenser:
Default Value
Measured Value
Trub / Chiller Loss (litres)
3.0
2.4
Boil Off (litres / hour)
2.33
2.4
HLT deadspace (litres)
n/a
1.7
I’m actually really pleased by these figures. The first line, trub / chiller loss, represents how much liquid can’t be transferred from the B40pro to the fermenter, either because it’s just below the dip tube on its lowest setting or because it’s stuck in the counterflow chiller with no way out. Where the dip tube is concerned I must admit I cheated a little and raised the left-hand side of the unit very slightly as the test liquid was running low, giving the dip tube a decent last slurp at the remains. Those 2.4 litres are what’s left in the slightly conical centre of the kettle and in the trub that’s piled there after whirl-pooling, which you can’t get to because at that stage the centre pipe is still fitted.
As for chiller loss, I’m confident I can say that there isn’t any with my setup due to the way I’ve positioned the counterflow coil; placed horizontally and 4.5 cm above the base of the kettle it will empty itself through gravity alone and drain via the lower left-hand valve. Fair enough, the wort is usually pumped to the fermenter via the upper left-hand valve since that’s the return from the chiller, but I thought it’s worth quickly switching the hose to the lower port before calling it a day, just to grab that last pint which would otherwise be written off.
Finally, the slightly higher boil off I experienced could be down to me running the heaters at 100% versus Brewfather’s noted 70% boil power, but as we’re only talking about 70 ml here I’m willing to ignore it in the knowledge that my power arrangements are able to support kettle and HLT indefinitely at maximum power.
Detail
Here’s the detailed notes I took as this test unfolded, reproduced in verbatim in case I find some problems with the above interpretation later.
Hot Liquor Tank (HLT)
Dead Space: 1.7 litres
Empty HLT completely
Add 5 litres water
Drain in-situ into measuring jug without tilting
Returned water: 3.3 litres
B40pro MLT / Kettle
Dead-Space Loss: 2.7 litres
Start with whole system dry, remove malt pipe, retain centre pipe
Take counterflow chiller out of circuit
Add 10 litres water (5 not enough to cover dip tube)
Prime pump and circulate, stop. Internal scale reads 9.5 litres exactly.
Pump to measuring jug via dip tube & lower left port: 7.3 litres
Dead Space + Chiller Loss: 2.1 litres
Return 7.3 litres back to MLT / Kettle, now just below 10 litre mark
Prime pump, recirculate: 9.5 litres on internal markings
Place counterflow chiller in circuit, circulate until bubbles stop
Internal scale now just below 8.5 litres
Drain to measuring jug: 7.9 litres.
All right, that makes no sense. I confess to slightly raising the left edge of the B40pro on both tests to delay sucking of air right until the end, but I’m sure I raised it the same amount both times. Although I expected there to be no appreciable chiller loss I can’t explain why the chiller added 600 ml of liquid, given that it was completely dry to begin with. The only variable was me tilting the MLT so I’m splitting the difference and calling chiller loss 0.0 litres and dead-space 2.4 litres.
Return 7.9 litres to MLT / Kettle, circulate without chiller until bubbles stop: just below 9.5 litres on internal markings.
Add another 10 litres because I want the elements to stay covered: just above 18.5 on internal markings, should be 20 litres measured with jugs. Chiller still out of circuit.
Recirculate via whirlpool tube, R/H dip tube raised above elements. Pump 25%, heaters to 100%, tank temperature 22.7 ℃. Mains coupling box 21.5 ℃. Start timer.
20 minutes in, tank temperature 62.7 ℃, coupling box 23.1 ℃. Mains flex heating up nicely.
40 minutes in, tank temperature 96.0 ℃, coupling box 25.9 ℃. Killing pump, switching on condenser.
45 minutes in, tank at 100 ℃, boiling. Heater to 95%, start 60 minute timer. Coupling at 26.1 ℃, mains flex and plug warm but not excessive.
50 minutes to go: switching back to 100% heaters in order to push the limit. Indicated temperature tops out at 100 ℃ and although I would probably maintain the same level of boil at 95 or even 90% I need to be sure that my power cables will be OK for an extended period at full whack. Coupling at 27.1 ℃.
30 minutes to go, half-way mark: coupling temperature seems to have stabilised at 27.6 ℃ and the mains fell and plug aren’t getting any hotter either. Heaters still at 100%, and the condenser output’s around 35 litres so far.
15 minutes to go: patching in the counterflow chiller so that I can get down to a temperature that won’t melt my measuring jug. Standard boil practice is to circulate the last 15 minutes through the chiller anyway in order to sanitise, so although it’s technically not part of the boil-off I’m reassured by the results from the previous test, which proved that the chiller didn’t consume any water anyway. Pump to 25%, tank temperature starts dropping. Killing condenser for now as it’s running cold anyway.
12 minutes to go: temperature bottomed out at 96 ℃ and starts climbing again.
9 minutes to go: we’re back at 100 ℃ in the tank and I’m turning the condenser back on. Return temperature is 96.7 ℃.
Time’s up, heaters off. Tank 100 ℃, return 96.7 ℃, coupling 28.4 ℃. Turning off condenser, starting cold water flow to chiller. Pump still at 25%.
8 minutes of chilling and we’re down to 42 ℃ in the tank, almost time to switch things off and measure the loss. Interestingly the coupling temperature is now 28 ℃ but on opening the coupling to remove the probe I find it’s no warmer than the wall socket at the other end of the flex. Looks like the waterproof coupling isn’t contributing much to the connection’s temperature.
Internal markings show level to be around 14.2, so I’m expecting a boil-off of just over 4 litres.
Took out 15.2 litres at 30 ℃ but 2.4 litres will be due to dead space, making boil-off 2.4 litres. Seems about right – Brewfather standard profile for B40pro with condenser and 70% boil power is 2.33 litres, so 2.4 seems entirely believable.
General Notes
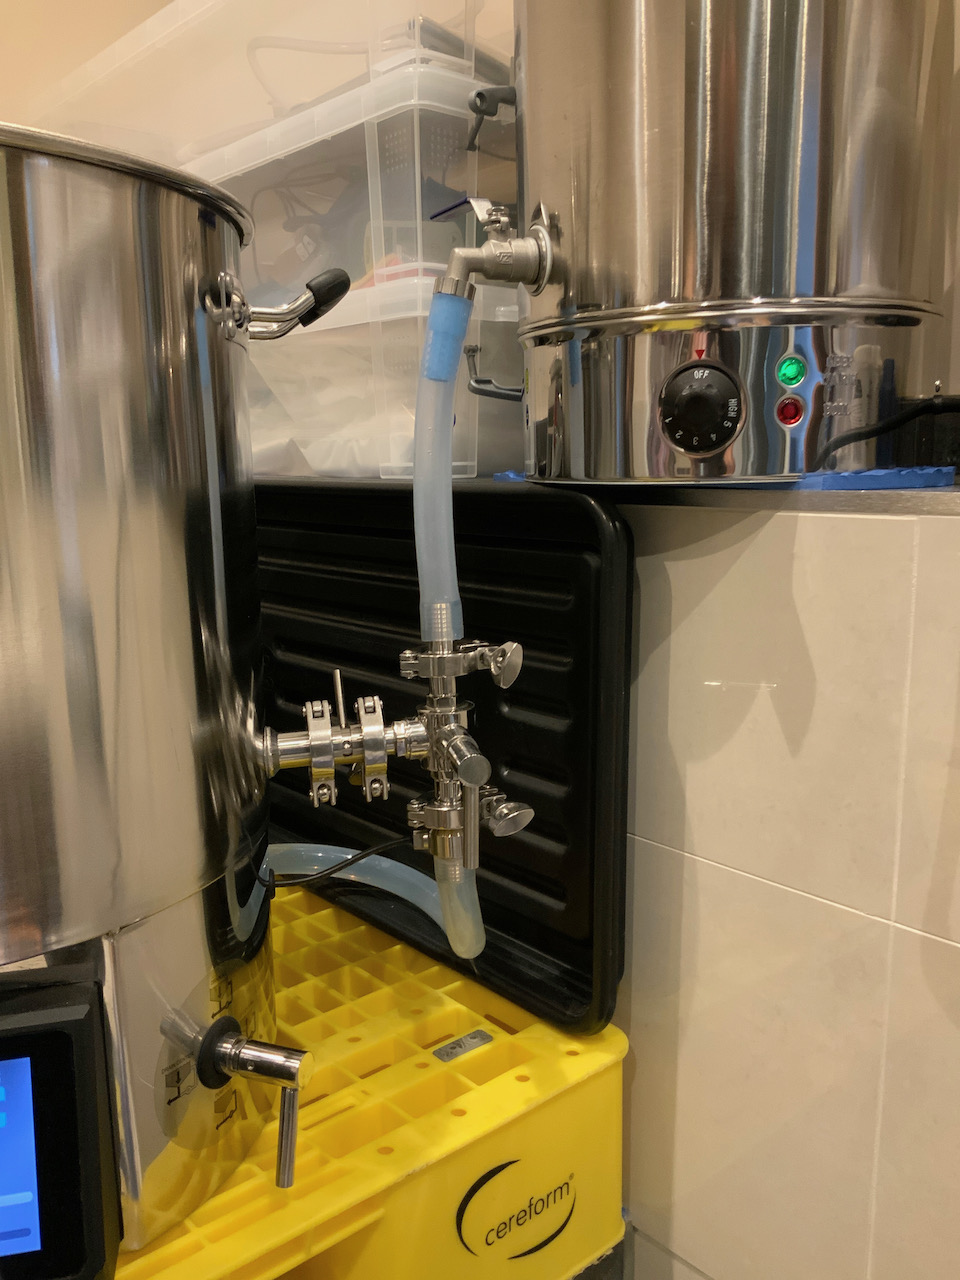
Counterflow chiller elevated to 4.5 cm above base of B40pro for optimum draining
The condenser exit hose really must have no back pressure, including being submerged in a jug. As soon as the end becomes submerged and the jug fills up, steam starts to exit from the smallest of gaps between the kettle and the steam hat.
Chiller / HLT arrangement and plumbing as shown below:
Since I started fermenting under pressure with the Fermzilla I’ve been wondering how I can reduce oxygen exposure when using more traditional vessels, including the SS Brewtech mini-bucket I purchased at the same time for experimental batches. It’s got a small spigot at the base for drawing samples / transfer / bottling, but whenever you open it you invariably suck air in via the top, and that’s not ideal.
The guys over at Brulosophy have previously something they called at BrüLoonLock, which is basically a mylar balloon taped to a tube and used in place of an airlock. It’s a great idea since it allows capture of CO2 during fermentation which can then be fed back into the keg when samples are taken or during cold-crashing. I’m not sure why they went for a mylar ballon; could be that there’s no material resistance when filling up, could be that CO2 doesn’t permeate that particular material although, even if it did, I wouldn’t care since oxygen is unlikely to get in while CO2 is leaking out.
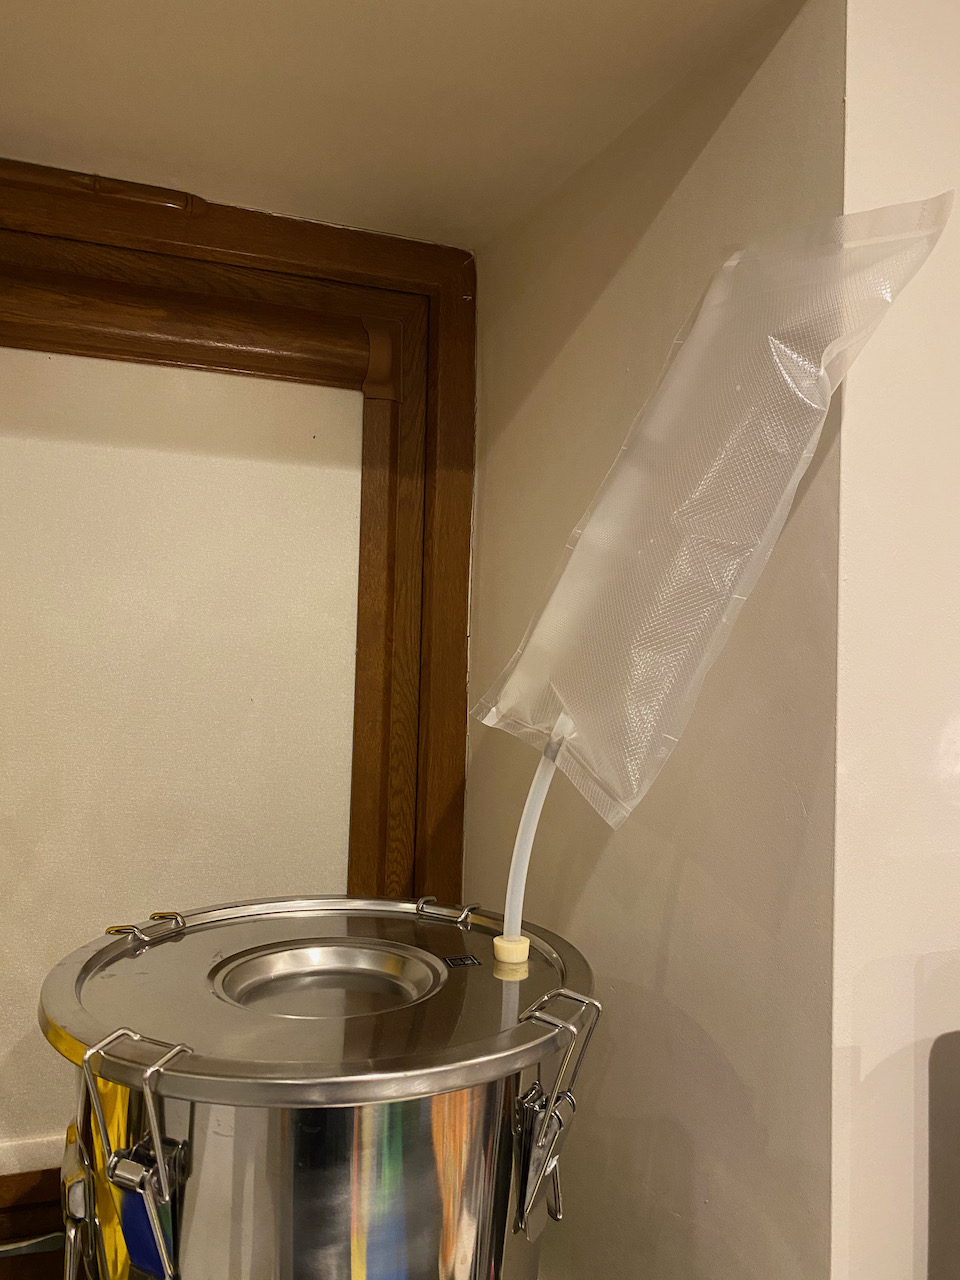
Regardless, I don’t have access to a mylar balloon right now, and with us being subject to lockdown 3.0 over here one needs to get creative. So I cut a length of plastic food-saver bag and sealed a section of 3/8″ gas line in at one end using RTV, a cross between silicone sealant and industrial glue.
Anyone seen my colostomy bag?
Using a piece of gas line allows me to slot this into the same bung which the airlock uses, and also opens up various other possibilities like pre-charging it with CO2 using a regular John Guest fitting, or including a T-piece and spunding valve in case I ever forget to remove the Bag-Thing once it’s full.
Speaking of which, I wonder what sort of pressure this will withstand? The bag’s edges are welded together and RTV sticks like the proverbial poo to a blanket, so I reckon this should handle a couple of PSI without too much bother. Finally, purging the bag of oxygen prior to use couldn’t be simpler, and that’s where I reckon I’ve got an advantage over the BrüLoonLock: just fold Bag-Thing in half and shut it in a book.
As I write this the bag is connected to my mini-bucket which is fermenting the second batch of blonde extract, and although fermentation has slowed considerably over the last 2 days there’s still enough going on to slowly fill her up. If this experiment is successful then I might make a bigger version so that I can bottle from the keg without having to top up the CO2 reserve, or I may not bother – any oxygen that’s sucked in via the top might well mix readily with the heavier-than-air ‘CO2 blanket’ sitting on top of the beer, but as I’m drawing from the bottom of the bucket and not swirling the brew around I don’t see how any oxygen exposure would have a chance to spoil any but the very last bottle, which is usually a partial fill that’s consumed early.
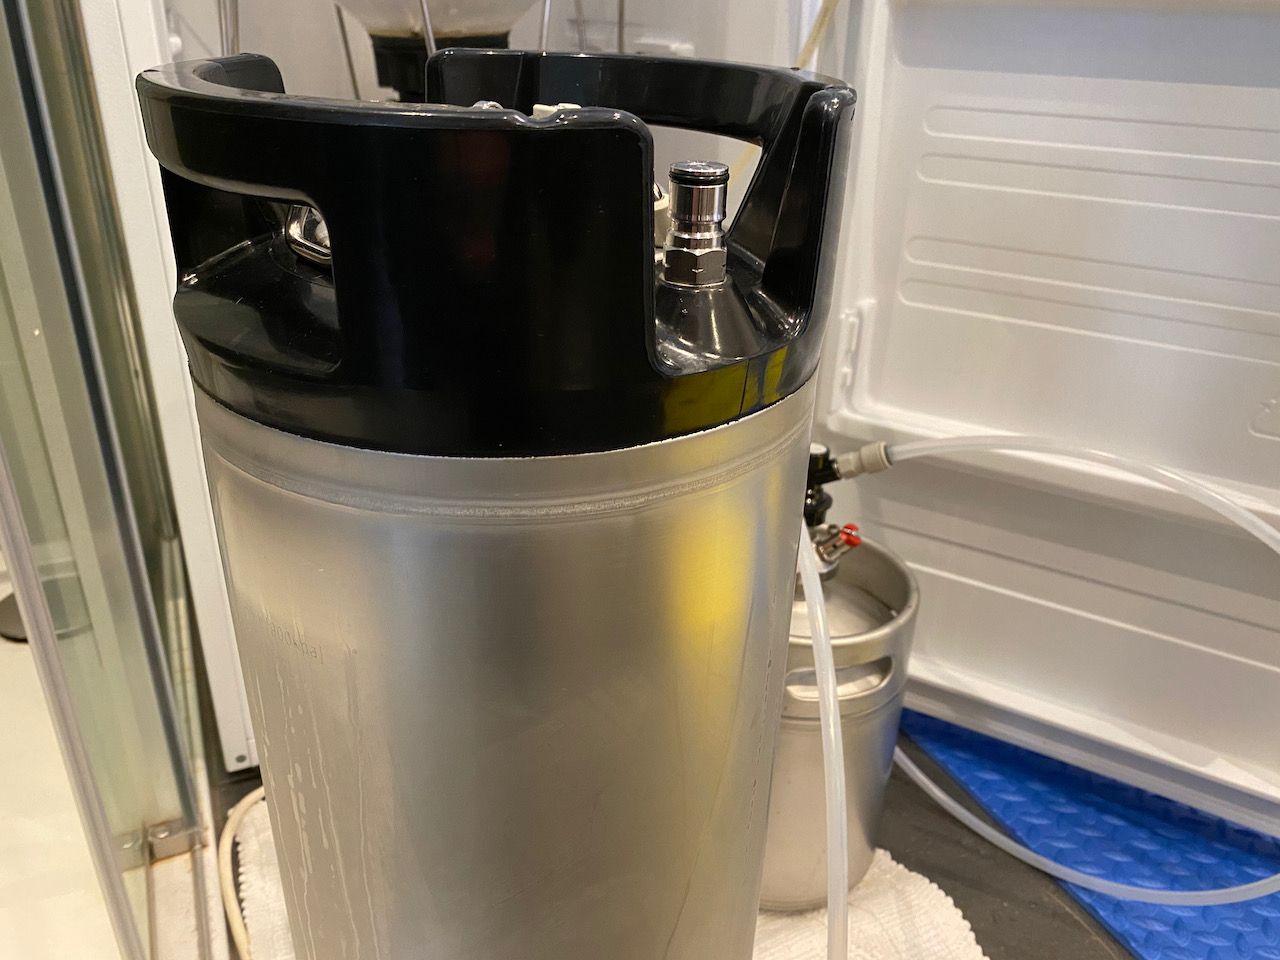
As kegging time looms I’m thinking more and more about how to transfer the partially carbonated Bure Gold from cold-crashed Fermzilla to Cornelius keg without exposing it to oxygen or converting it to foam. Key to both points is keeping the pressure up and doing it slowly, taking care to purge all equipment and lines of oxygen also.
There’s a great idea in this video for using the gas-in posts of both vessels with a connecting line in order to exactly equalise the pressure between both vessels and prevent foaming, but crucially it requires connection to the CO2 cylinder via a T-piece so that the gas line maintains back-pressure, and dropping the pressure in the keg starts the siphoning process. I don’t have a gas T-piece, and expect that were I to simply connect the pressurised keg to the pressurised vessel any drop in pressure would be equalised via the gas line rather than starting the flow of beer.
Blow-Tie to the Rescue!
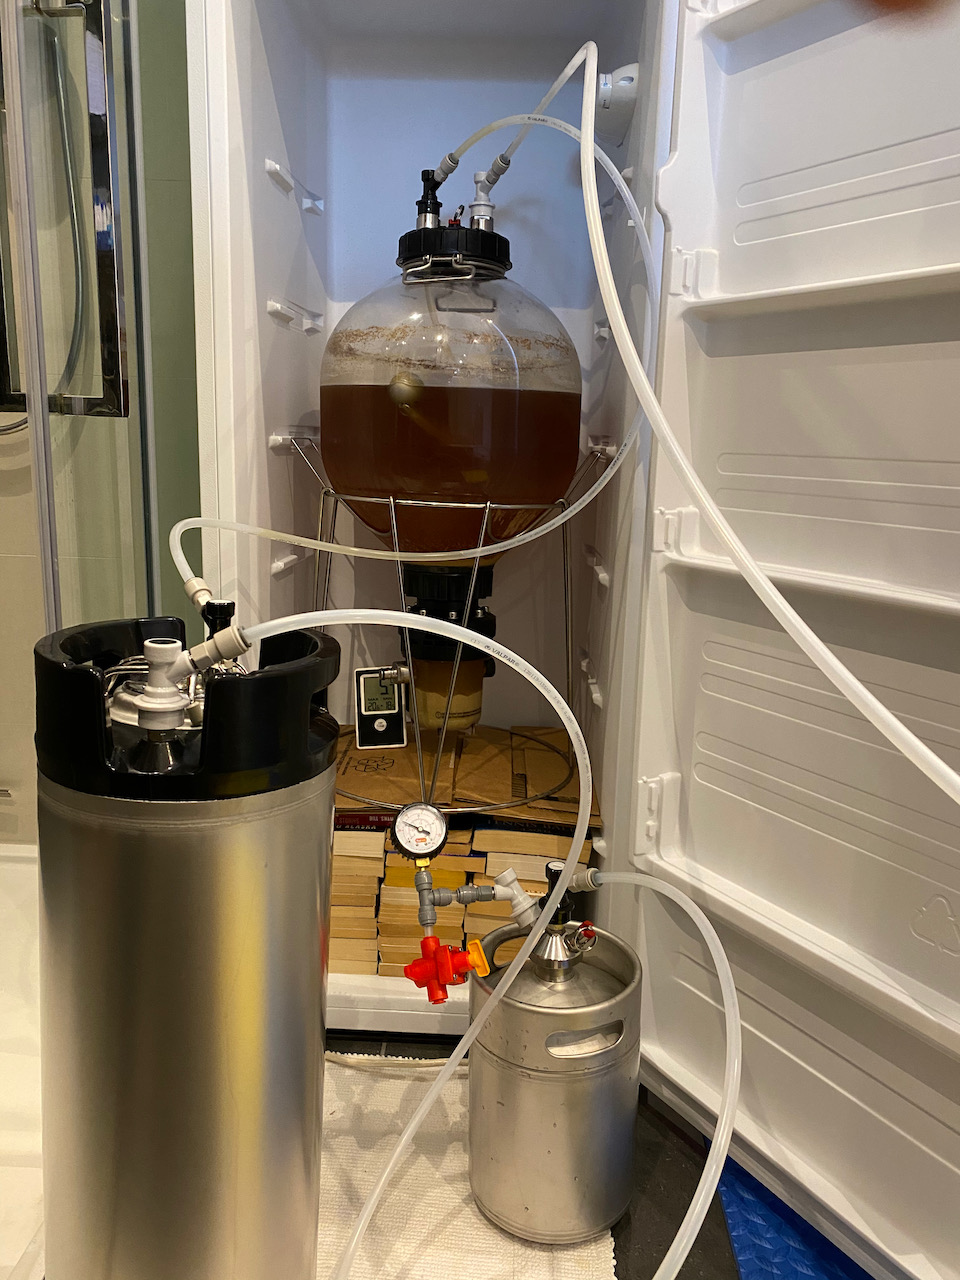
On to plan B then, and I’m going to use my spunding valve to maintain back-pressure in the keg while slightly increasing the pressure in the Fermzilla using my gas line and regulator. Here’s how that process breaks down in my head:
Purge the 19 litre Corny keg of air by filling it with no-rinse sanitiser and driving that out using CO2. Repeat with secondary 5 litre Mangrove Jacks keg.
Use spare carbonation caps to purge two transfer lines of oxygen; one with a black disconnect at each end, a second one with one black and one grey disconnect.
Connect the Corny keg’s IN post to the Mangrove Jack’s OUT post using the grey-to-black transfer line.
Use the CO2 line on MJ’s IN post to raise the pressure slightly to 12 PSI. Do the same on the Fermzilla, and this time leave the gas connected. Both vessels should now have identical pressure.
Connect Fermzilla OUT post to Corny keg’s OUT post using black-to-black transfer line. Nothing should happed.
Fully close the spunding valve and fit it to MJ’s IN post. Again, nothing should happen.
Slowly open the spunding valve until it starts to hiss slightly. Beer should begin to flow from the Fermzilla to the Corny keg.
Keep an eye on things in case there’s more beer in the FV than the keg can hold. In theory any beer / foam overflow should go to the Mangrove Jack’s keg, giving me a chance to shut off the transfer before it gets into the spunding valve or the pressure gauge, which I’d left attached as a sign of confidence in my approach.
Much Later …
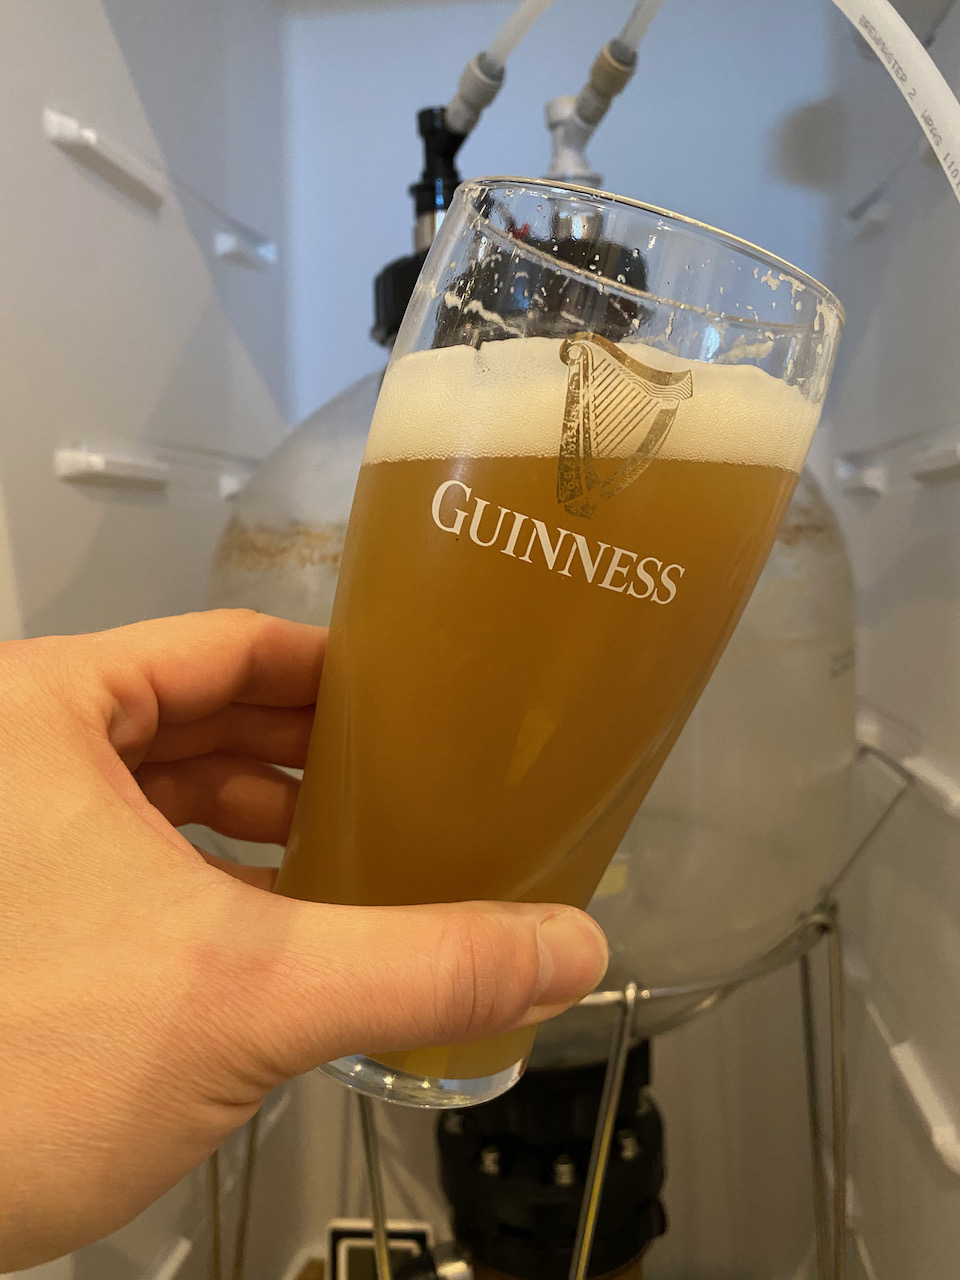
Everything went pretty much as planned, with the only hiccup being my forgetting to switch the gas on as soon as the transfer started, and mildly panicking for 5 seconds when the spunding valve grew silent. In the end it took somewhere around 45 minutes to fill the 19 litre Corny keg to approximately 17 litres before the Fermzilla’s floating dip tube started drawing bubbles at the limit of its tether.
One thing to watch out for next time: as the level of beer drops to the conical section, the float ball may try to snag on the yeasty trub that’s deposited there which can lead to the dip tube sucking air. Easily fixed by flicking the side of the vessel, but could lead to foam in the keg if it’s not caught straight away.
Speaking of which, neither beer nor foam made their way into the secondary keg. Hurrah! I celebrated by drawing off a very hazy last pint from one of the carbonation caps on the side of the collection jar – thankfully the trub-line was just below this point so I got to enjoy a NEIPA-like hop bomb from the dregs beyond the butterfly valve which the dip-tube couldn’t reach. Very nice!
I’m getting close to kegging Bure Gold so I needed to clean and passivate the keg, and it makes sense to do all the new stainless stuff in one hit with as much re-use of chemicals as possible. But first everything has to be squeaky clean.
Cleaning
I filled the B40 with 10 litres of water from the warm tap at around 37 ℃ and added 50g Trisodium Phosphate, mixing it with a plastic spoon while circulating gently. Approximate ratio of TSP to water was therefore 5g / litre, which is the lower end of the 5 – 10g / litre ratio advised by the simple instructions printed on the small bottle which arrived with the B40.
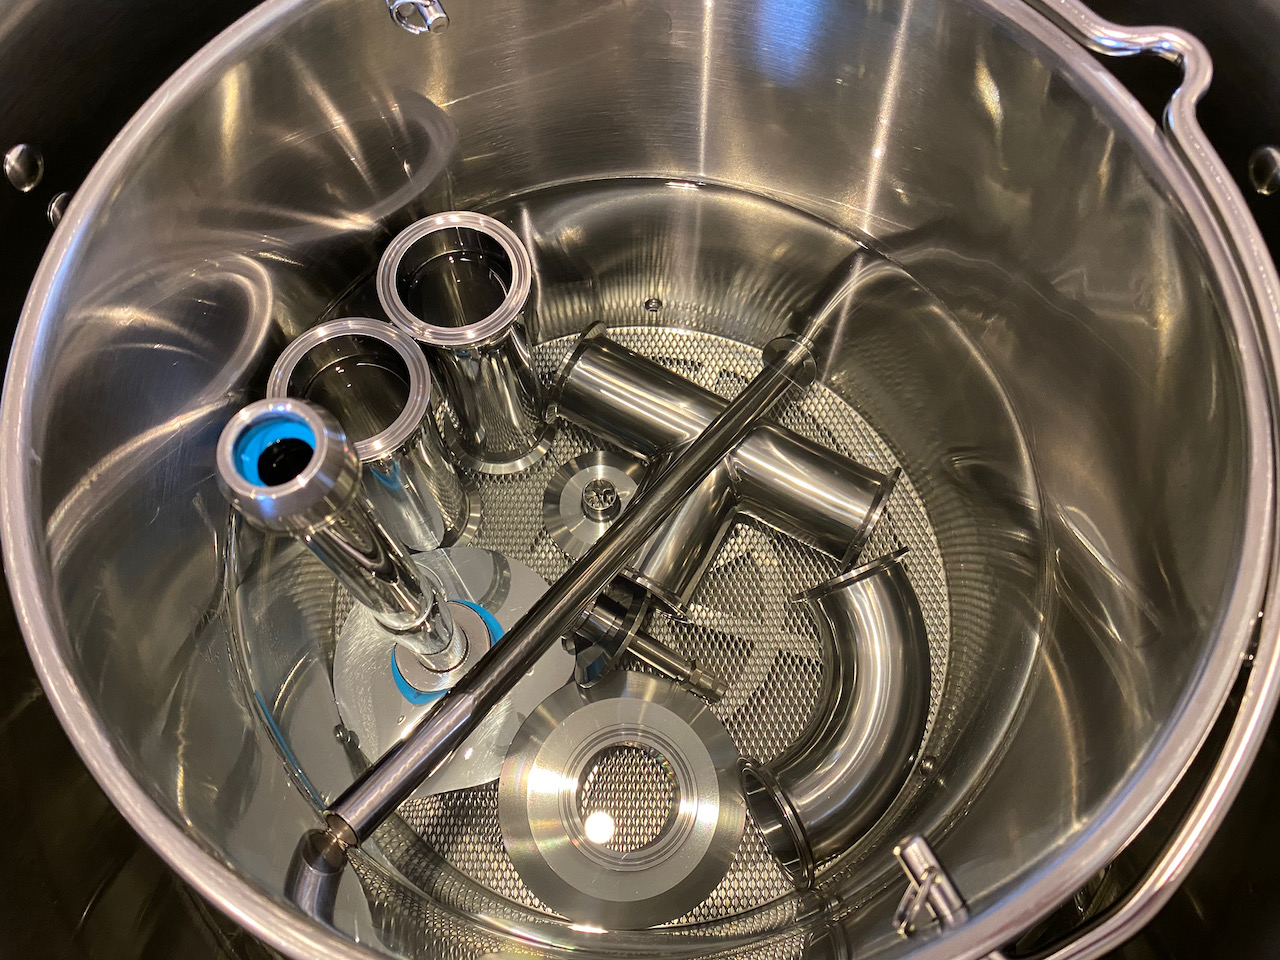
The stainless components which make up the centre tube, sparge hat, and all parts of the steam condenser were carefully placed into the malt pipe and lowered into the B40, which I then topped with the steam hat fitted with CIP adapter and ball. The CIP was plumbed to the ‘out’ pipe and the valves set so that the main vessel pumped straight to CIP, picking up from the dip tube on the right. Periodically I’d switch the lower left valve so that the CIP shared the flow with the chiller, ensuring that too had a healthy rate of cleaning. I let that circulate for about 45 minutes before transferring the TSP solution to my 19 litre Cornelius keg, the SS Brewtech Mini Bucket, and the Mangrove Jack’s 5 litre mini keg. The B40 was then rinsed out several times until the water ran clear.
Passivating
The process of passivating all stainless surfaces in order to build up protection against corrosion calls for a ridiculous amount of Star San. I’d heard that you can also use Citric Acid to do the same job, so when I saw some for sale at B&Q I decided to take that route – would be cheaper and kinder to the environment as well. Unfortunately there’s not much info out there on the ratios to use. The back of the packet recommended that when de-scaling dishwashers (among other things) you should add half the pack to the detergent drawer and the rest to the machine itself before doing a normal wash.
I don’t know how much water a dishwasher uses during a normal cycle, but I felt that were I to fill the B40 to the brim then that would be considerably more. After some head-scratching I opted to fill her with 25 litres of water and add the whole 250g box of Citric Acid, figuring that it made for a nice ratio of 10g per litre, and that 25 litres was closer than 40 litres to what a dishwasher would use. This also meant that most of the trainees fittings in the malt pipe would be submerged, while the CIP ball again should keep everything else constantly exposed to the solution. As per previous cleaning step I periodically switched the CIP over to the chiller so that too was covered. The only thing I did differently this time around was to use the heater in order to maintain temperature at 50 ℃, figuring that since I’m letting it run the full 60 minutes I might as well maintain temperature – again mimicking the dishwasher.
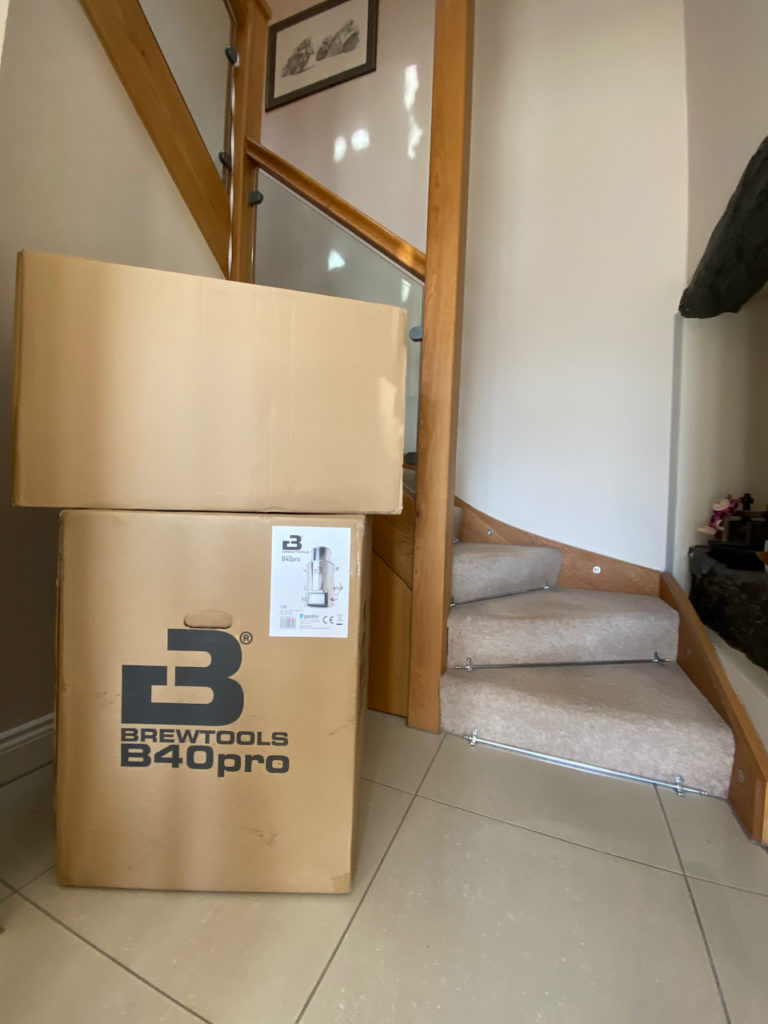
Shiny and New: my all-in-one system al the way from Norway
I’ve been waiting quite a while for this and hope it’ll get me closer to making my own beer from raw ingredients, moving away from extract and kit brews. The bottom box is the all-in-one mash & lauter tun / boil kettle, the top box is the three valve accessory kit including counterflow chiller plus steam hat and condenser. Can’t wait to get this lot set up …
Another new arrival in the brewery this week: the Fermzilla! This plastic Unitank is a good intermediate step on the way to a much more expensive stainless steel version and will allow me to ferment under pressure, transferring straight to a purged keg without any oxygen getting at my precious beer.
I’m going to run it with a kit first and have selected Bure Gold as a kind of testbed. Watch this space!!


